# Use Write Forwarding
You can enable read/write capability for one or more of the secondary clusters in an Aurora global database. In this configuration, Aurora forwards SQL statements that perform write operations to the primary cluster. This feature, called write forwarding, helps you to avoid implementing your own mechanism to send write operations from a secondary AWS Region to the primary AWS Region. In this lab, you will exercise this feature and explore the different data consistency modes associated with this feature.
This lab contains the following tasks:
1. Gather the needed information
2. Create a database schema
3. Insert data from a secondary cluster
4. Test consistency modes with a simple application
5. Choose the right read consistency mode
This lab requires the following prerequisites:
* [Get Started](/prereqs/environment/) (choose the **Deploy Global DB** option)
* [Connect to the Cloud9 Desktop](/prereqs/connect/)
* [Deploy an Aurora Global Database](/global/deploy/)
## 1. Gather the needed information
In this lab, you will interact with the global database created in the previous labs from two distinct regions. Thus, you need to retrieve a few connection related parameters for both the primary and secondary regions, to be able to connect to the database.
This table provides an overview of the parameters needed, and where you can find them:
Parameter | Parameter Key | Location in Primary Region | Location in Secondary Region
----- | ----- | ----- | -----
Aurora **cluster** endpoint | `clusterEndpoint` | Event Engine Team Dashboard or CloudFormation stack outputs | *not active in the secondary region*
Aurora **reader** endpoint | `readerEndpoint` | Event Engine Team Dashboard or CloudFormation stack outputs | RDS service console
Secrets Manager Secret ARN | `secretArn` | Event Engine Team Dashboard or CloudFormation stack outputs | *used from the primary region*
Cloud9 Desktop URL | `clientIdeUrl` | Event Engine Team Dashboard or CloudFormation stack outputs | CloudFormation stack outputs
If you are participating in a formal workshop, and the lab environment was provisioned for you using Event Engine, the parameter values for the **primary region** can be found on the Team Dashboard in Event Engine.
Otherwise, in the **primary region**, open the Amazon CloudFormation service console. Click on the stack named either `auroralab` or starting with `mod-`.
!!! warning "Region Check"
Ensure you are still working in the **primary region**, especially if you are following the links above to open the service console at the right screen.
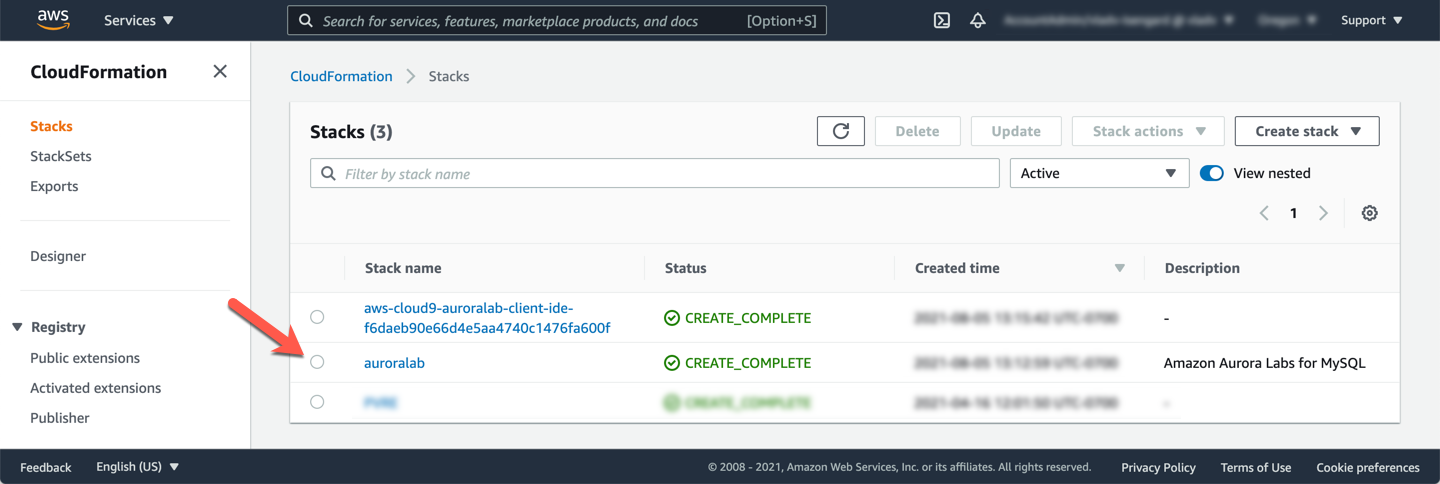
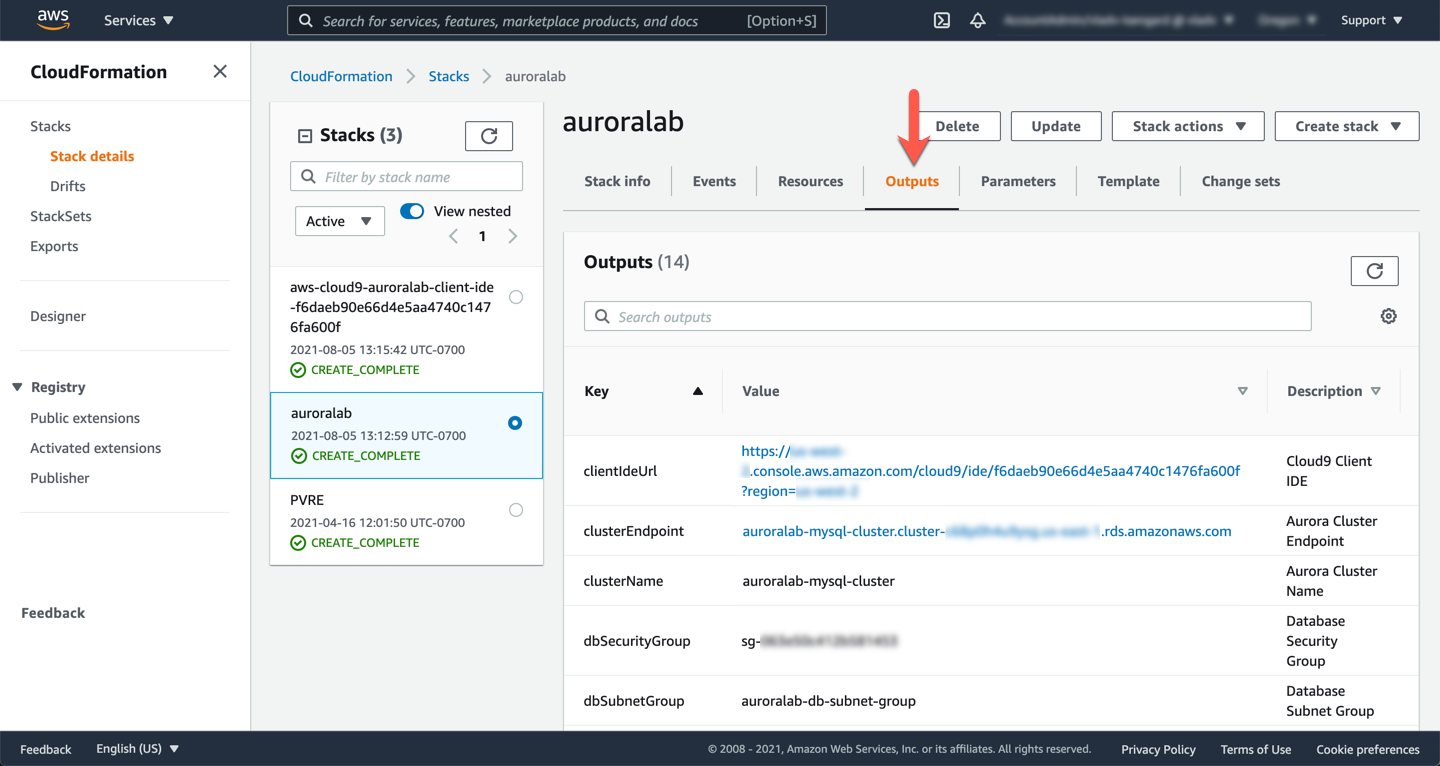
Change to the **Outputs** tab, and find the values for the parameters, and make a note of them:
* clusterEndpoint
* readerEndpoint
* secretArn
* clientIdeUrl
!!! note
If these values are not present, you may not have selected the correct region, or the lab environment was not initialized with the Global Database feature enabled. If you are participating in an organized event (e.g. workshop), please reach out to a lab assistant for help.
In the **secondary region**, open the Amazon RDS service console at the MySQL DB cluster details page of the **secondary DB cluster**.
!!! warning "Region Check"
Ensure you are still working in the **primary region**, especially if you are following the links above to open the service console at the right screen.
If not already selected, click on the **Connectivity and security** tab, and note down the value of the **Reader Endpoint**. Verify that it is in an `Available` status.
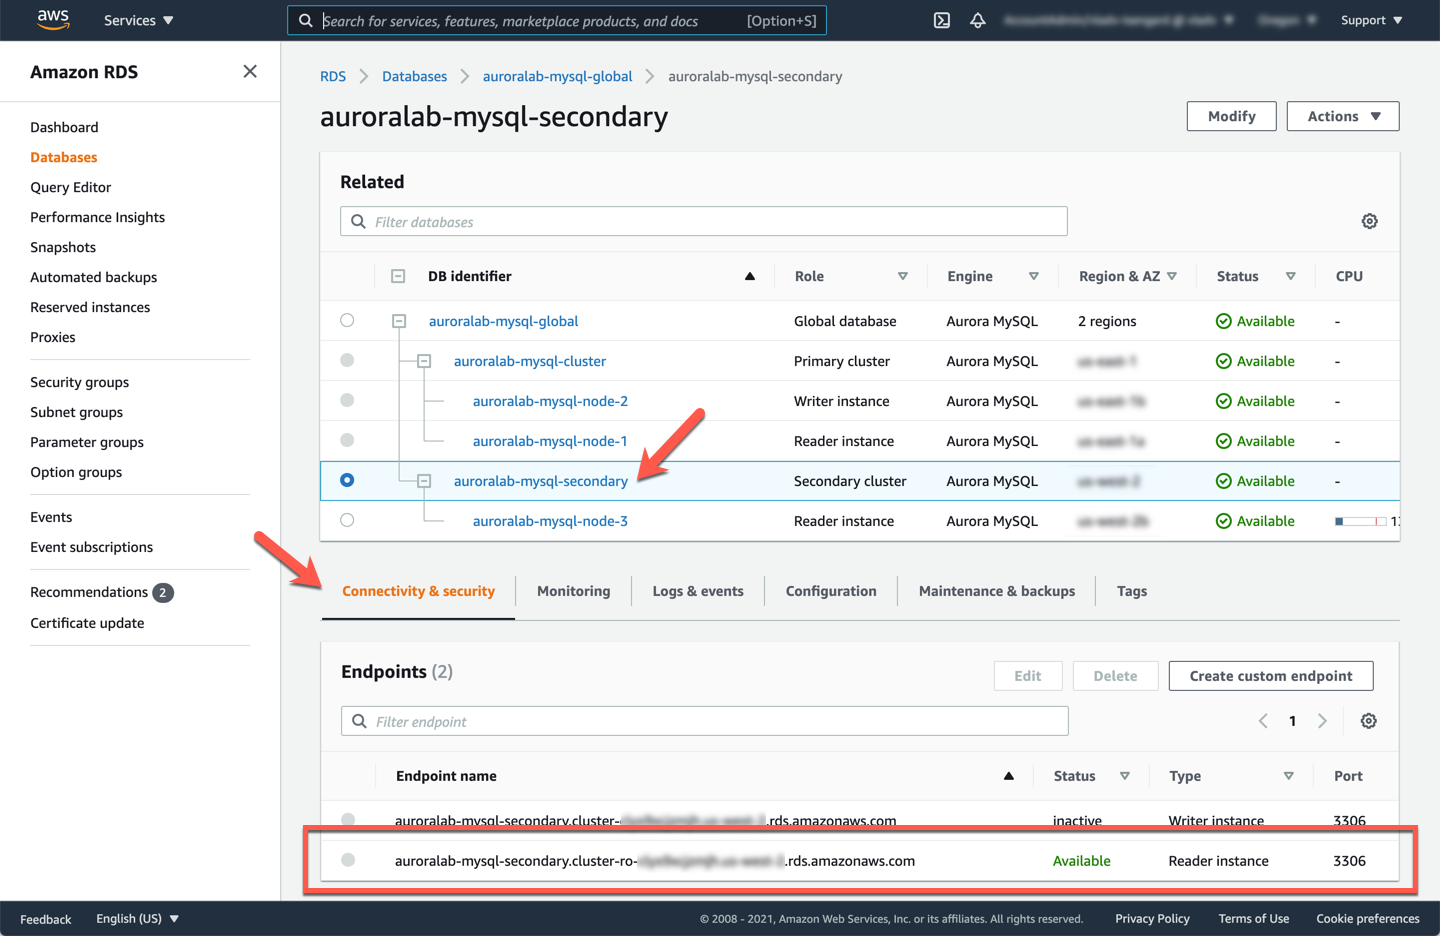
!!! note
The **Writer** (cluster) endpoint is also displayed, but is marked in `Creating` or `Inactive` state. This is normal, the cluster endpoint will only be activated when a secondary region is promoted to a stand-alone DB cluster.
At this point you have collected all the information needed for both the **primary** and **secondary regions**, and you can continue with the lab.
## 2. Create a database schema
The following schema will be used in all the tasks in this lab. While you can issue data manipulation language (DML) requests such as `INSERT INTO`, `UPDATE` or `DELETE` using write forwarding, data definition language (DDL) and certain other operations can only be performed directly on the writer DB instance of the primary DB cluster. Therefore the schema needs to be created on the primary DB cluster.
If you have not already opened a terminal window in the Cloud9 desktop in a previous lab, please [following these instructions](/prereqs/connect/) to do so now in the **primary region**. Once connected, enter one of the following commands, replacing the placeholders appropriately.
!!! warning "Region Check"
Ensure you are still working in the **primary region**, especially if you are the links in this guide to open the service console at the right screen.
```
mysql -h[clusterEndpoint] -u$DBUSER -p"$DBPASS"
```
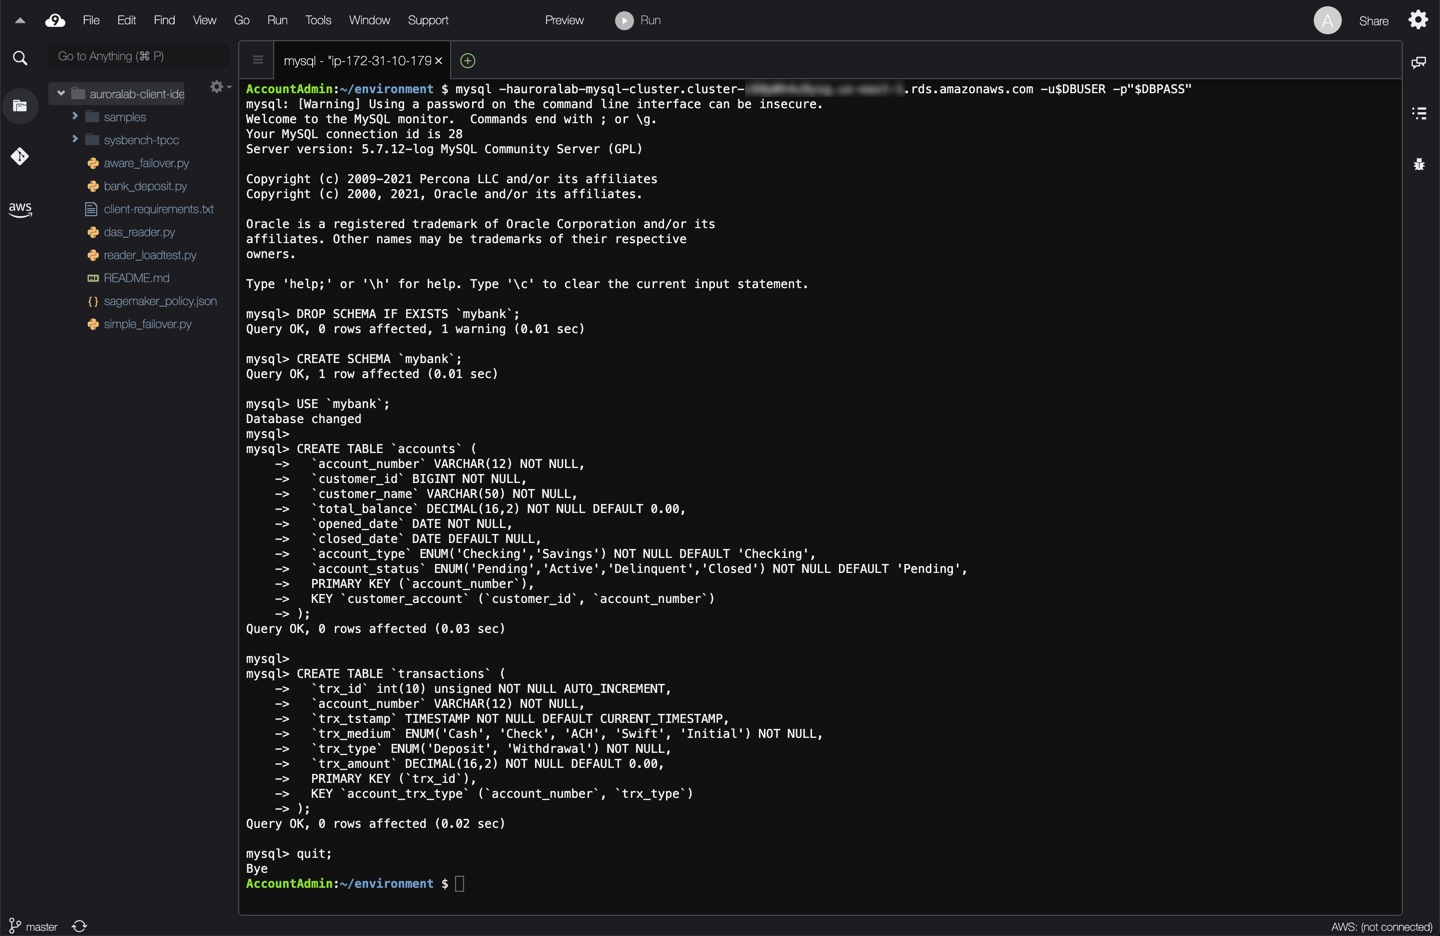
Once connected to the database, use the code below to create the schema for this lab. Run the following SQL queries:
```
DROP SCHEMA IF EXISTS `mybank`;
CREATE SCHEMA `mybank`;
USE `mybank`;
CREATE TABLE `accounts` (
`account_number` VARCHAR(12) NOT NULL,
`customer_id` BIGINT NOT NULL,
`customer_name` VARCHAR(50) NOT NULL,
`total_balance` DECIMAL(16,2) NOT NULL DEFAULT 0.00,
`opened_date` DATE NOT NULL,
`closed_date` DATE DEFAULT NULL,
`account_type` ENUM('Checking','Savings') NOT NULL DEFAULT 'Checking',
`account_status` ENUM('Pending','Active','Delinquent','Closed') NOT NULL DEFAULT 'Pending',
PRIMARY KEY (`account_number`),
KEY `customer_account` (`customer_id`, `account_number`)
);
CREATE TABLE `transactions` (
`trx_id` int(10) unsigned NOT NULL AUTO_INCREMENT,
`account_number` VARCHAR(12) NOT NULL,
`trx_tstamp` TIMESTAMP NOT NULL DEFAULT CURRENT_TIMESTAMP,
`trx_medium` ENUM('Cash', 'Check', 'ACH', 'Swift', 'Initial') NOT NULL,
`trx_type` ENUM('Deposit', 'Withdrawal') NOT NULL,
`trx_amount` DECIMAL(16,2) NOT NULL DEFAULT 0.00,
PRIMARY KEY (`trx_id`),
KEY `account_trx_type` (`account_number`, `trx_type`)
);
```
You have now created the schema of a very simple banking applications. You can now track customer accounts and the transactions they make.
Disconnect from the database using the following command:
```
quit;
```
In order to demonstrate a more realistic load scenario, you will now start a background workload, so the Global Database is actively performing work, not idle. You will use Percona's TPCC-like benchmark script based on sysbench to generate load. Start the load generator, choose the tab below that best matches your circumstances, and run the indicated commands:
=== "The primary DB cluster has been pre-created for me"
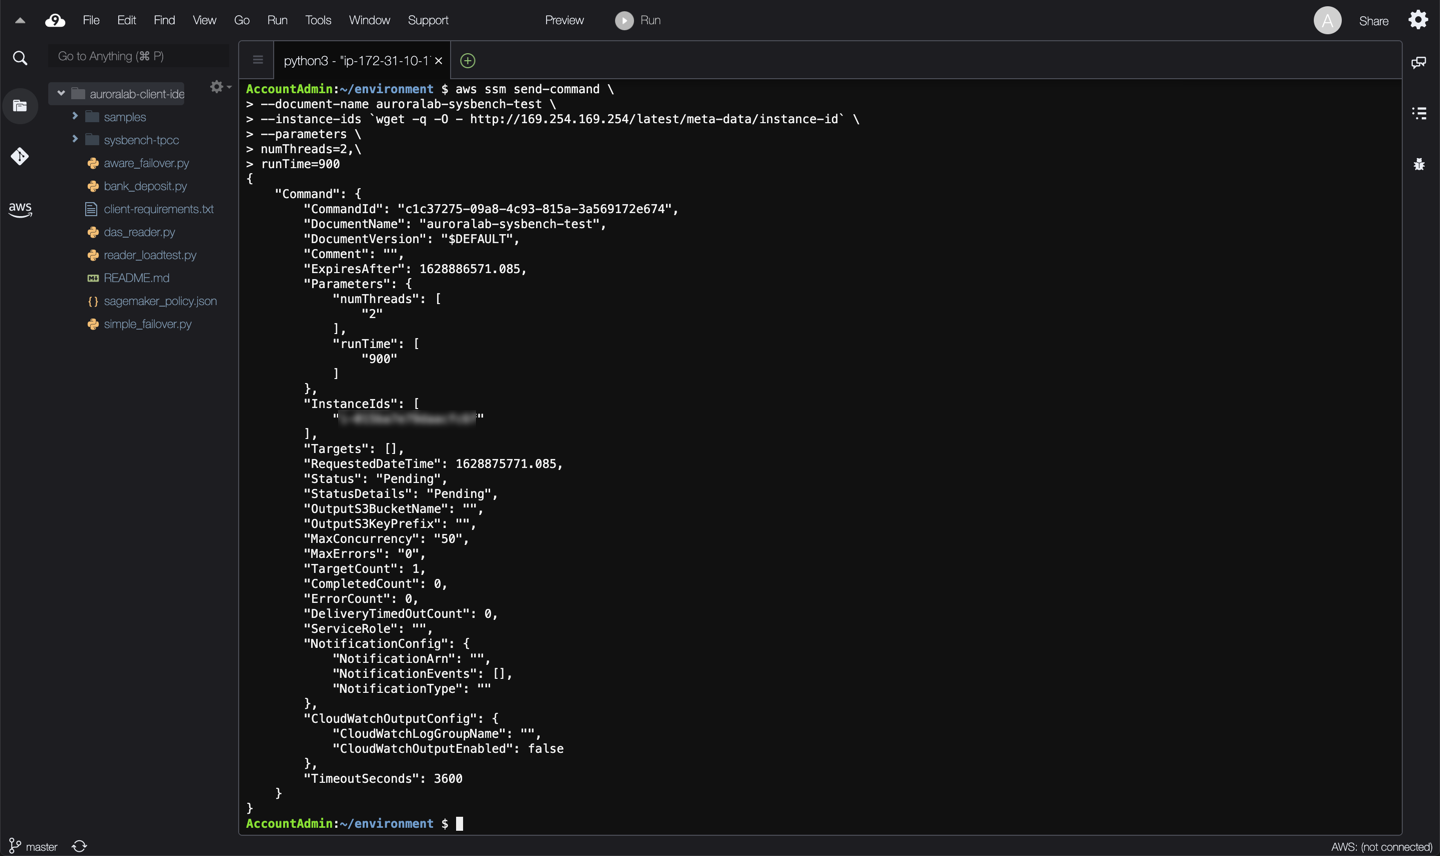
If AWS CloudFormation has provisioned the **primary** DB cluster on your behalf, and you skipped the **Create a New DB Cluster** lab, you can run the simplified command below, replacing the ==[ec2Instance]== placeholder with the appropriate value from your CloudFormation stack outputs, or Event Engine Team Dashboard if you are participating in an organized workshop.
aws ssm send-command \
--document-name auroralab-sysbench-test \
--instance-ids `wget -q -O - http://169.254.169.254/latest/meta-data/instance-id` \
--parameters \
numThreads=2,\
runTime=900
=== "I have created the primary DB cluster myself"
If you have completed the [Create a New DB Cluster](/provisioned/create/) lab, and created the **primary** Aurora DB cluster manually execute the command below, replacing the ==[ec2Instance]== placeholder with the appropriate value from your CloudFormation stack outputs, or Event Engine Team Dashboard if you are participating in an organized workshop. Also replace the ==[clusterEndpoint]== placeholder with the cluster endpoint of your DB cluster.
aws ssm send-command \
--document-name auroralab-sysbench-test \
--instance-ids `wget -q -O - http://169.254.169.254/latest/meta-data/instance-id` \
--parameters \
clusterEndpoint="[clusterEndpoint]",\
dbUser=$DBUSER,\
dbPassword="$DBPASS",\
numThreads=2,\
runTime=900
## 3. Insert data from a secondary cluster
Next, you will create some customer accounts for the banking application, simulating the activities that a bank teller in a branch location of your bank might do, if that location is closer to your secondary AWS region.
If you have not already opened a terminal window or the Cloud9 desktop in a previous lab, please [following these instructions](/prereqs/connect/) to do so now, but make sure you use the CLoud9 Desktop URL in the **secondary region**.
!!! warning "Region Check"
Ensure you are still working in the **secondary region**, especially if you are the links in this guide to open the service console at the right screen.
!!! warning "First time access to Cloud9 desktop in secondary region"
If you are accessing the Cloud9 desktop in the **secondary region** for the first time, ensure that the Cloud9 IDE interface is set up correctly, by following the instructions in the [Connect to the Cloud9 Desktop](/prereqs/connect/) lab.
Once connected, you need to set up the database credentials on the Cloud9 desktop in the secondary region. If you have created the original primary DB cluster manually, you have performed a similar step at that time. Run the following commands, replacing the placeholders with values as indicated in the below table:
Placeholder | Where to find it
----- | -----
==[secretArn]== | If you are participating in a formal workshop, and the lab environment was provisioned for you using Event Engine, the value of the Secret ARN may be found on the Team Dashboard in Event Engine. Otherwise you will find it in the Outputs of the CloudFormation stack you used to provision the lab environment. The value starts with `arn:aws:secretsmanager:`.
==[primaryRegion]== | The identifier of the **primary region** you are using, click on the name in the top right corner of the console. You'll find it next to the name, for example `us-west-2`, although your region may vary.
```
CREDS=`aws secretsmanager get-secret-value --secret-id [secretArn] --region [primaryRegion] | jq -r '.SecretString'`
export DBUSER="`echo $CREDS | jq -r '.username'`"
export DBPASS="`echo $CREDS | jq -r '.password'`"
echo "export DBPASS=\"$DBPASS\"" >> /home/ec2-user/.bashrc
echo "export DBUSER=$DBUSER" >> /home/ec2-user/.bashrc
```
Next, run the command below, replacing the ==[readerEndpoint]== placeholder with the reader endpoint of your **secondary region** DB cluster.
```
mysql -h[readerEndpoint] -u$DBUSER -p"$DBPASS" mybank
```
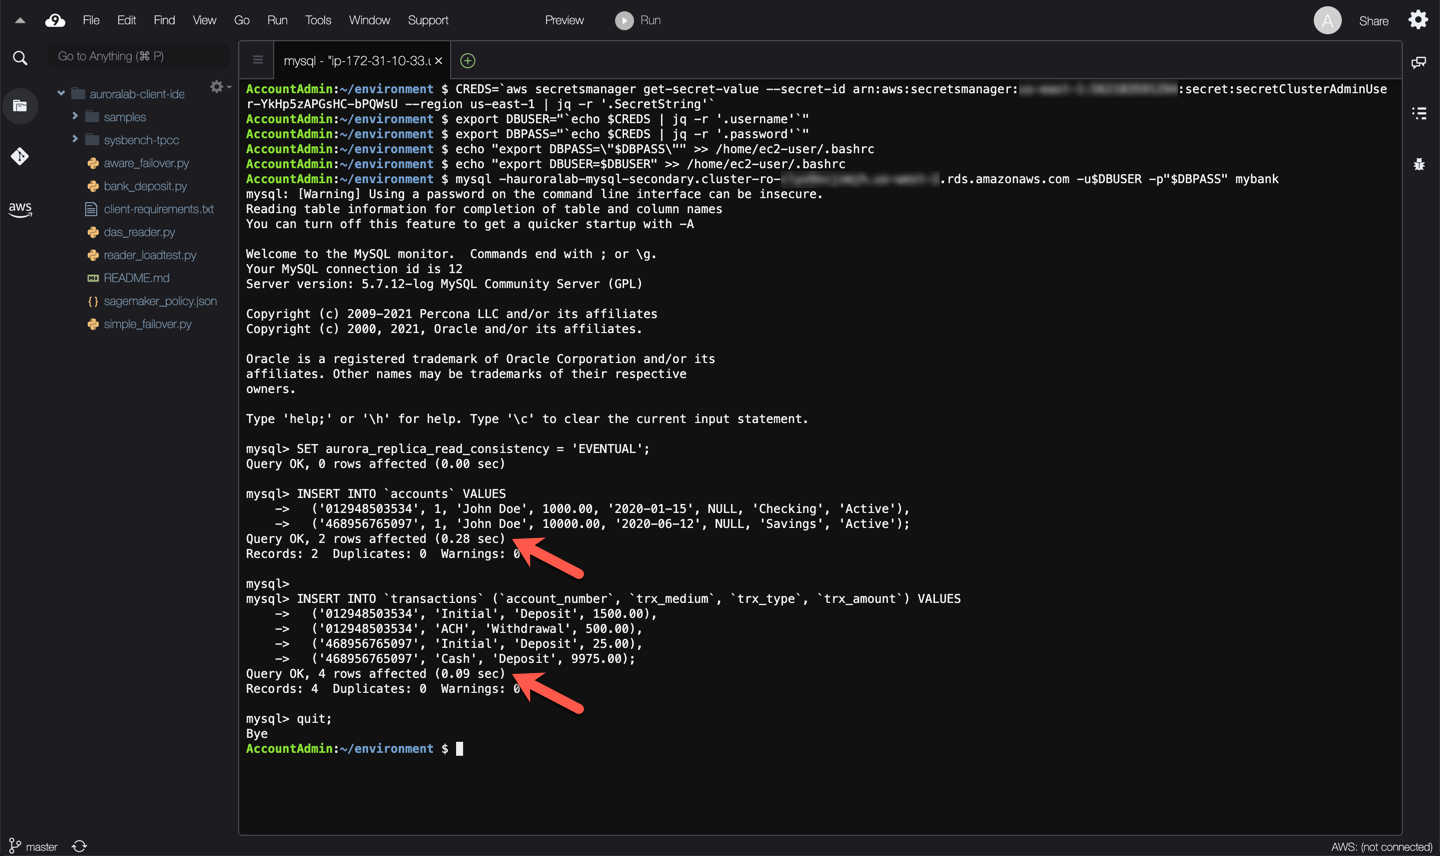
Once connected to the a reader DB instance in the secondary region, run the following command to activate write forwarding. To be able to use write forwarding, even if the secondary DB cluster is already enabled for write forwarding, you have to indicate a read consistency level. In this example, you are using the `EVENTUAL` read consistency level, which means your writes will be forwarded to the primary region, applied there, and you will receive a confirmation indicating the success (or error) of that operation, but the DB engine will not wait for those changes to be replicated back to the secondary region. As a result any immediately following reads of the changed data, in the same session or other sessions on the secondary DB cluster may return a stale result. Reads will be fast, but eventually consistent.
```sql
SET aurora_replica_read_consistency = 'EVENTUAL';
```
With the consistency mode set, you can now insert a few customer accounts in the banking application schema.
```sql
INSERT INTO `accounts` VALUES
('012948503534', 1, 'John Doe', 1000.00, '2020-01-15', NULL, 'Checking', 'Active'),
('468956765097', 1, 'John Doe', 10000.00, '2020-06-12', NULL, 'Savings', 'Active');
INSERT INTO `transactions` (`account_number`, `trx_medium`, `trx_type`, `trx_amount`) VALUES
('012948503534', 'Initial', 'Deposit', 1500.00),
('012948503534', 'ACH', 'Withdrawal', 500.00),
('468956765097', 'Initial', 'Deposit', 25.00),
('468956765097', 'Cash', 'Deposit', 9975.00);
```
Note that the operation latencies are higher because these statements are being forwarded to the primary region, thus incurring a cross region network round-trip.
Disconnect from the database using the following command:
```
quit;
```
## 4. Test consistency modes with a simple application
In this task you will explore the practical effects the write forwarding read consistency modes have on a simplified bank teller application. This [banking application](/scripts/bank_deposit.py) allows you to display your account balances, and deposit money into your accounts.
**TEST 1: Eventual Consistency**
When read consistency is set to `EVENTUAL`, results of write operations in the same session aren't visible until the write operation is performed on the primary region *and* replicated to the current region. Queries don't wait for the updated results to be available. Thus, a subsequent query might retrieve the older data or the updated data, depending on the timing of the statements and the amount of replication lag.
Start the banking application using eventual consistency and using the correct database credentials. Replace the ==[readerEndpoint]== placeholder with the reader endpoint of your **secondary region** DB cluster.
```
python3 bank_deposit.py -e [readerEndpoint] -u $DBUSER -p "$DBPASS" -c EVENTUAL
```
Notice that read operations to populate the account summary are fast.
Next press `d` then `Enter` to make a deposit at the prompt, provide an amount at the next prompt (integer values please!), then press `Enter` again.
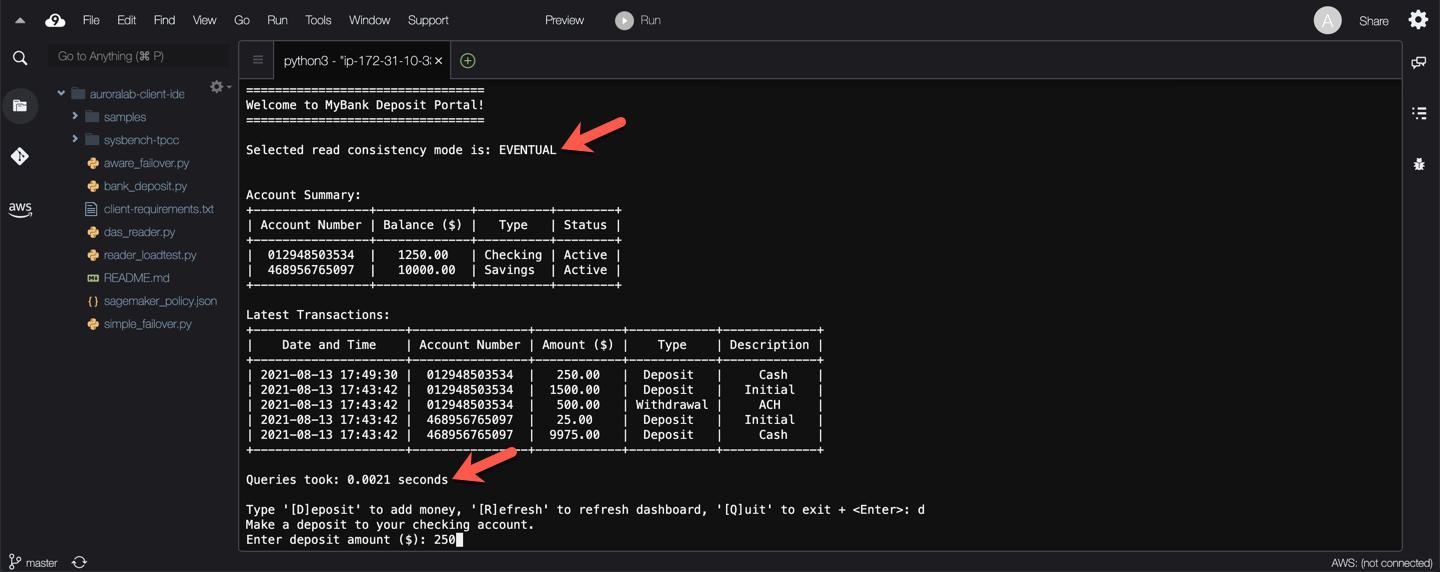
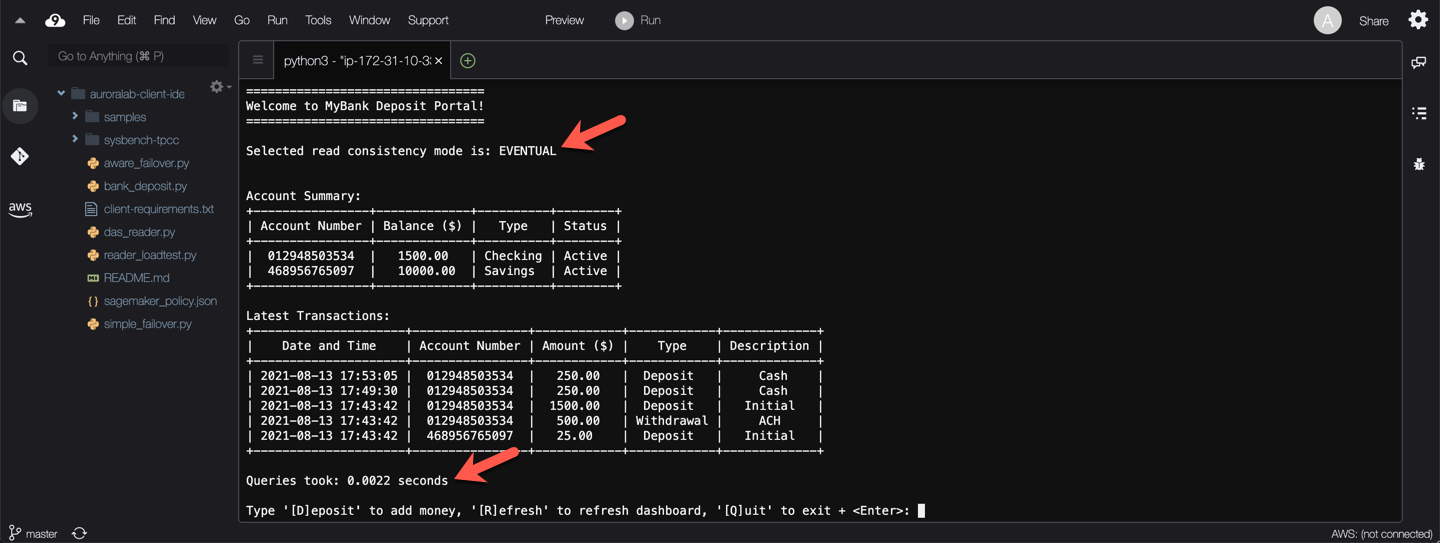
What do you see? — The screen has been refreshed, the read operations to populate the account summary were fast, again, but they show stale data!

Try refreshing the account summary a few times by pressing `r` then `Enter` at the prompt. Eventually the account summary shows the new account balance.
Press `q` then `Enter` to exit the application.
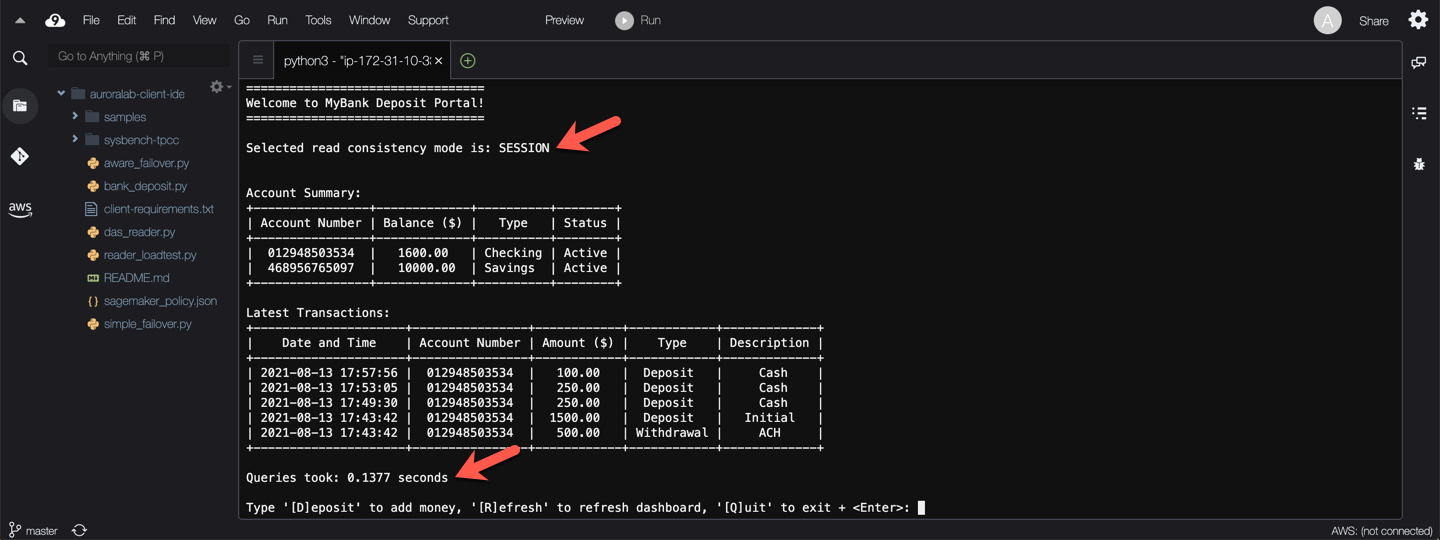
**TEST 2: Session Consistency**
When read consistency is set to `SESSION`, all queries in a secondary region that uses write forwarding see the results of all changes made in that session. The changes are visible regardless of whether the transaction is committed. If necessary, the query waits for the results of forwarded write operations to be replicated to the current region. A query doesn't wait for updated results from write operations performed in other regions or in other sessions within the current region.
As before, start the banking application, this time using session consistency and using the correct database credentials. Replace the ==[readerEndpoint]== placeholder with the reader endpoint of your **secondary region** DB cluster.
```
python3 bank_deposit.py -e [readerEndpoint] -u $DBUSER -p "$DBPASS" -c SESSION
```
Notice that read operations to populate the account summary initially are fast.
Next press `d` then `Enter` to make a deposit at the prompt, provide an amount at the next prompt (integer values please!), then press `Enter` again.

What do you see? — The screen has been refreshed, the read operations to populate the account summary were slower, but they show accurate data!
Try refreshing the account summary a few times by pressing `r` then `Enter` at the prompt. Subsequent reads should be fast again, until you make a deposit again.

Press `q` then `Enter` to exit the application.
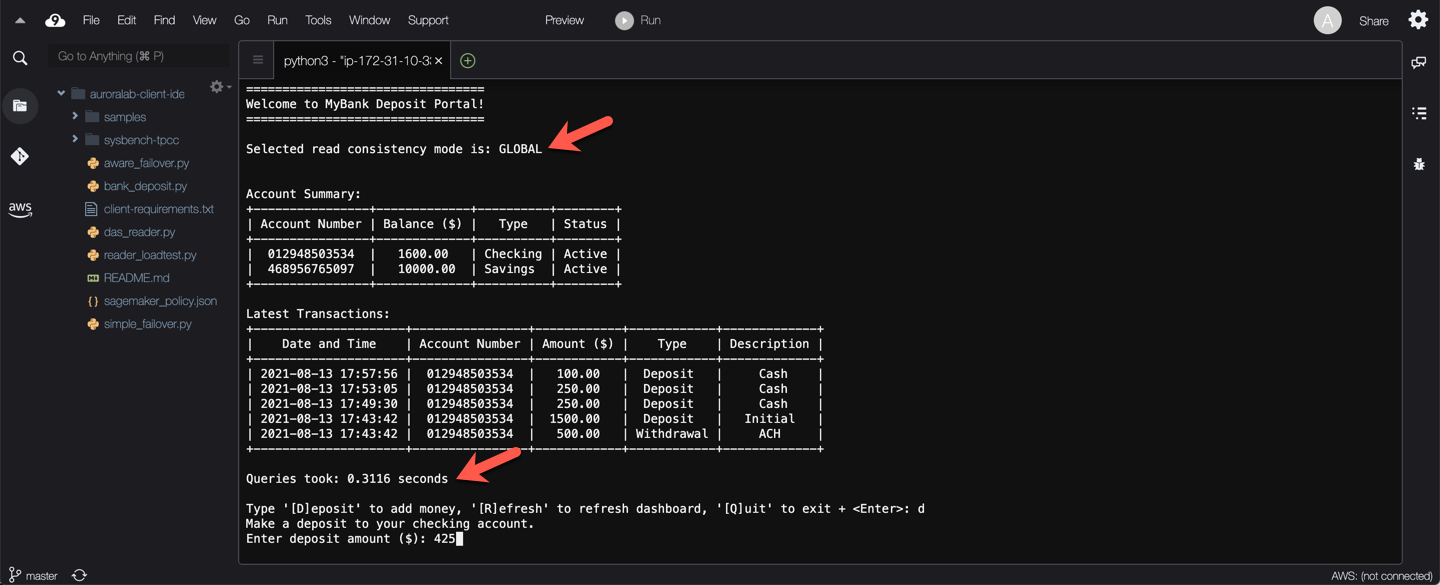
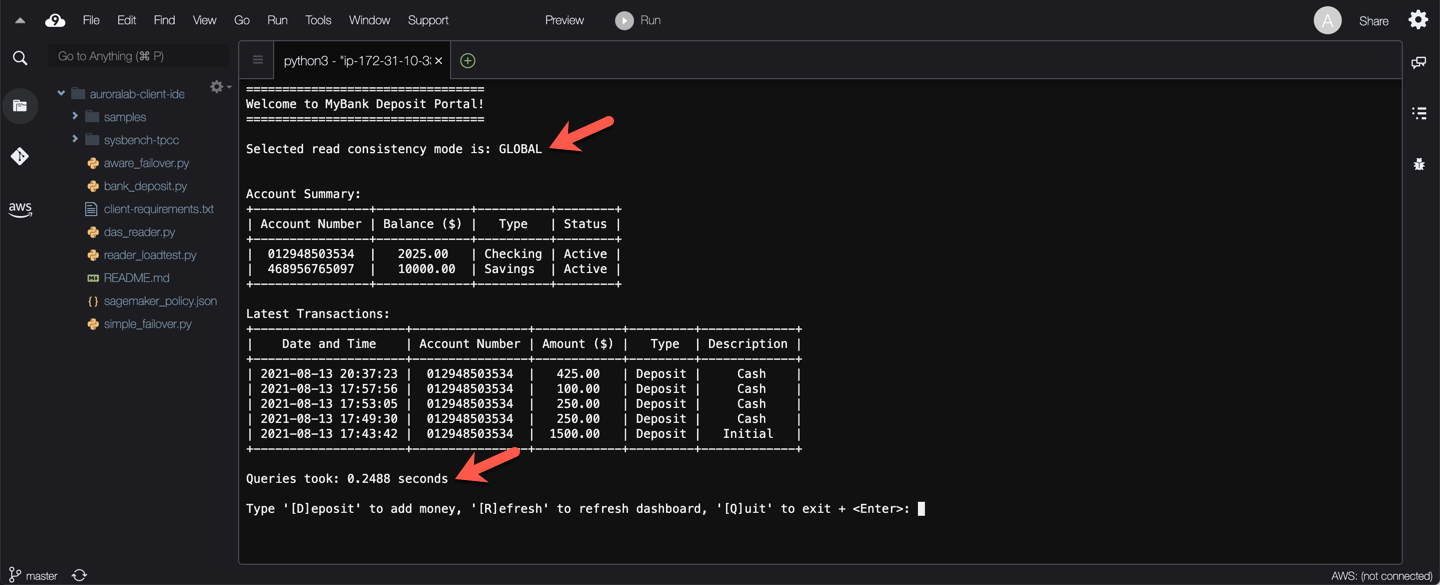
**TEST 3: Global Consistency**
When read consistency is set to `GLOBAL`, a session in a secondary region sees changes made by that session. It also sees all committed changes from both the primary region and other secondary regions. Each query might wait for a period that varies depending on the amount of session lag. The query proceeds when the secondary cluster is up-to-date with all committed data from the primary cluster, as of the time that the query began.
As before, start the banking application, this time using global consistency and using the correct database credentials. Replace the ==[readerEndpoint]== placeholder with the reader endpoint of your **secondary region** DB cluster.
```
python3 bank_deposit.py -e [readerEndpoint] -u $DBUSER -p "$DBPASS" -c GLOBAL
```
Notice that read operations to populate the account summary initially are slower, compared to the previous consistency tests.
Next press `d` then `Enter` to make a deposit at the prompt, provide an amount at the next prompt (integer values please!), then press `Enter` again.
What do you see? — The screen has been refreshed, the read operations to populate the account summary were also slower, but they show accurate data!
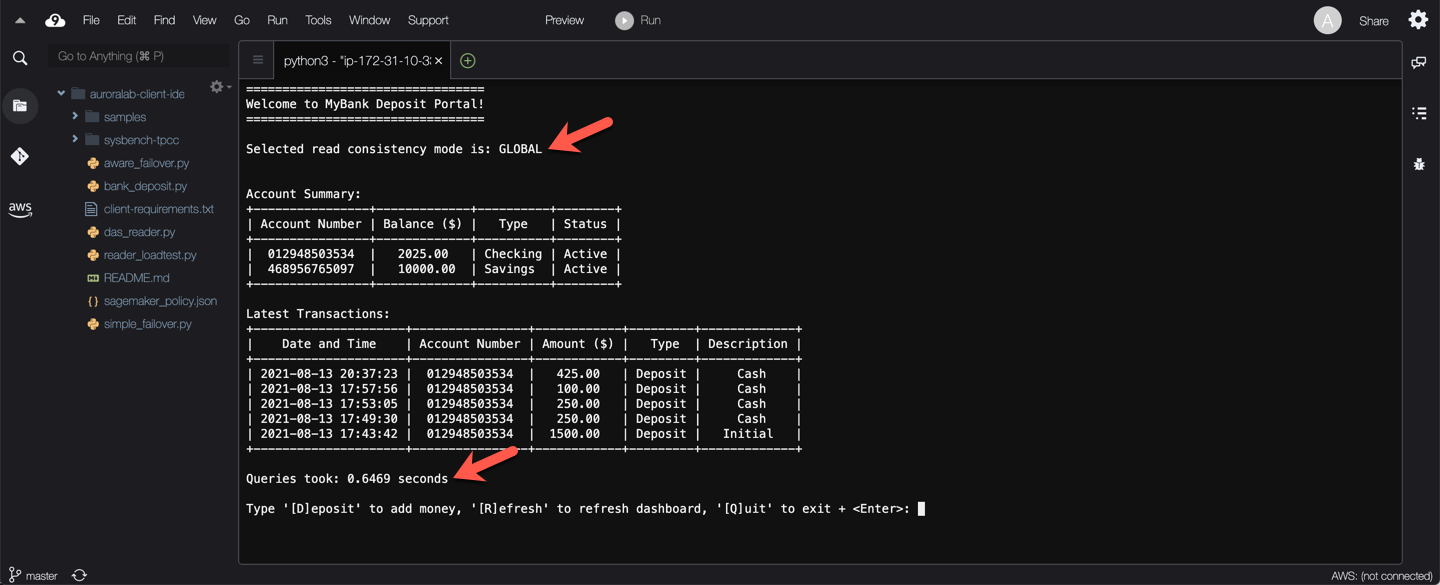
Try refreshing the account summary a few times by pressing `r` then `Enter` at the prompt. Since each database query waits for the secondary cluster to catch up with committed data as of the time the query began, reads should be consistently slower compared to our previous consistency tests.
Press `q` then `Enter` to exit the application.
## 5. Choose the right read consistency mode
Above, you were able to experience what the impact of the consistency modes might look like to an end user interacting with applications leveraging Global Database Write Forwarding. Which one is the right one for your workload, may depend on a number of factors. Below are a few example use cases:
=== "Eventual Consistency"
Use `EVENTUAL` read consistency mode when immediate subsequent read accuracy is not needed, or can be overcome by other means. This ensures reads from the secondary region are always fast, using an eventual consistent response.
One example is a order processing workflow. Given an eCommerce use case, when a customer submits an order, the application responds with an *Order Confirmation* screen. It is typically sufficient that the application receives confirmation that the writes were successful to the database without needing a strongly consistent subsequent read of the data set.
Another example is a user profile update workflow. Given a user profile service, when a customer updates their profile, confirmation that the changes were saved is also typically sufficient. Lets say the end user updates their password, the password is not displayed back. Additionally, it will take the user a few seconds to navigate the interface to use the newly set password, this allows the database time to reach consistency of that change.
=== "Session Consistency"
Use `SESSION` read consistency mode when immediate subsequent read accuracy is needed, and cannot be achieved by other means, such as caching the changed data application side.
Financial applications (such as the simple example in this lab) are generally good candidates for session level read consistency. Users may perform multiple transactions, that build upon the results of the previous ones. In this case the comparatively slower reads as a results of the changes are typically acceptable as end users typically expect the system to perform some work as a result of their change requests.
=== "Global Consistency"
Use `GLOBAL` read consistency mode when globally strong read consistency is necessary. While using this mode may be tempting to simplify applications, and avoid consistency specific implementations, the higher query response lag as a result of having to wait for data to reach global consistency, may not be appropriate for most use cases.
Trading applications or auction workflows, where the functionality largely relies on every participant having an accurate view of the data state at any given point in time, are good candidates for this consistency mode.