# Connect to the Cloud9 Desktop
To interact with the Aurora database cluster, you will use an AWS Cloud9 cloud-based integrated development environment (IDE). We'll refer to it as your **Cloud9 desktop** going forward. All necessary software packages and scripts have been installed and configured in this environment.
??? faq "Why can't I use my own laptop?"
We aim to provide a consistent experience to each lab participant. In the past, we have noticed that permissions and configuration differences on participant devices have resulted in inconsistent, and suboptimal participant experiences. Some participants were unable to install required tools, others needed to significantly deviate from the instructional steps, resulting in less than optimal learning outcomes.
This lab contains the following tasks:
1. Open and set up your Cloud9 desktop
2. Open a terminal in your Cloud9 desktop
3. Verify lab environment
This lab requires the following prerequisites:
* [Get Started](/prereqs/environment/)
## 1. Open and set up your Cloud9 desktop
Please select the option that matches your circumstances best:
=== "I'm in a workshop using Event Engine"
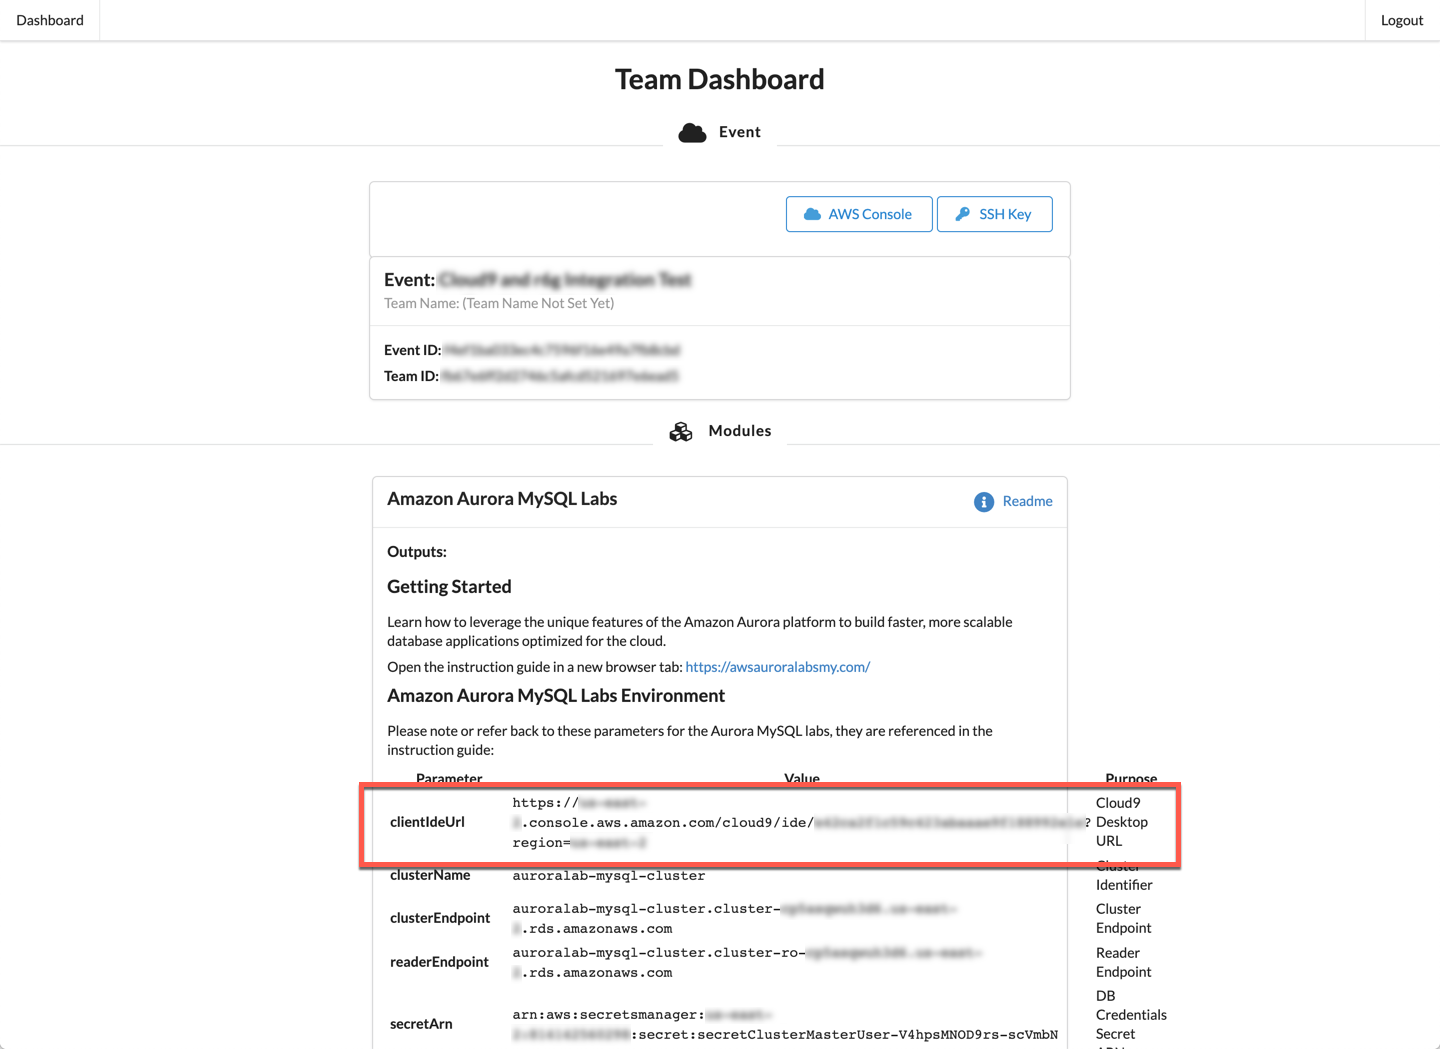
On the Event Engine Team Dashboard, locate the parameter called ==[clientIdeUrl]==, the value of it is a web link. Either click the link, or copy the URL into a new tab in your web browser.
=== "I deployed the lab environment manually"
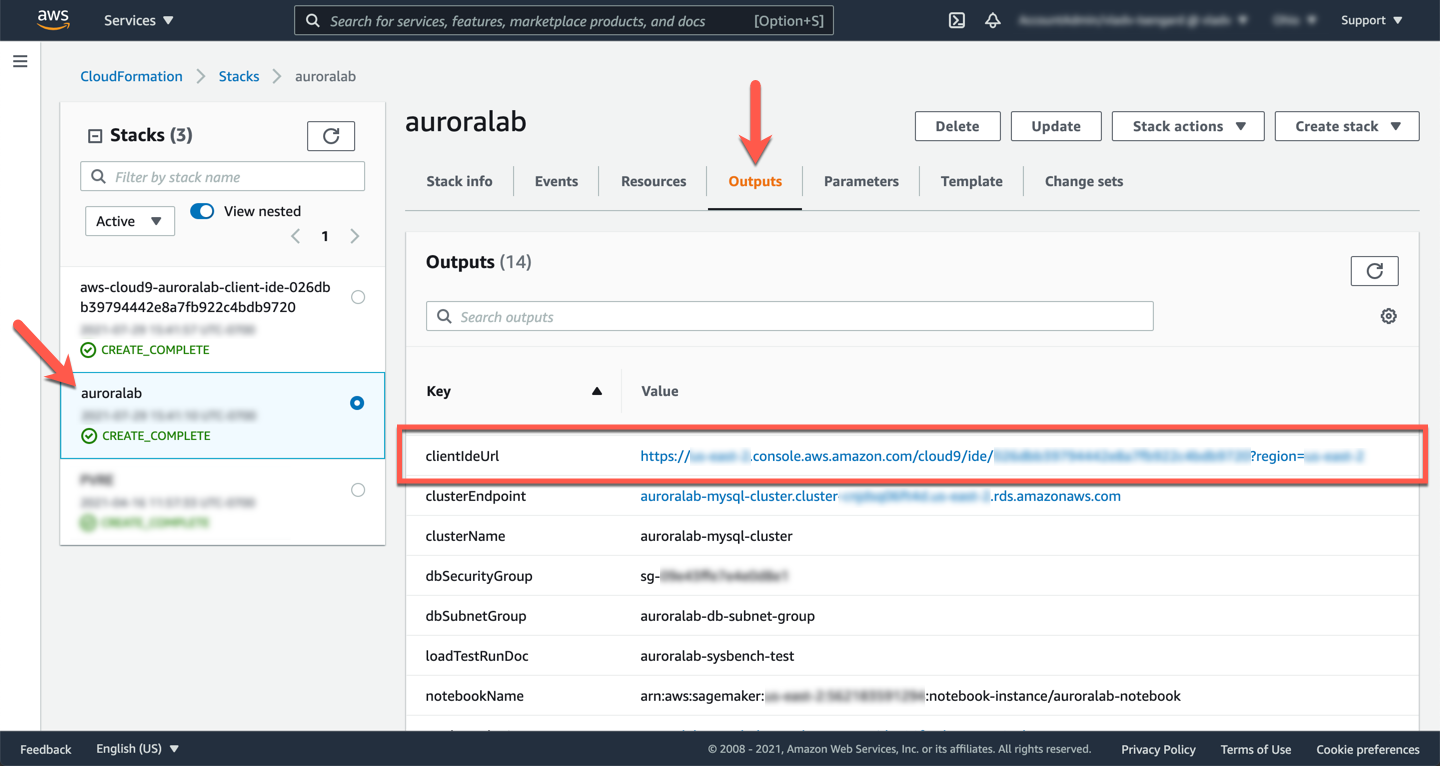
As indicated at the end of the [Get Started](/prereqs/environment/) lab (previously completed), the **Outputs** section of the stack view in the AWS CloudFormation service console contains several parameters and their values. Locate the locate the parameter called ==[clientIdeUrl]==, the value of it is a web link. Either click the link, or copy the URL into a new tab in your web browser.
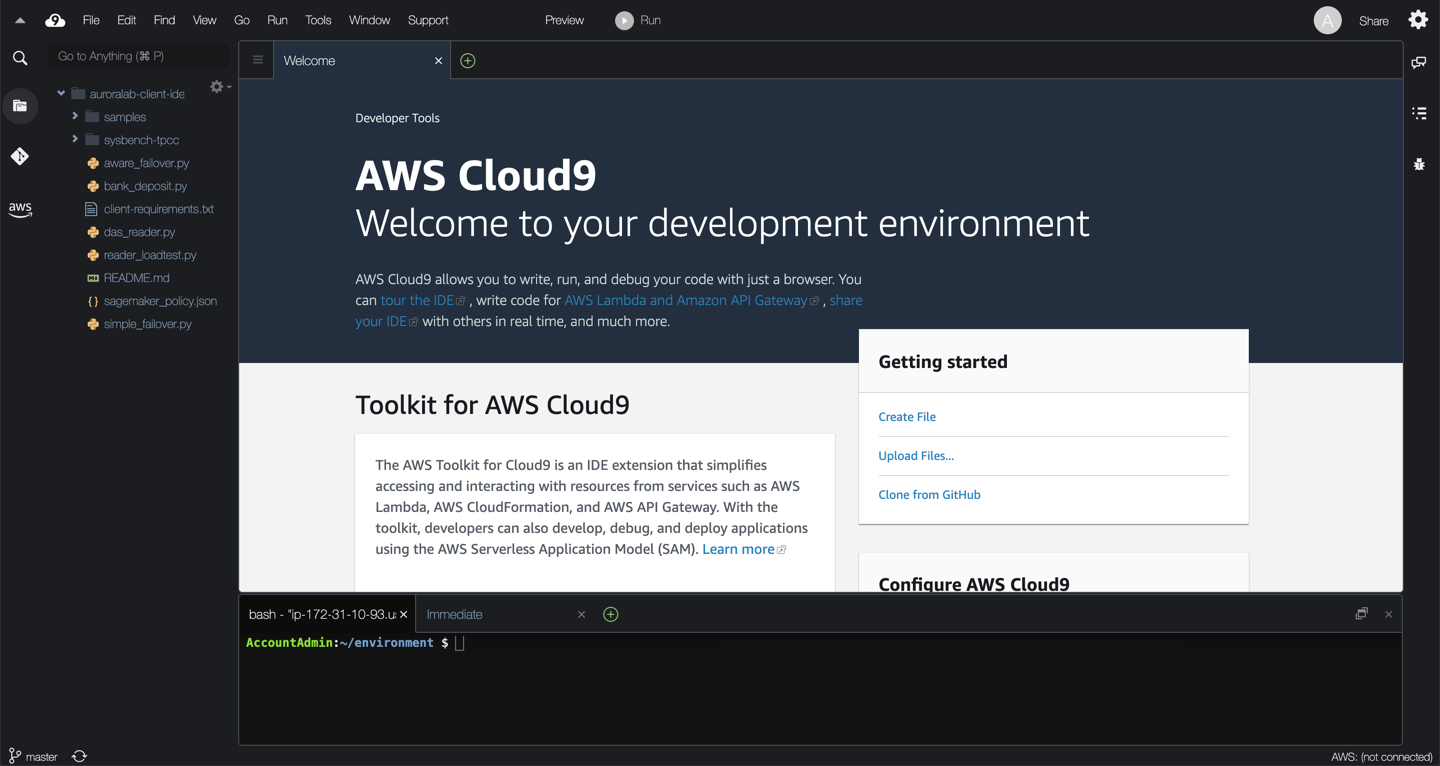
Depending on timing, your Cloud9 desktop may take a few minutes to initialize. Once available, you will be greeted with an initial welcome screen, similar to the example below.
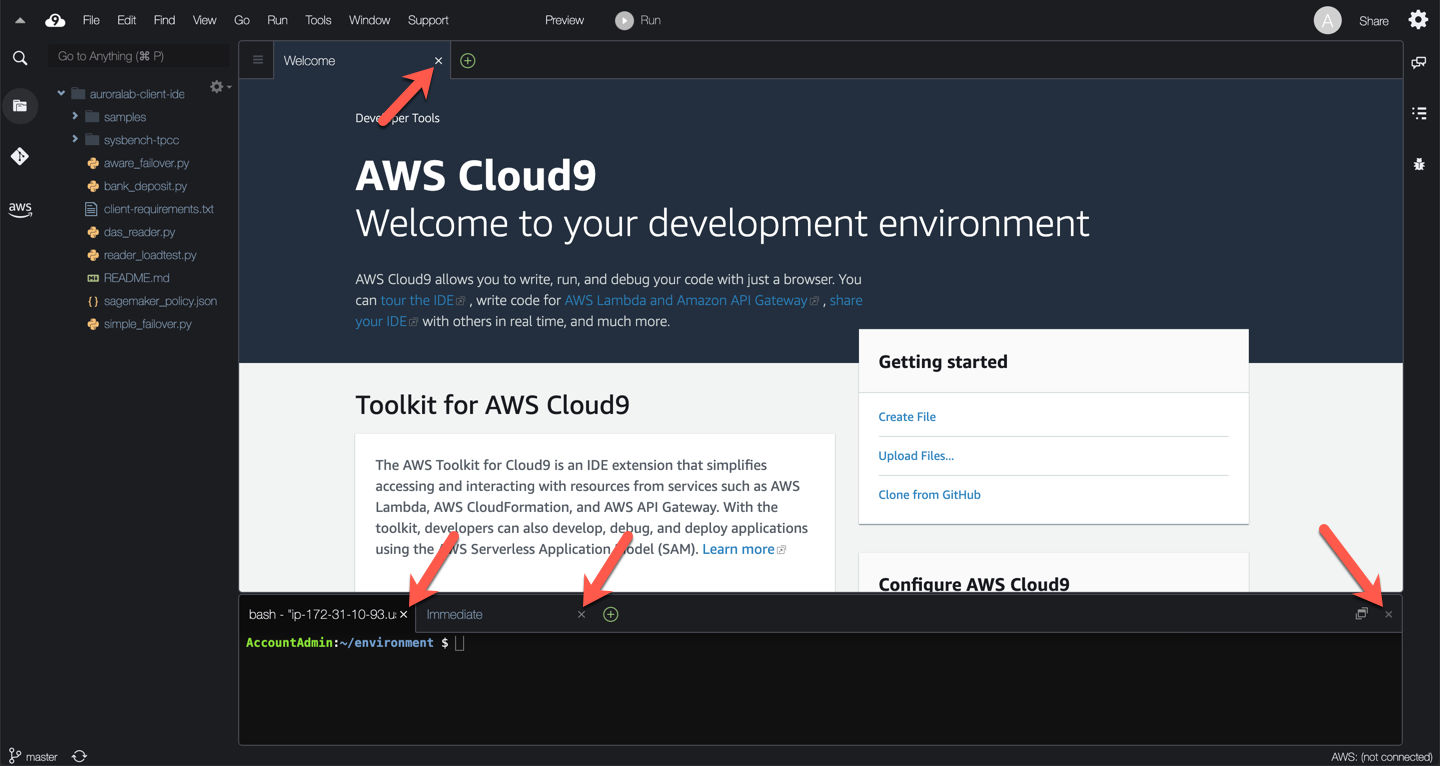
Close the **Welcome** tab in the main desktop panel, then close the terminal, and **Immediate** interpreter tabs in the command panel at the bottom of your desktop. Ignore/dismiss any confirmation or warning prompts. Finally, close the command panel itself using the `x`-mark in the top-right corner of that panel. This will dedicate the full screen real estate to the components needed for the lab environment.
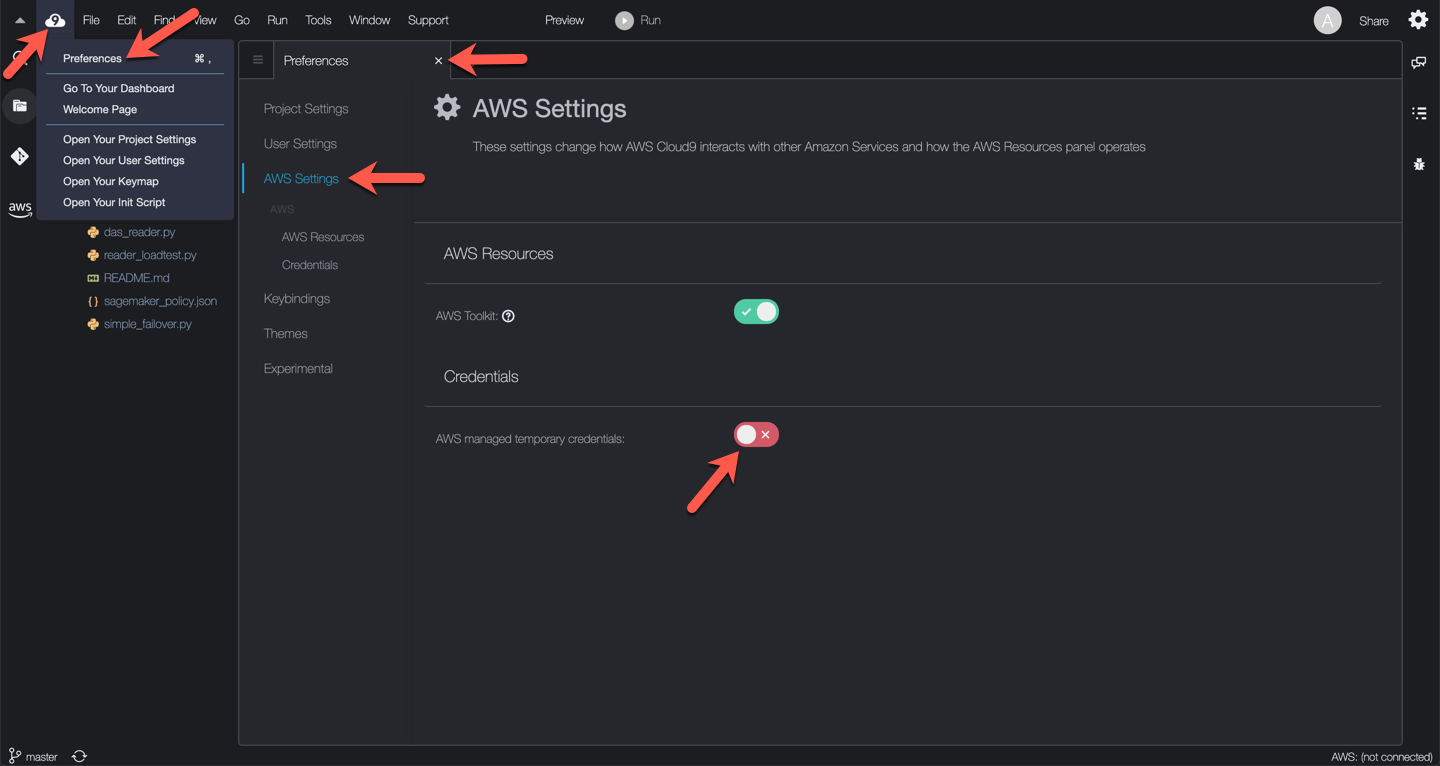
Click the **Cloud9 icon** in the top right corner, and open the **Preferences** menu. On the Preferences tab, in the navigation side bar, choose **AWS Settings**, then **Credentials**. Toggle **AWS managed temporary credentials** to `Off` (red). You may close the Preferences tab, by clicking the small `x`-mark on the tab.
## 2. Open a terminal in your Cloud9 desktop
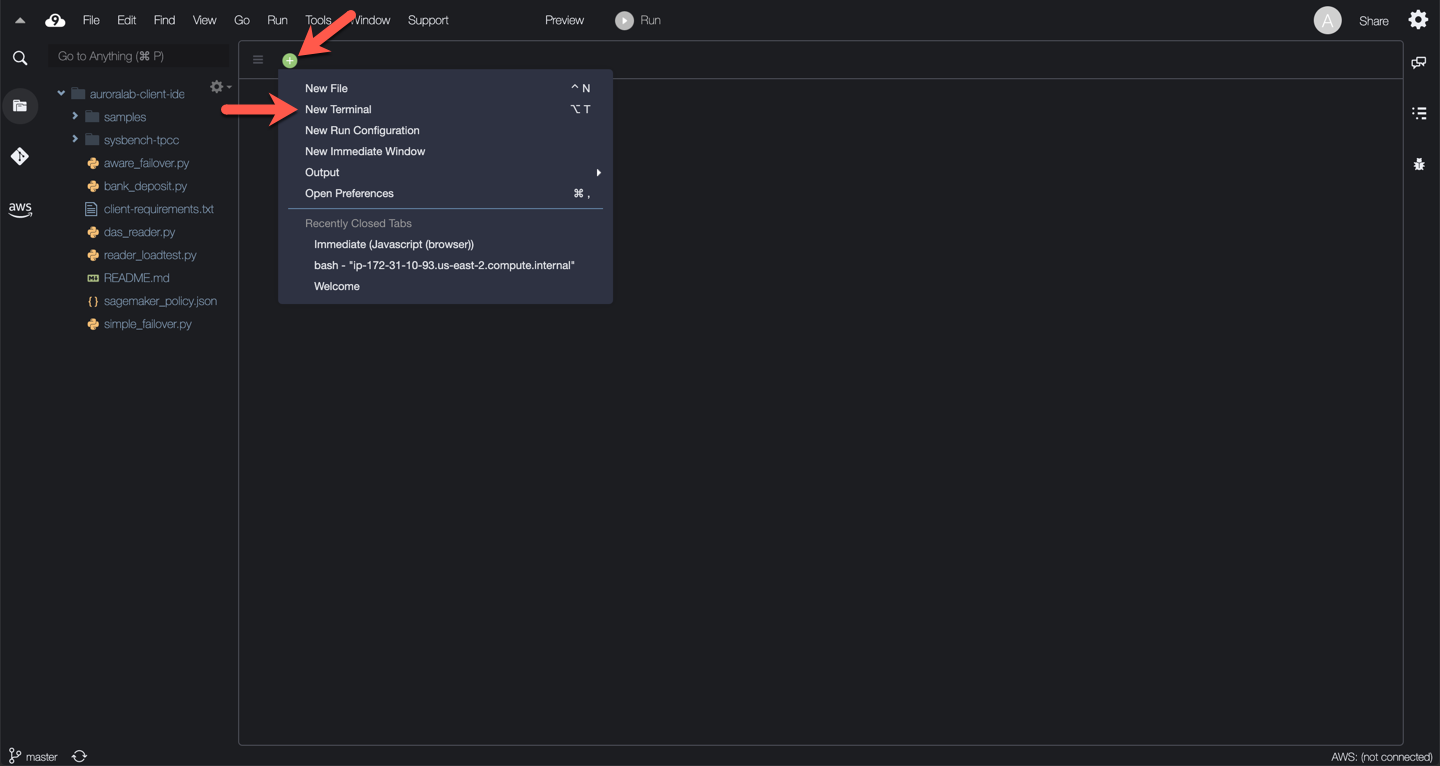
Open a new **Terminal** tab by using the `+` (plus) symbol in the top left of the main panel to open a pop-up menu. Choose **New Terminal** from that menu.
!!! note "Multiple terminal tabs"
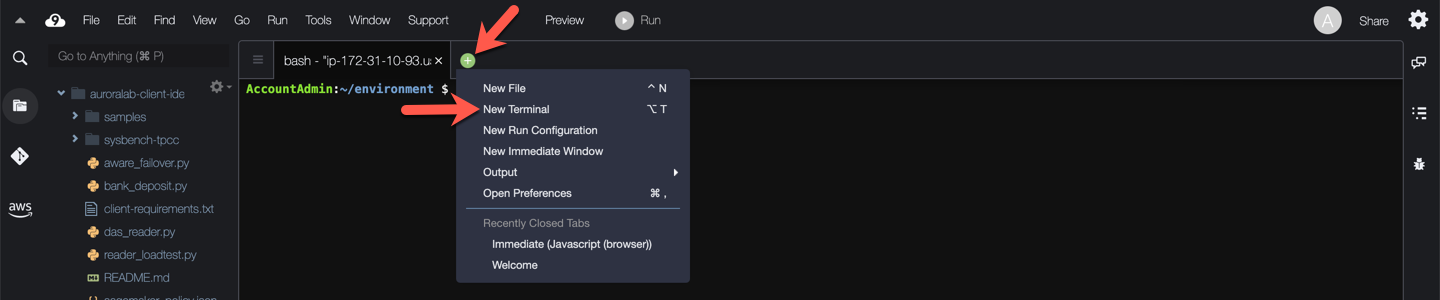
Cloud9 allows you to open multiple terminal tabs, when needed. Some subsequent labs will require you use multiple terminal windows. In that case simply repeat the last step above: click the `+` (plus) symbol in the top left of the main panel and choose **New Terminal** from the popup menu.
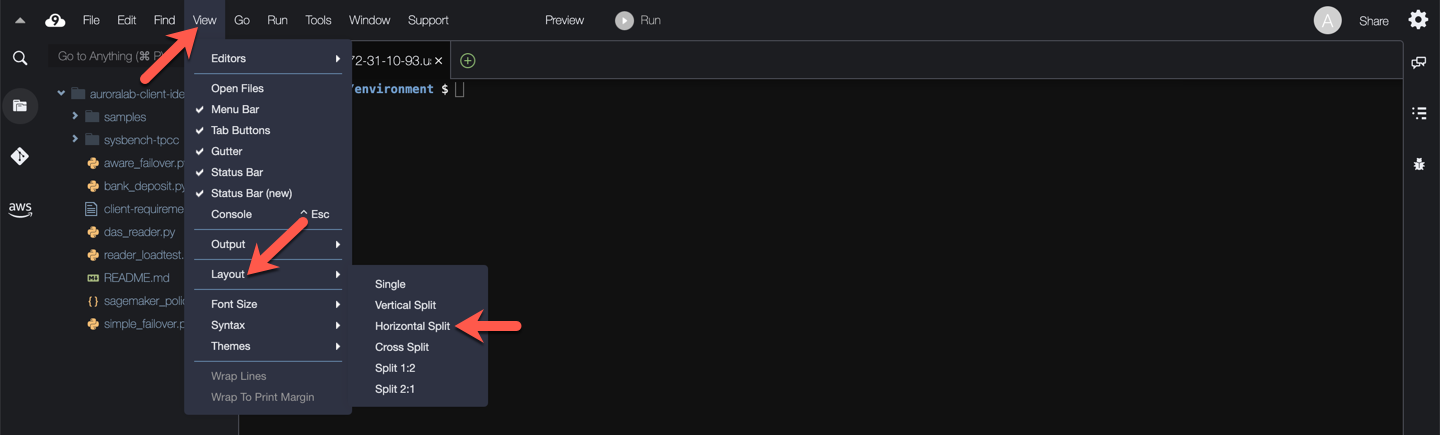
In some labs it may also be more beneficial to have multiple terminal windows side-by-side. You can arrange them like that by changing the layout. Go to **View** in the main toolbar, select **Layout** and switch as necessary between **Single**, **Horizontal Split** or **Cross Split**.
## 3. Verify lab environment
Finally, verify that the Cloud9 desktop has been configured properly. Type the following command in the terminal window:
```
tail -n1 /bootstrap.log
```
You should see the output: `[TIMESTAMP] * signal bootstrap complete`.
Once you have verified the environment is configured correctly, you can proceed to the next lab.