# Auto Scale Read Replicas
This lab will demonstrate how auto scaling read replicas work. You will use a load generator script to send traffic to the reader endpoint of the DB cluster. Once this load is detected, Aurora will provision an additional reader instance to distribute the read traffic..
This lab contains the following tasks:
1. Run a read-only workload
2. Observe read replica auto scaling
This lab requires the following prerequisites:
* [Get Started](/prereqs/environment/)
* [Connect to the Cloud9 Desktop](/prereqs/connect/)
* [Create a New DB Cluster](/provisioned/create/) (conditional, only if you plan to create a cluster manually)
* [Connect to the DB Cluster and Load Data](/provisioned/interact/)
## 1. Run a read-only workload
For this task you will use the **Reader Endpoint** of the cluster. If you created the cluster manually, you can find the endpoint value as noted at Step 2. in that lab. If the DB cluster was created automatically for you the value can be found on the Event Engine Dashboard or in your CloudFormation stack outputs.
If you have not already opened a terminal window in the Cloud9 desktop in a previous lab, please [following these instructions](/prereqs/connect/) to do so now. Run the load generation script from the terminal window, replacing the ==[readerEndpoint]== placeholder with the reader endpoint:
```
python3 reader_loadtest.py -e[readerEndpoint] -u$DBUSER -p"$DBPASS" -dmylab
```
The command will report the number of queries it is sending to the database per second.

## 2. Observe read replica auto scaling
Now, open the Amazon RDS service console in a different browser tab.
!!! warning "Region Check"
Ensure you are still working in the correct region, especially if you are following the links above to open the service console at the right screen.
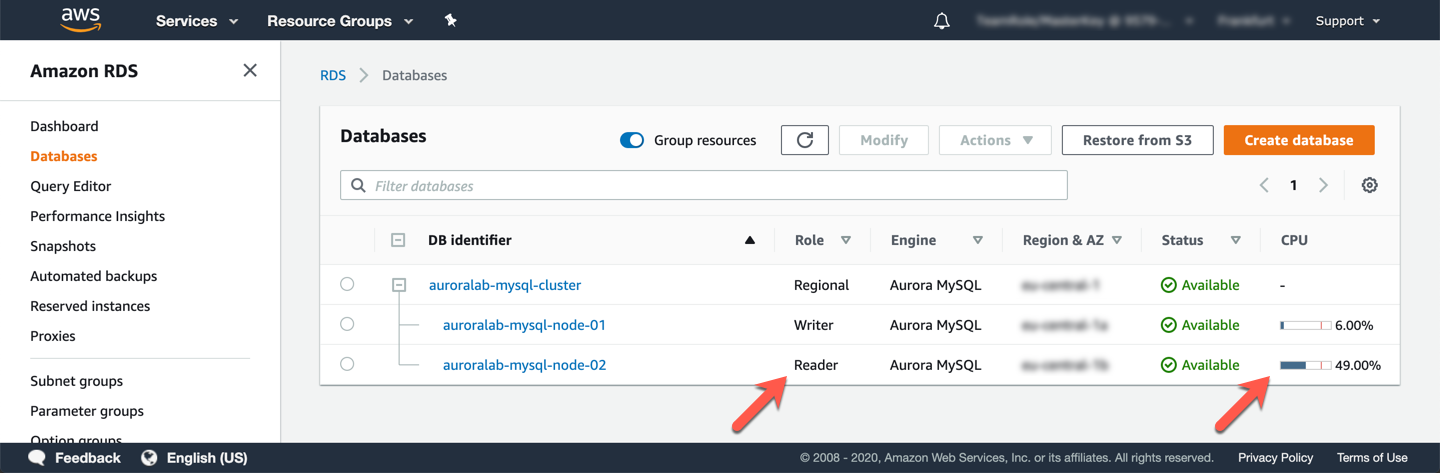
Take note that the reader node is currently receiving load. It may take a minute or more for the metrics to fully reflect the incoming load.
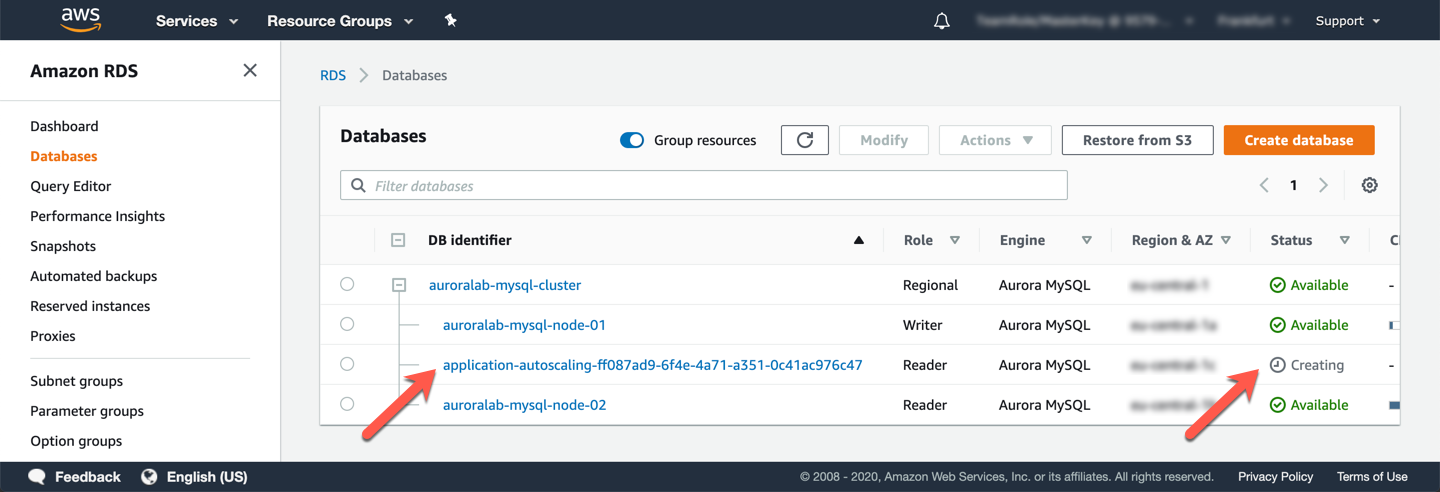
After several minutes return to the list of instances and notice that a new reader is being provisioned to your cluster.
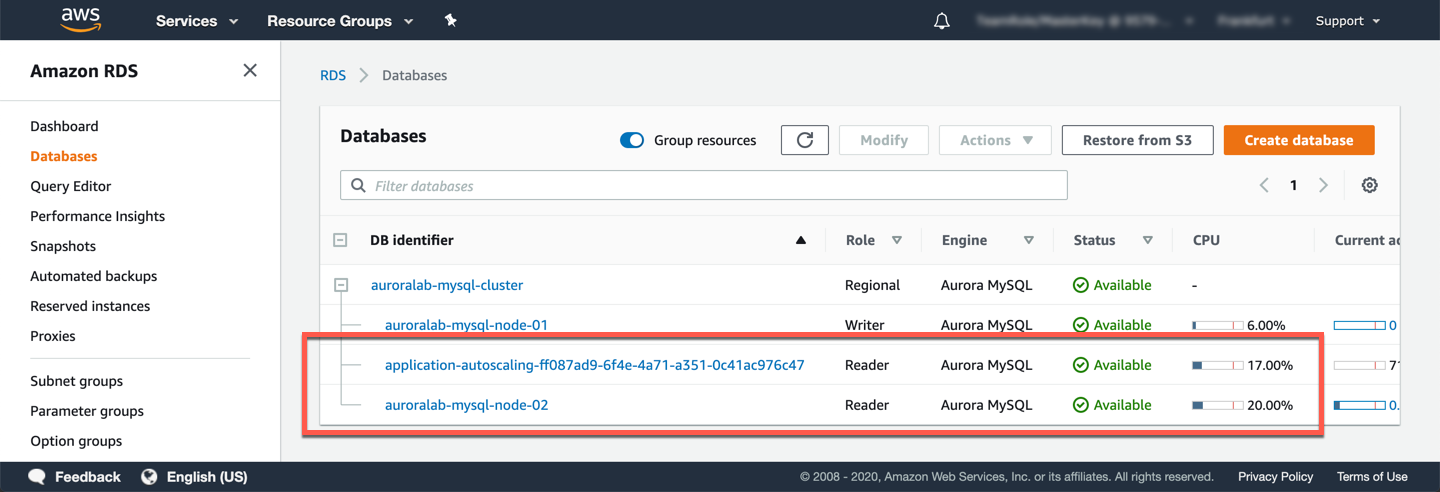
Once the new replica becomes available, note that the load distributes and stabilizes (it may take a few minutes to stabilize).
You can now toggle back to the Cloud9 desktop terminal, and type `CTRL+C` to quit the load generator. After a while the additional reader will be removed automatically after several minutes. While you are welcome to wait until that happens, you may also proceed with the next lab at this point.