# Backtrack a DB Cluster
!!! error "Backtrack is not compatible with Global Database and Aurora MySQL 3"
Please note that backtrack feature is currently not compatible with Aurora Global Database or Aurora MySQL version 3. If you run through these labs, you will not be able to use this cluster for Global Database lab. If you enabled Aurora MySL version 3 during the initial deployment, these labs will not work. You will have to either create a new cluster for global database labs, or create a new stack using the instruction listed in the [Global Database labs](/global/deploy) section. To successfully run these labs you must have an Aurora MySQL version 2 database instance.
This lab will walk you through the process of backtracking a DB cluster.
Backtracking "rewinds" the DB cluster to the time you specify. While it is not a replacement for backing up your DB cluster for DR purposes, backtracking allows you to easily undo mistakes quickly, or explore earlier data changes.
This lab contains the following tasks:
1. Make unintended data changes
2. Backtrack to recover from unintended changes
This lab requires the following prerequisites:
* [Get Started](/prereqs/environment/)
* [Connect to the Cloud9 Desktop](/prereqs/connect/)
* [Create a New DB Cluster](/provisioned/create/) (conditional, only if you plan to create a cluster manually)
* [Connect to the DB Cluster and Load Data](/provisioned/interact/)
## 1. Make unintended data changes
If you have not already opened a terminal window in the Cloud9 desktop in a previous lab, please [following these instructions](/prereqs/connect/) to do so now. Then, connect to the DB cluster endpoint using the MySQL client, if you are not already connected after completing the previous lab, by running:
```
mysql -h[clusterEndpoint] -u$DBUSER -p"$DBPASS" mylab
```
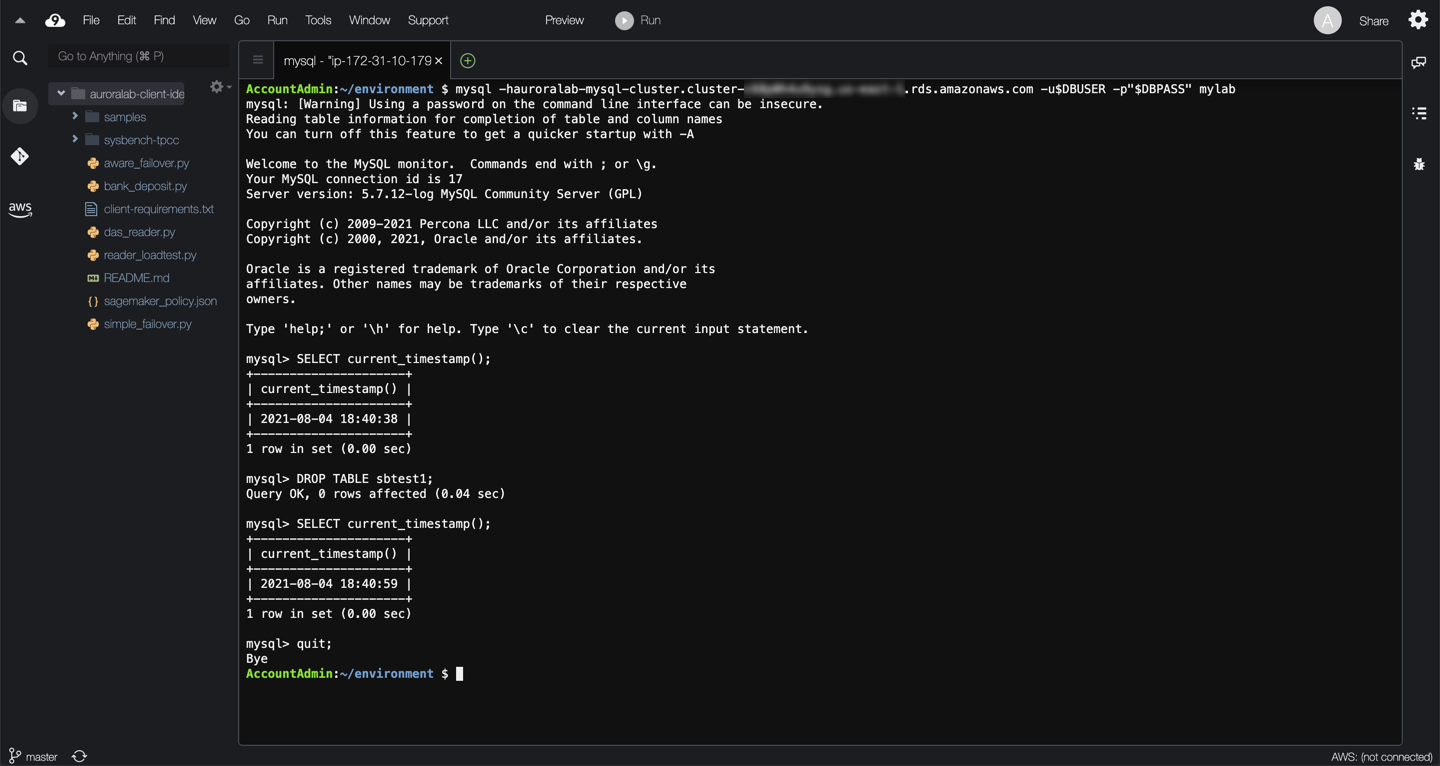
Next, drop the `sbtest1` table:
!!! note
Consider executing the commands below one at a time, waiting a few seconds between each one. This will make it easier to determine a good point in time for testing backtrack. In a real world situation, you will not always have a clean marker to determine when the unintended change was made. Thus you might need to backtrack a few times to find the right point in time.
```
SELECT current_timestamp();
DROP TABLE sbtest1;
SELECT current_timestamp();
quit;
```
Remember or save the time markers displayed by the commands above, you will use them as references later, to simplify determining the right point in time to backtrack to for demonstration purposes.
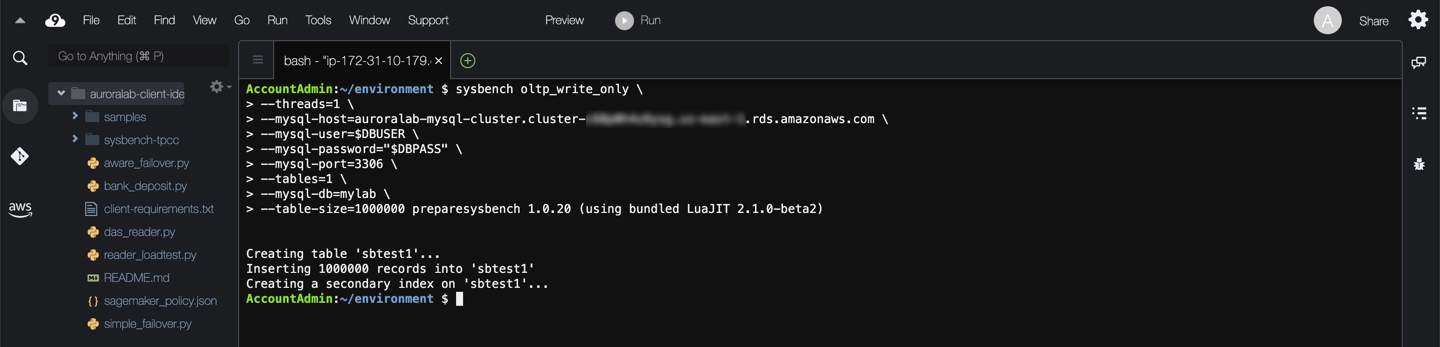
Now, run the following command to replace the dropped table using the sysbench command, replacing the ==[clusterEndpoint]== placeholder with the cluster endpoint of your DB cluster:
```
sysbench oltp_write_only \
--threads=1 \
--mysql-host=[clusterEndpoint] \
--mysql-user=$DBUSER \
--mysql-password="$DBPASS" \
--mysql-port=3306 \
--tables=1 \
--mysql-db=mylab \
--table-size=1000000 prepare
```
??? tip "What do all these parameters mean?"
Parameter | Description
--- | ---
--threads | Number of concurrent threads.
--mysql-host | The cluster endpoint of the Aurora DB cluster.
--mysql-user | The user name of the MySQL user to authenticate as.
--mysql-password | The password of the MySQL user to authenticate as.
--mysql-port | The port the Aurora database engine is listening on.
--tables | Number of tables to create.
--mysql-db | The schema (database) to use by default.
--table-size | The number or rows to generate in the table.
Reconnect to the DB cluster, and run the checksum table operation, the checksum value should be different than the source cluster value calculated in the [Clone a DB Cluster](/provisioned/clone/#2-verify-that-the-data-set-is-identical) lab:
```
mysql -h[clusterEndpoint] -u$DBUSER -p"$DBPASS" mylab
checksum table sbtest1;
quit;
```
## 2. Backtrack to recover from unintended changes
Backtrack the database to a time slightly after the second time marker (right after dropping the table).
!!! note
Backtrack operations occur at the DB cluster level, the entire database state is rolled back to a designated point in time, even though the example in this lab illustrates the effects of the operation on an individual table.
```
aws rds backtrack-db-cluster \
--db-cluster-identifier auroralab-mysql-cluster \
--backtrack-to "yyyy-mm-ddThh:mm:ssZ"
```

Run the below command to track the progress of the backtracking operation. Repeat the command several times, if needed. The operation should complete in a few minutes.
```
aws rds describe-db-clusters \
--db-cluster-identifier auroralab-mysql-cluster \
| jq -r '.DBClusters[0].Status'
```

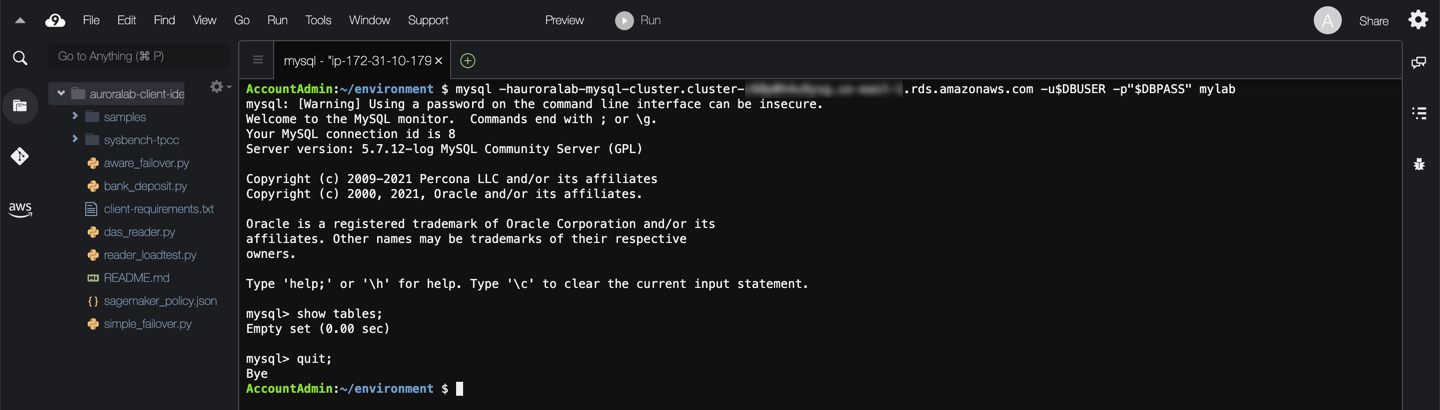
Connect back to the database. The `sbtest1` table should be missing from the database.
```
mysql -h[clusterEndpoint] -u$DBUSER -p"$DBPASS" mylab
show tables;
quit;
```
Now backtrack again to a time slightly before the first time marker above (right before dropping the table).
```
aws rds backtrack-db-cluster \
--db-cluster-identifier auroralab-mysql-cluster \
--backtrack-to "yyyy-mm-ddThh:mm:ssZ"
```
Track the progress of the backtracking operation, using the command below. The operation should complete in a few minutes. Repeat the command several times, if needed.
```
aws rds describe-db-clusters \
--db-cluster-identifier auroralab-mysql-cluster \
| jq -r '.DBClusters[0].Status'
```
Connect back to the database again. The `sbtest1` table should now be available in the database again, but contain the original data set.
```
mysql -h[clusterEndpoint] -u$DBUSER -p"$DBPASS" mylab
show tables;
checksum table sbtest1;
quit;
```