` HTML element with the ID `amazon-chime-sdk-widget-container` and append it to the `` HTML element.
```html
```
The `amazon-chime-sdk-widget-container` uses the following CSS custom properties (variables) to set `z-index` to `9999` in `frontend/src/index.css`.
```css
:root {
/* z-index */
--chime-sdk-widget-z-index: 9999;
}
#amazon-chime-sdk-widget-container {
z-index: var(--chime-sdk-widget-z-index);
}
```
Try adjusting the `--chime-sdk-widget-z-index` value and upload the latest code.
```
cd frontend
npm run deploy
```
See the next question if the `z-index` solution does not help.
#### Can I embed a widget in my HTML element?
Pass your HTML element after copying the content of `dist/widget.js` into your application.
```js
const container = document.getElementById('my-container');
window.initAmazonChimeSDKWidget(container);
```
Ensure that you set the `pointer-events` CSS property to `none`, so elements behind your container receive pointer events.
```css
#my-container {
pointer-events: none;
}
```
If you do not specify any parameter to `window.initAmazonChimeSDKWidget()`, the demo creates the `
` HTML element with the ID `amazon-chime-sdk-widget-container`. Refer to style properties `#amazon-chime-sdk-widget-container` in `frontend/src/index.css`.
#### Can I change the language used in the demo?
Yes, the demo supports localization using [i18next](https://www.i18next.com/) and [react-i18next](https://react.i18next.com/) internationalization frameworks. Follow the steps mentioned in `frontend/src/localization/index.ts` to support your language.
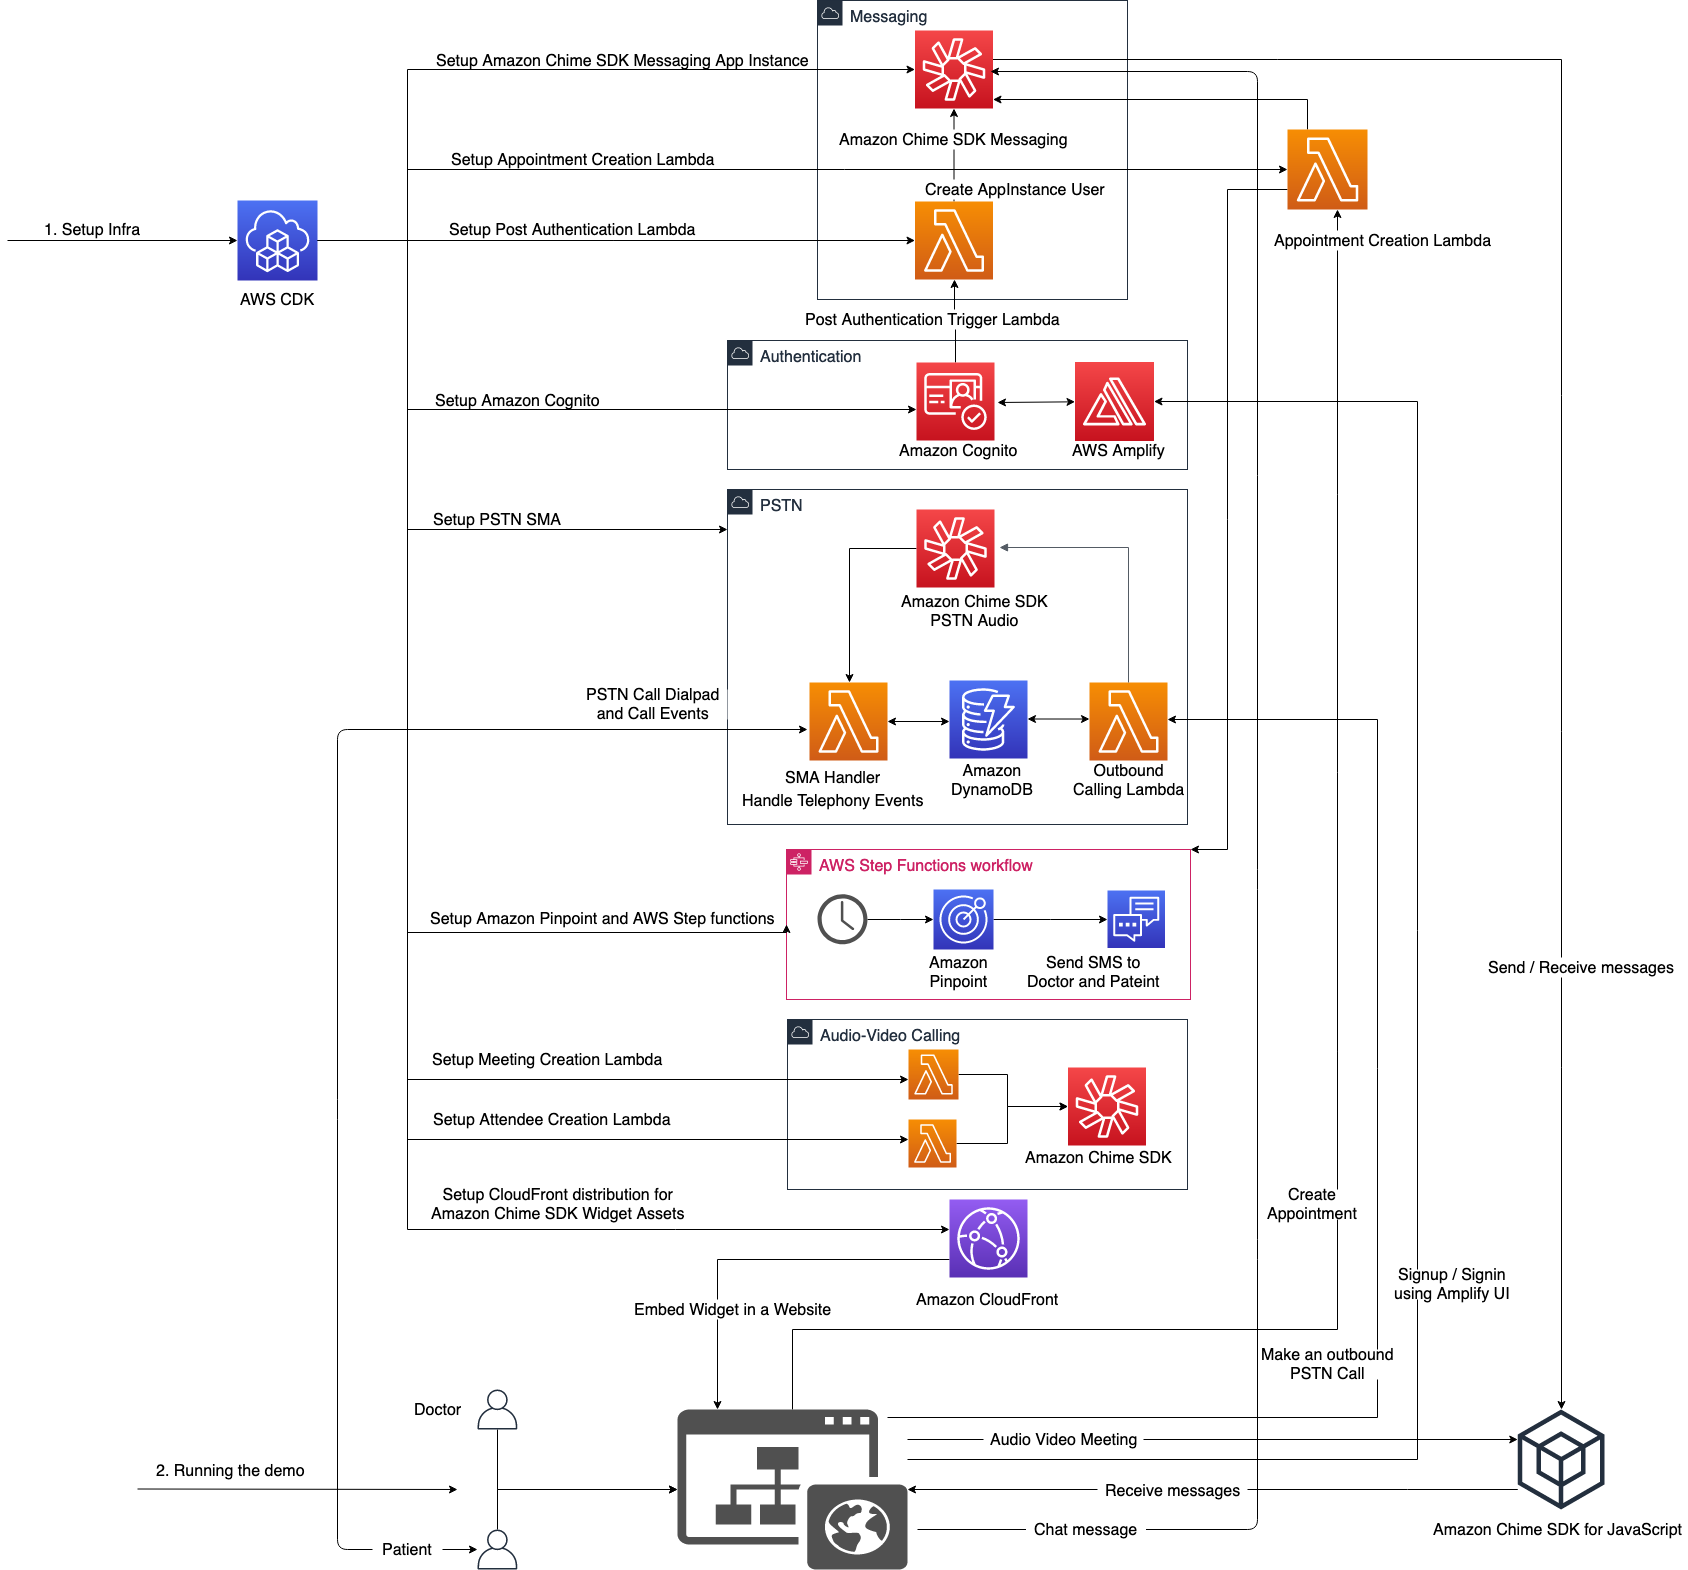
## Appendix A: Solution architecture
## Appendix B: Demo screenshots
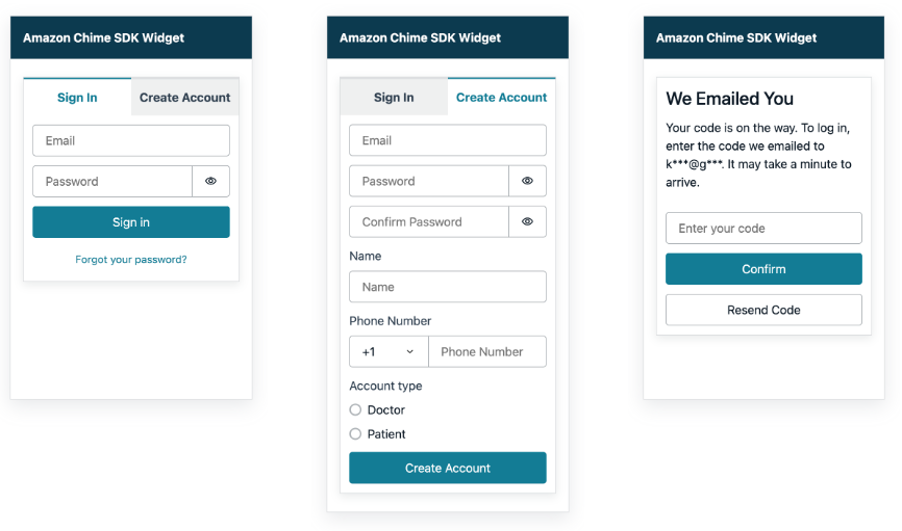
### Sign in/Sign up
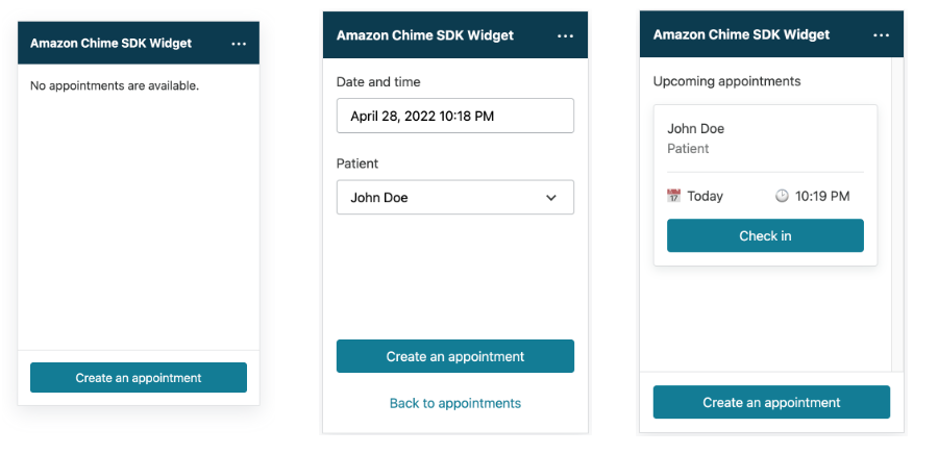
### Appointment
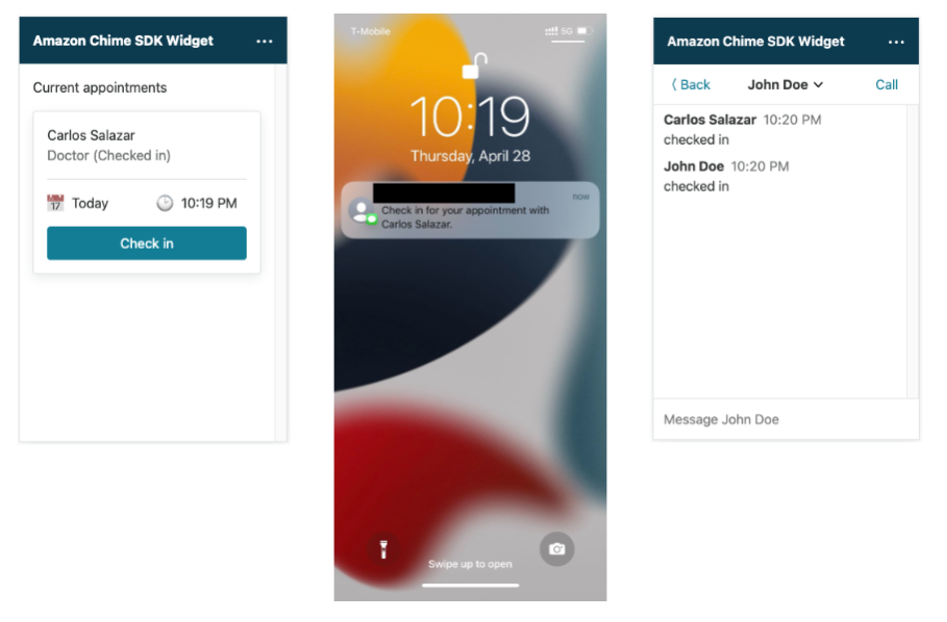
### Check-in and SMS notification
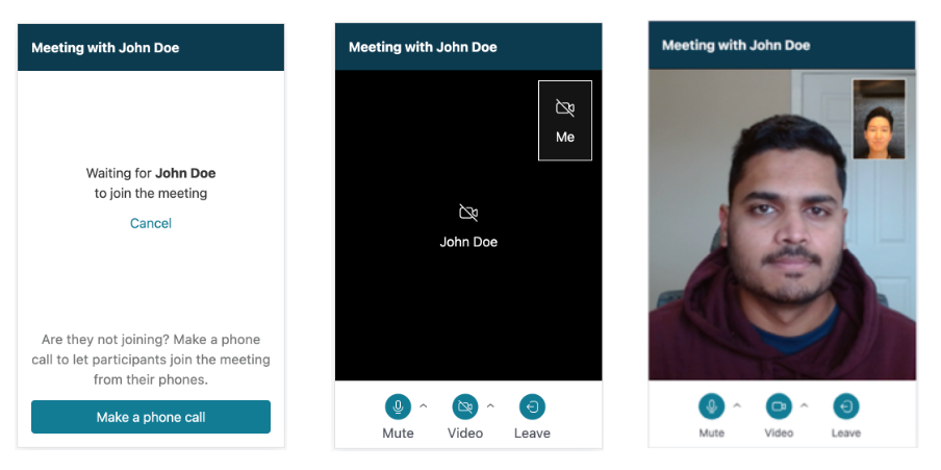
### Audio video call (Doctor)
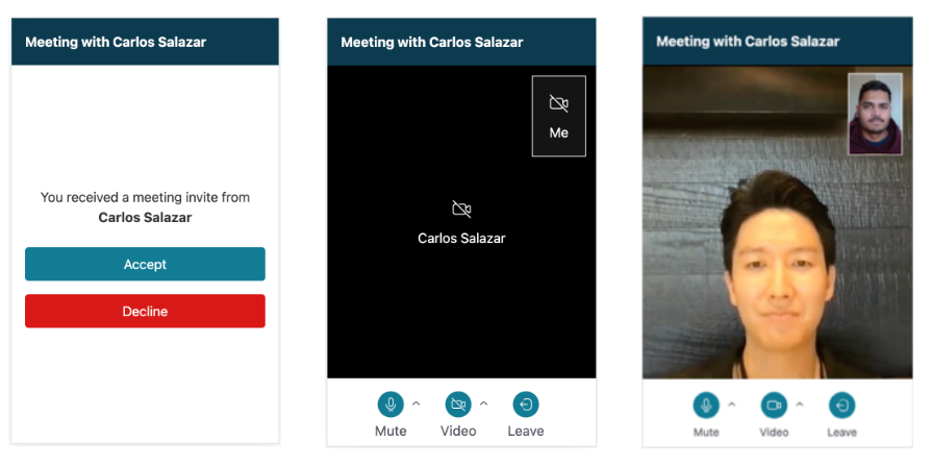
### Audio video call (Patient)
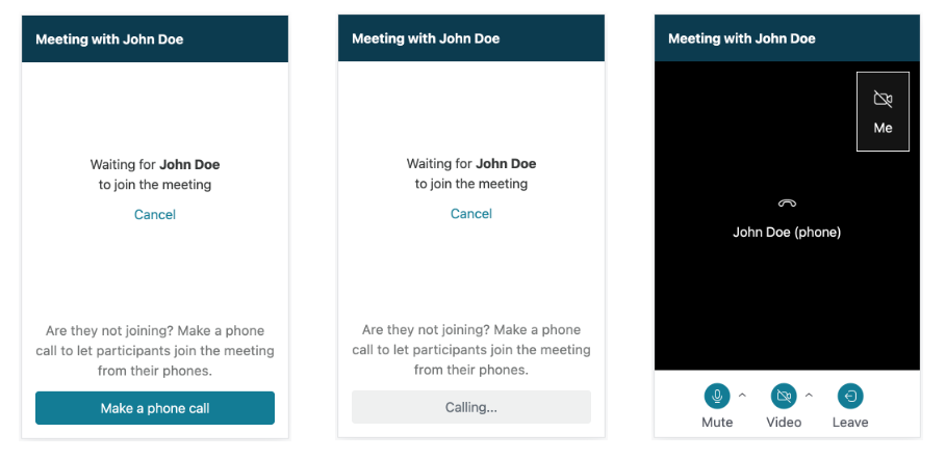
### Phone call (Doctor)
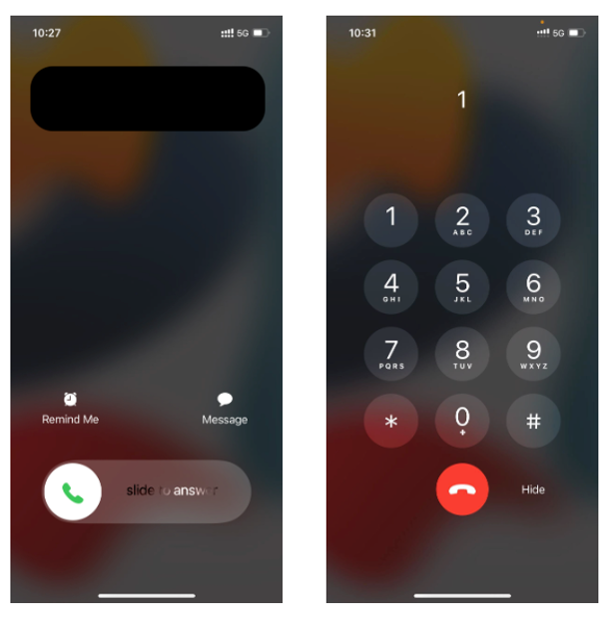
### Phone call (Patient)
### Chat widget
