",
}, // Default to empty object
storage: window.localStorage, // Default to localStorage
});
```
Then, wrap your app with the `PasswordlessContextProvider`:
```typescript
import { PasswordlessContextProvider } from "amazon-cognito-passwordless-auth/react";
ReactDOM.createRoot(document.getElementById("root")).render(
);
```
You can also wrap your app with the `Passwordless` component. In that case, your app will only show if the user is signed in, otherwise the `Passwordless` component shows to make the user sign in. If you're using the sample components, also include the CSS import:
```typescript
import {
PasswordlessContextProvider,
Passwordless as PasswordlessComponent,
} from "amazon-cognito-passwordless-auth/react";
import "amazon-cognito-passwordless-auth/passwordless.css";
ReactDOM.createRoot(document.getElementById("root")).render(
",
customerName: "ACME corp.",
customerLogoUrl: "",
}}
>
);
```
If you want to make the `Passwordless` component bigger or smaller, e.g. the size of the entire page, override the height and width of the `.passwordless-main-container` class in your own CSS definitions. For example:
```
.passwordless-main-container {
height: 100vh !important;
}
```
Also, add the [FIDO2 "toast"](#fido2toast-component) to display the suggestion to enable FaceID/TouchID, and be able to show the authenticators manager:
```typescript
import {
PasswordlessContextProvider,
Passwordless as PasswordlessComponent,
Fido2Toast,
} from "amazon-cognito-passwordless-auth/react";
import "amazon-cognito-passwordless-auth/passwordless.css";
ReactDOM.createRoot(document.getElementById("root")).render(
",
customerName: "ACME corp.",
customerLogoUrl: "",
}}
>
);
```
In your components, use the `usePasswordless` hook:
```typescript
import { usePasswordless } from "amazon-cognito-passwordless-auth/react";
function MyComponent() {
const { signInStatus, ... } = usePasswordless();
return Your sign in status: {signInStatus}
;
}
```
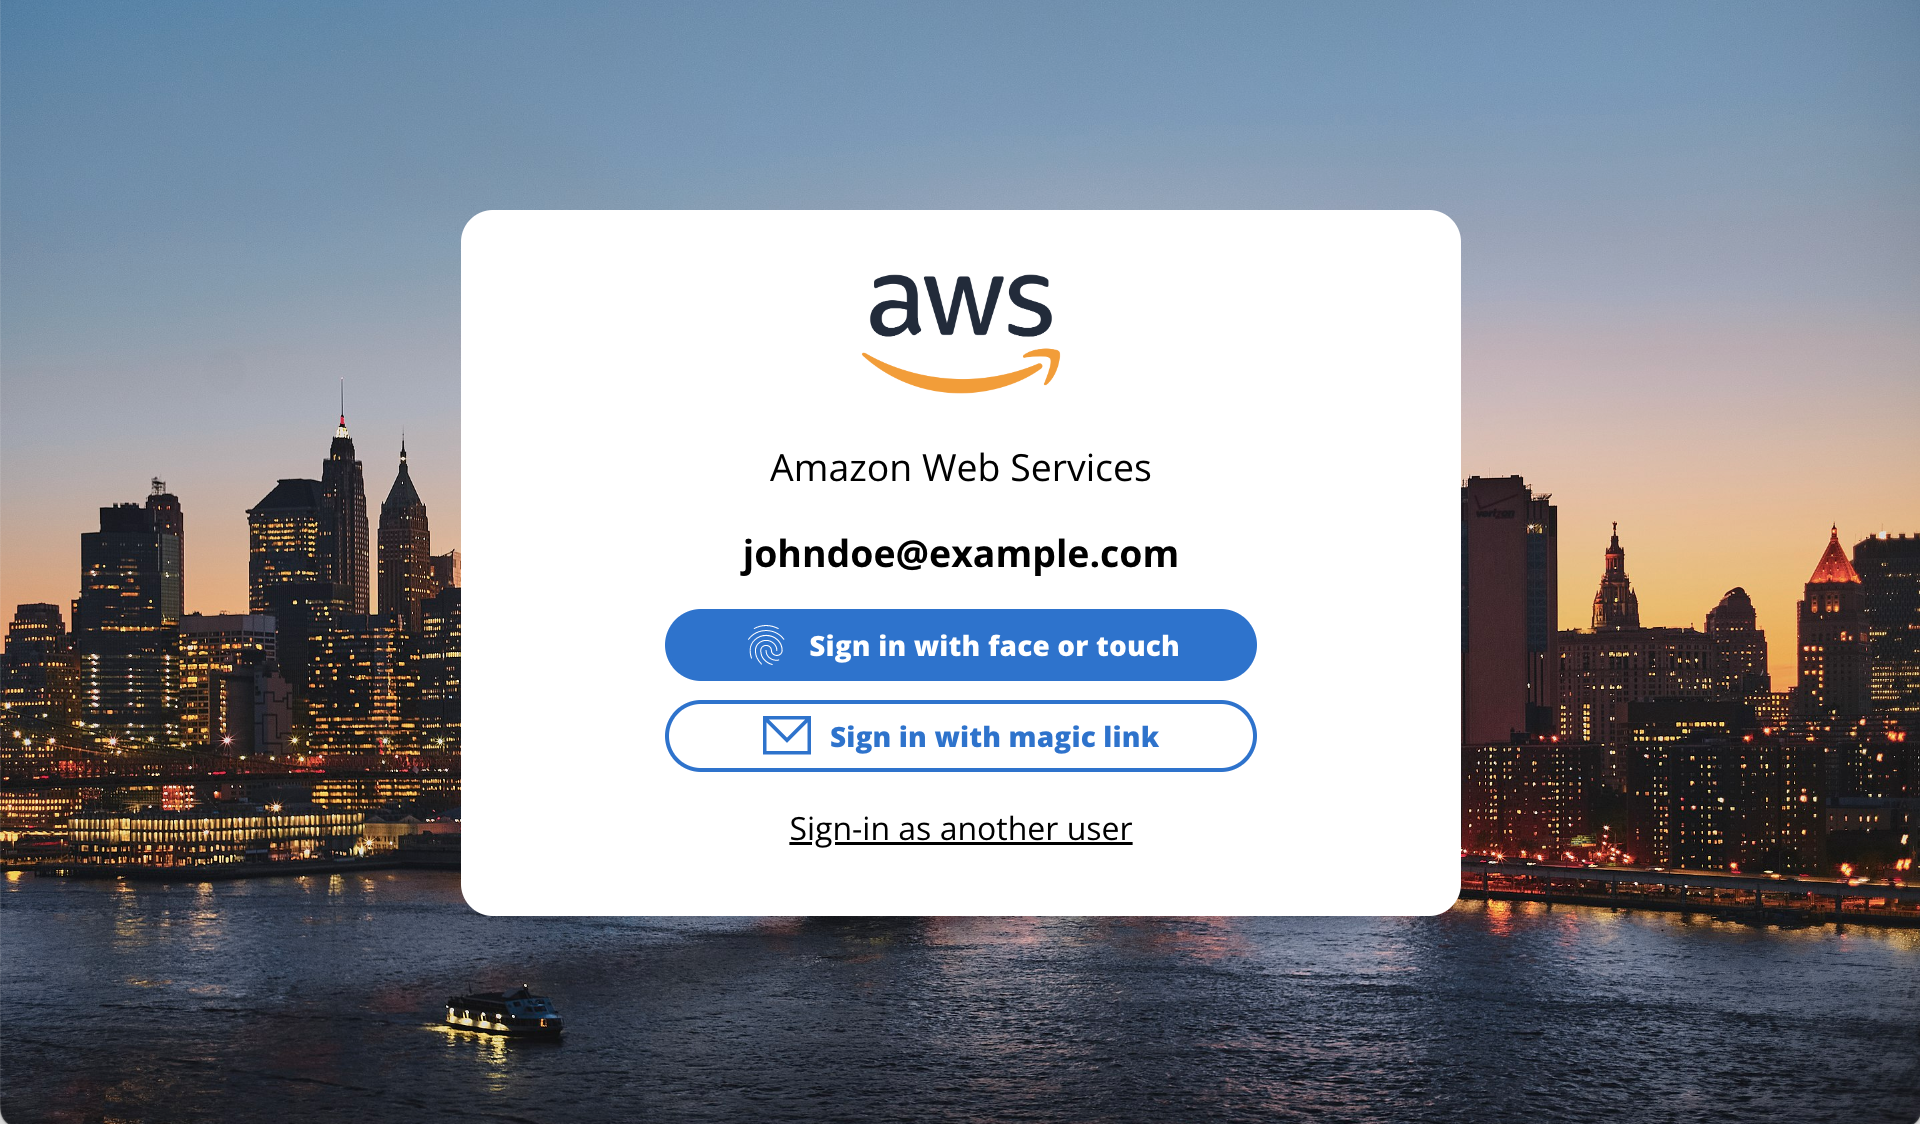
#### Sign In with Magic Link
```javascript
import { signUp } from "amazon-cognito-passwordless-auth/cognito-api";
import { usePasswordless } from "amazon-cognito-passwordless-auth";
export default function YourComponent() {
const { requestSignInLink, authenticateWithSRP } = usePasswordless();
async function logInWithMagicLink() {
// Request a magic link to be e-mailed to the user.
// When the user clicks on the link, your web app will open and parse the link
// automatically (if you've loaded this library), and sign the user in
await requestSignInLink({
username: "Your username or alias (e.g. e-mail address)",
});
}
return (
// Your component's view
// You would add a form or so here to collect the user's e-mail address,
// and then invoke the logInWithMagicLink function above
Your component
);
}
```
#### Token (JWT) Storage
The library automatically saves the state (ie: idToken, accessToken and others) inside your configured storage (default: localStorage) so that now you can use the rest of the methods and it will remember the logged user and will perform all requests against it.
To access them, use the `usePasswordless()` hook as follows:
```javascript
const {
tokens, // the raw tokens, i.e. ID, Access, Refresh token as strings
tokensParsed, // the JSON parsed tokens
} = usePasswordless();
```
#### Create FIDO2 Credential
Once you are signed in, you can create FIDO2 (WebAuthn) credentials for your user, this will prompt the native WebAuthn dialog (e.g. Face/Touch) on your environment and set it up for your cognito user.
```javascript
import { usePasswordless } from "amazon-cognito-passwordless-auth/react";
export default function YourComponent() {
const { fido2CreateCredential } = usePasswordless();
async function createCredential() {
const credential = await fido2CreateCredential({
friendlyName: "Your device name",
});
// The credential object will look like this:
// credential = {
// credentialId: string;
// friendlyName: string;
// createdAt: Date;
// lastSignIn?: Date;
// signCount: number;
// update: (friendlyName: string) => void; // function to update the friendlyName
// delete: () => void; // function to delete the credential
// }
}
return (
// Your component's view
// You would add a form or so here to invoke the createCredential function above,
// and ask the user to provide a friendly name for the credential
Your component
);
}
```
This will prompt the native WebAuthn dialog (e.g. Face/Touch) on your environment to create the credential.
#### LogIn with your FIDO2 Credential
If the user has registered FIDO2 credentials, use the `authenticateWithFido2()` function to let the user sign-in with them.
```javascript
import { usePasswordless } from "amazon-cognito-passwordless-auth/react";
export default function YourComponent() {
const { authenticateWithFido2 } = usePasswordless();
async function signInWithFaceOrTouch() {
const credential = await authenticateWithFido2({
username: "Your username or alias (e.g. e-mail address)",
});
}
return (
// Your component's view
// You would add a form or so here to collect the user's e-mail address,
// and then invoke the signInWithFaceOrTouch function above
Your component
);
}
```
This will prompt the native WebAuthn dialog (e.g. Face/Touch) on your environment to perform the log in.
#### Sign In with Password
Sure you can still use passwords if you really want to :)
```javascript
import { signUp } from "amazon-cognito-passwordless-auth/cognito-api";
import { usePasswordless } from "amazon-cognito-passwordless-auth";
export default function YourComponent() {
const { authenticateWithSRP, authenticateWithPlaintextPassword } =
usePasswordless();
async function logInWithPassword() {
// You can sign in with username and password too:
await authenticateWithSRP({
username: "YOUR_USER_NAME",
password: "YOUR_PREFERRED_PASSWORD",
});
// Or, if you don't want to use SRP (e.g. because you're using the Cognito User Migration trigger),
// sign in using the plaintext password:
await authenticateWithPlaintextPassword({
username: "YOUR_USER_NAME",
password: "YOUR_PREFERRED_PASSWORD",
});
}
return (
// Your component's view
// You would add a form or so here to collect the user's e-mail address and password,
// and then invoke the logInWithPassword function above
Your component
);
}
```
#### SignOut
To delete the stored tokens (JWTs), and revoke the refresh token, use the `signOut()` function.
```javascript
import { usePasswordless } from "amazon-cognito-passwordless-auth/signOut";
export default function YourComponent() {
const { signOut } = usePasswordless();
async function doSignOut() {
await signOut();
}
return (
// Your component's view
// Add a button or so to call the doSignOut function
Your component
);
}
```
#### Sign Up
If your User Pool is enabled for self sign-up, users can sign up like so:
```javascript
import { signUp } from "amazon-cognito-passwordless-auth/cognito-api";
export default function YourComponent() {
async function signUp() {
await signUp({
username: "YOUR_USER_NAME",
password: "YOUR_PREFERRED_PASSWORD",
/* BELOW PARAMETERS ARE OPTIONAL */
userAttributes: [
{
name: "name",
value: "YOUR NAME",
},
],
});
// userAttributes are optional and you can pass any Cognito User pool attributes
// Read more: https://docs.aws.amazon.com/cognito/latest/developerguide/user-pool-settings-attributes.html
}
return (
// Your component's view
// You would add a form or so here to collect the user's e-mail address and password,
// and then invoke the signUp function above
Your component
);
}
```
#### Refresh user data (aka: tokensParsed)
If you have changed attributes on your cognito user and want to refresh the tokens to include the updated data, use `refreshTokens()` function.
```javascript
import { usePasswordless } from "amazon-cognito-passwordless-auth/react";
export default function YourComponent() {
const { refreshTokens } = usePasswordless();
async function doRefresh() {
await refreshTokens();
}
return (
// Your component's view
// Add a button or so to call the doRefresh function
Your component
);
}
```
#### List FIDO2 Credentials
The list of FIDO2 credentials is made available via the hook:
```javascript
import { usePasswordless } from "amazon-cognito-passwordless-auth/react";
export default function YourComponent() {
// Credentials will be fetched when the app loads, initially fido2Credentials will be undefined
const { fido2Credentials } = usePasswordless();
// After credentials have been fetched, fido2Credentials will be an array of credentials.
// Each credential object in the array will look like this:
// credential = {
// credentialId: string;
// friendlyName: string;
// createdAt: Date;
// lastSignIn?: Date;
// signCount: number;
// update: (friendlyName: string) => void; // function to update the friendlyName
// delete: () => void; // function to delete the credential
// }
return (
// Your component's view
{fido2Credentials === undefined
? "Loading FIDO2 credentials ..."
: `You have ${fido2Credentials.length} registered credentials`}
);
}
```
#### Delete FIDO2 Credential
```javascript
import { usePasswordless } from "amazon-cognito-passwordless-auth/react";
export default function YourComponent() {
const { fido2Credentials } = usePasswordless();
async function deleteCredential(index) {
// Example: delete the 1st credential
fido2Credentials?.at(index).delete();
}
return (
// Your component's view
// Add a button or so to call the deleteCredential function
Your component
);
}
```
#### Update FIDO2 Credential
```javascript
import { usePasswordless } from "amazon-cognito-passwordless-auth/react";
export default function YourComponent() {
const { fido2Credentials } = usePasswordless();
async function updateCredential(index) {
// Example: update the 1st credential
fido2Credentials?.at(index).update({ friendlyName: "My Phone" });
}
return (
// Your component's view
// You would add a form or so here to collect the updated friendly name,
// and then invoke the updateCredential function above
Your component
);
}
```
#### Update Cognito User Attributes
To update your Cognito User Attributes you can use the `updateUserAttributes` function:
```javascript
import { updateUserAttributes } from "amazon-cognito-passwordless-auth/cognito-api";
async function update() {
await updateUserAttributes({
userAttributes: [
{
name: "name",
value: "YOUR NEW NAME",
},
],
});
}
```
#### Send the user attribute verification code
To receive a code via email or SMS to verify the `email` or `phone_number` respectively, use the `getUserAttributeVerificationCode` function:
```javascript
import { getUserAttributeVerificationCode } from "amazon-cognito-passwordless-auth/cognito-api";
async function getCode() {
await getUserAttributeVerificationCode({
attributeName: "email",
});
await getUserAttributeVerificationCode({
attributeName: "phone_number",
});
}
```
#### Verify Cognito User Attribute
To verify `email` or `phone_number` attributes, use the `verifyUserAttribute` function
```javascript
import { verifyUserAttribute } from "amazon-cognito-passwordless-auth/cognito-api";
async function provideVerificationCode() {
await verifyUserAttribute({
attributeName: "phone_number",
code: "123456",
});
}
```
#### Helpers
**timeAgo(now: number, from: Date)**
A helper function that returns a human friendly string indicating how much time passed from the `from` Date to the `now` timestamp
```javascript
import { timeAgo } from "amazon-cognito-passwordless-auth/util";
const now = timeAgo(Date.now(), new Date()); // Just now
const seconds = timeAgo(Date.now(), new Date(Date.now() - 30 * 1000)); // 30 seconds ago
const hours = timeAgo(Date.now(), newDate(Date.now() - 2 * 3600 * 1000)); // 2 hours ago
```
 You should wrap your own in app in this component (as child):
```jsx
You should wrap your own in app in this component (as child):
```jsx
 #### `
 Provide a friendly name for the FIDO2 credential being registered:
 FIDO2 activated:
 Manage FIDO2 credentials. This toast appears on the top right of the page, if you call `toggleShowAuthenticatorManager()` (function made available by the `usePasswordless` hook).
