# Sample Scripts to Customize SageMaker Notebook Instance
Table of contents:
- [1. Overview](#1-overview)
- [2. Non-exhaustive list of customizations](#2-non-exhaustive-list-of-customizations)
- [3. Installation](#3-installation)
- [3.1. Installation from github](#31-installation-from-github)
- [3.2. Installation from local source](#32-installation-from-local-source)
- [4. Usage](#4-usage)
- [5. Appendix](#5-appendix)
- [5.1. Restart JupyterLab](#51-restart-jupyterlab)
- [5.2. Change terminal font size](#52-change-terminal-font-size)
- [5.3. Docker Tweaks](#53-docker-tweaks)
- [5.4. Advance Jupyter Lab Tweaks](#54-advance-jupyter-lab-tweaks)
- [6. Related Projects](#6-related-projects)
- [7. Security](#7-security)
- [8. License](#8-license)
- [9. Acknowledgements](#9-acknowledgements)
## 1. Overview
This repo contains scripts to re-run common tweaks on a fresh (i.e., newly
created or rebooted) SageMaker **classic** notebook instance, to make the
notebook instance a little bit more ergonomic for prolonged usage.
After running these scripts your default command-line terminal will go from this:
 To something like this:
 Once installed, everytime you access a newly restarted notebook instance, you
just need to perform these three short, simple steps to see and experience the
customizations:
1. open a terminal,
2. run a one-liner command line `~/SageMaker/initsmnb/setup-my-sagemaker.sh`,
3. [restart the Jupyter process](#51-restart-jupyterlab).
By supporting a simple one-liner command line, we hope that you can quickly test
this repo as a *data scientist* (with your notebook instance as all that you
need), rather than as an *infrastructure engineer* which typically works with
more sophisticated automation tools or services.
We hope that you find this repo useful to adopt into your daily work habits.
## 2. Non-exhaustive list of customizations
Please note that tweaks marked with **\[Need sudo\]** can only be in-effect when
your notebook instance enables
[root access for notebook users](https://aws.amazon.com/blogs/machine-learning/control-root-access-to-amazon-sagemaker-notebook-instances/), and
**\[Need internet\]** requires internet connection.
- **\[Need sudo & internet\]** [code-server](https://github.com/coder/code-server) and opinionated
extensions for Python data science works.
- **\[Need sudo & internet\]** Docker: enable SageMaker local mode, and advance docker customizations.
See [here](#53-docker-tweaks) for details, and how to disable.
- Please note that you may need to increase your notebook instance's EBS to make sure that the
`~/SageMaker/` has enough space to hold docker images, docker containers, and docker temp files.
- Jupyter Lab:
- **\[Need sudo & internet\]** Use the newest release of Jupyter Lab (3.x or newer), with advance
customizations. See [here](#54-advance-jupyter-lab-tweaks) for details, and how choose to stay
with the stock Jupyter Lab from the notebook instance.
- **\[Need sudo\]** In addition to SageMaker's built-in conda environments, Jupyter Lab to also
auto-scan `/home/ec2-user/SageMaker/envs/` for custom conda environments.
This allows for a "persistent" conda environment under `/home/ec2-user/SageMaker/envs` that
survives instance reboot.
You can create a new custom conda environment as follows:
`conda create --prefix /home/ec2-user/SageMaker/envs/MY_CUSTOM_ENV_NAME python=3.10 ipykernel`.
Replace the environment name and python version with your choice. Please note that conda
environment must have `ipykernel` package installed. Once the environment is created, you may
need to [restart JupyterLab](#51-restart-jupyterlab) before you can see the environment
listed as one of the kernels.
- Reduce font size on Jupyter Lab, and show line numbers on editors.
- **\[Need sudo\]** Terminal defaults to `bash` shell, dark theme, and smaller font.
- Git:
- Optionally change committer's name and email, which defaults to `ec2-user`
- git aliases: `git lol`, `git lola`, `git lolc`, and `git lolac`
- New repo (i.e., `git init`) defaults to branch `main`
- `nbdime` for notebook-friendly diffs
- Terminal:
- `bash` shortcuts: `alt-.`, `alt-b`, `alt-d`, and `alt-f` work even when
connecting from OSX.
- **\[Need sudo & internet\]** Install command lines: `htop`, `tree`, `dos2unix`,
`dstat`, `tig` (alinux only), `ranger` (the CLI file explorer),
[cookiecutter](https://pypi.org/project/cookiecutter/),
[pre-commit](https://pre-commit.com/),
[s4cmd](https://github.com/bloomreach/s4cmd),
[black-nb](https://github.com/tomcatling/black-nb),
[black](https://github.com/psf/black),
[jupytext](https://github.com/mwouts/jupytext), and
[AWS CDK CLI](https://docs.aws.amazon.com/cdk/v2/guide/home.html).
- `pre-commit` caches of hook repositories survive reboots
- `ranger` is configured to use relative line numbers
- Whenever possible, commands are installed to the persistent area under
`~/SageMaker/.initsmnb.d/`, so that on reboot, the tweaking script can
skip re-installing those commands to speed-up the tweaking time.
- ipython run from Jupyter Lab's terminal:
- shortcuts: `alt-.`, `alt-b`, `alt-d`, and `alt-f` work even when connecting
from OSX.
- recolor `o.__class__` from dark blue (nearly invisible on the dark theme) to
a more sane color.
- Some customizations on `vim`:
- Notably, change window navigation shortcuts from `ctrl-w-{h,j,k,l}` to
`ctrl-{h,j,k,l}`.
Otherwise, `ctrl-w` is used by most browsers on Linux (and Windows?) to
close a browser tab, which renders windows navigation in `vim` unusable.
- Other opinionated changes; see `init-vim.sh`.
- **\[Need sudo\]** Optionally mount one or more EFS.
## 3. Installation
This step needs to be done **once** on a newly *created* notebook instance.
You can choose to have the installation process automatically download the
necessary files from this repo, provided that your SageMaker classic notebook
instance has the necessary network access to this repo.
Another choice is to bootstrap this repo into your SageMaker classic notebook
instance, then invoke the install script in its local mode.
### 3.1. Installation from github
Go to the Jupyter Lab on your SageMaker notebook instance. Open a terminal,
then run this command:
```bash
curl -sfL \
https://raw.githubusercontent.com/aws-samples/amazon-sagemaker-notebook-instance-customization/main/initsmnb/install-initsmnb.sh \
| bash -s -- --git-user 'First Last' --git-email 'ab@email.abc'
```
Both the `--git--user 'First Last` and `--git-email ab@email.abc` arguments are
optional. If you're happy with SageMaker's preset (which uses `ec2-user` as
the commiter name), you can drop these two arguments from the install command.
If you want to auto-mount one or more EFS, install as follows:
```bash
curl -sfL \
https://raw.githubusercontent.com/aws-samples/amazon-sagemaker-notebook-instance-customization/main/initsmnb/install-initsmnb.sh \
| bash -s -- \
--git-user 'First Last' \
--git-email 'ab@email.abc' \
--efs 'fs-123,fsap-123,my_efs_01' \
--efs 'fs-456,fsap-456,my_efs_02'
```
All mount points will live under `/home/ec2-user/mnt/`. Thus, the above example
will install a script that can mount two EFS, the first one `fs-123` will be
mounted as `/home/ec2-user/mnt/my_efs_01/`, while the second one `fs-456` will
be mounted as `/home/ec2-user/mnt/my_efs_02/`.
After the installation step finishes, you should see a new directory created: `/home/ec2-user/SageMaker/initsmnb/`.
Your next step is to jump to section [Usage](#4-usage).
### 3.2. Installation from local source
On your SageMaker notebook instance, open a terminal and run these commands:
```bash
cd ~/SageMaker
git clone https://github.com/aws-samples/amazon-sagemaker-notebook-instance-customization.git
cd amazon-sagemaker-notebook-instance-customization/initsmnb
./install-initsmnb.sh --from-local --git-user 'First Last' --git-email 'ab@email.abc'
```
After the installation step finishes, you should see a new directory created: `/home/ec2-user/SageMaker/initsmnb/`.
Your next step is to jump to section [Usage](#4-usage).
## 4. Usage
Once installed, you should see file `/home/ec2-user/SageMaker/initsmnb/setup-my-sagemaker.sh`.
To apply the customizations to the current session, open a terminal and run
`~/SageMaker/initsmnb/setup-my-sagemaker.sh`. Once the script finishes, please
follow the on-screen instruction to restart the Jupyter server (and after that,
do remember to reload your browser tab).
Due to how SageMaker notebook works, please re-run `setup-my-sagemaker.sh` on a
newly *started* or *restarted* instance. You may even consider to automate this
step using SageMaker lifecycle config.
## 5. Appendix
### 5.1. Restart JupyterLab
On the Jupyter Lab's terminal, run this command:
```bash
# For notebook instance with alinux
sudo initctl restart jupyter-server --no-wait
# Use this instead, for notebook instance with alinux2
sudo systemctl restart jupyter-server
```
After issuing the command, your Jupyter interface will probably freeze, which
is expected.
Then, reload your browser tab, and enjoy the new experience.
### 5.2. Change terminal font size
To change the terminal font size, after installation
1. open `/home/ec2-user/SageMaker/initsmnb/change-jlab-ui.sh` in a text editor,
2. go to the section that customizes the terminal,
3. then change the fontsize (default is 10) to another value of your choice.
### 5.3. Docker Tweaks
- Enable SageMaker local mode.
- Relocate docker's data-root to persistent area `~/SageMaker/.initsmnb.d/docker/`, so that after
reboot, your `docker images` won't show empty images anymore (provided you've docker build or pull
before).
- Relocate docker's tmpdir to persistent area `~/SageMaker/.initsmnb.d/tmp/`, so that you can build
large custom images that require more space than what `/tmp` (i.e., on root volume) provides.
- A secondary benefit is to allow SageMaker local mode to run with S3 input that's larger than
what `/tmp` (i.e., on root volume) provides. Please note SageMaker local mode will copy the
S3 input to the docker's tmpdir, but upon completion the SDK won't remove the tmp dir. Hence,
you need to manually remove the temporary S3 inputs from the persistent docker's tmpdir.
Should you choose not to apply the docker tweaks, make sure to pass `--no-config-docker` to the
`install-initsmnb.sh` script.
### 5.4. Advance Jupyter Lab Tweaks
- Upgrade to the latest release of Jupyter Lab.
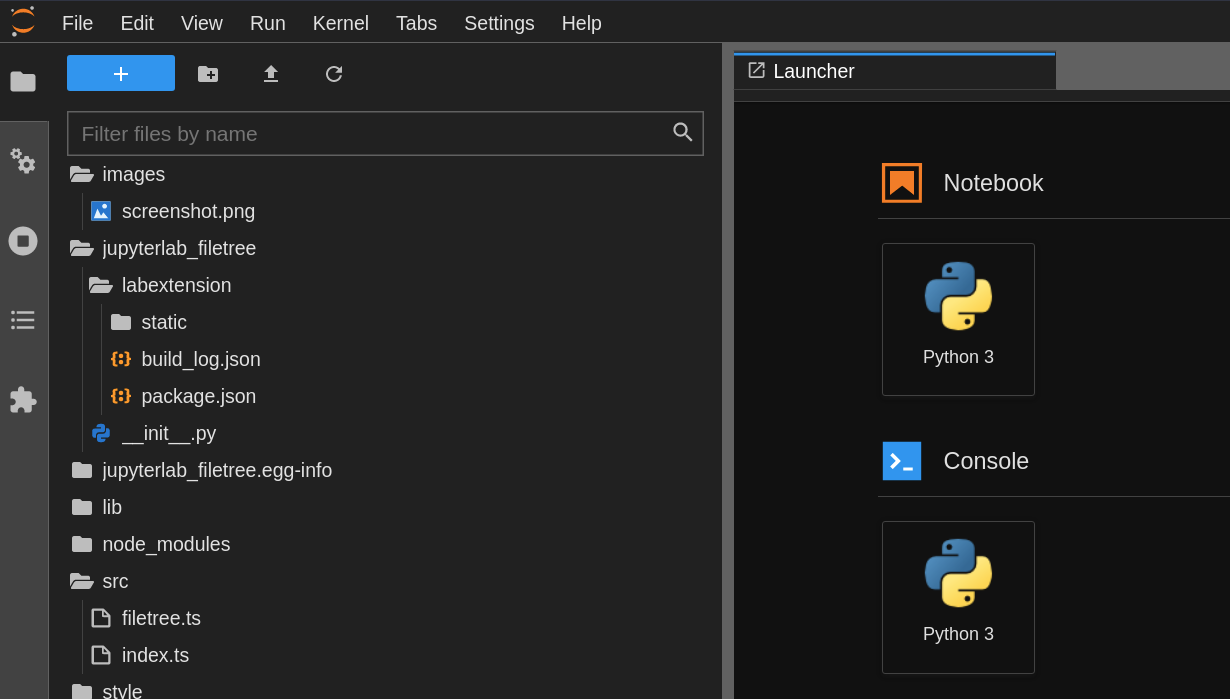
- Tree-like file explorer (thanks to
[jupyterlab-unfold](https://github.com/jupyterlab-contrib/jupyterlab-unfold)).
- Enable code formatting (thanks to
[jupyterlab-code-formatter](https://github.com/ryantam626/jupyterlab_code_formatter)),
[black](https://github.com/psf/black), and [isort](https://github.com/PyCQA/isort).
- Press `ctrl-shift-b` to reformat a notebook or text editor with `black`.
- Press `ctrl-shift-i` to reformat a notebook or text editor with `isort`.
- To apply `black` + `isort` at the same time to a notebook, you can also click a button on the
toolbar as shown
[here](https://ryantam626.github.io/jupyterlab_code_formatter/usage.html#for-the-entire-document).

- Centralize notebook checkpoints to `/tmp/.ipynb_checkpoints/`. This prevents
`.ipynb_checkpoints/` from making its way into the tarballs generated by
SageMaker SDK for training, inference, and framework processing scripts, and
model repack.
- Disable the git extension for Jupyter Lab. This is aimed for power users who primarily use git
from CLI, and do not want to be distracted by Jupyter Lab's frequent refreshes on the lower-left
status bar.
Should you choose not to apply these advance JLab tweaks (hence, continue to use the JLab version
provided by the notebook instance), make sure to pass `--plain-old-jlab` to the
`install-initsmnb.sh` script.
## 6. Related Projects
Once you've customized your development environment on your SageMaker classic
notebook instance, we invite you to explore related samples.
1. [aws-samples/python-data-science-template](https://github.com/aws-samples/python-data-science-template/)
shows a one-liner command line that instantenously auto-generate a modular
structure for your new Python-based data science project.
2. [aws-samples/amazon-sagemaker-entrypoint-utilities](https://github.com/aws-samples/amazon-sagemaker-entrypoint-utilities)
is a sample library to help you quickly write a SageMaker **meta**-entrypoint
script for training. This approach aims to reduce the amount of boilerplate
codes you need to write for model training, such as argument parsings and
logger configurations, which are repetitive and tedious.
3. [ML Max](https://github.com/awslabs/mlmax/) is a set of example templates to
accelerate the delivery of custom ML solutions to production so you can get
started quickly without having to make too many design choices. At present,
it covers four pillars: training pipeline, inference pipeline, development
environment, and data management/ETL.
4. Learn about a different mechanism to create custom Jupyter kernel on a SageMaker
classic notebook instance, described in
[aws-samples/aws-sagemaker-custom-jupyter-kernel](https://github.com/aws-samples/aws-sagemaker-custom-jupyter-kernel/).
5. *Wearing an "infrastructure engineer" hat* -- when you're ready or allowed to
implement the customizations as a lifecycle configuration for your SageMaker
notebook instance, feel free to further explore these
[examples](https://github.com/aws-samples/amazon-sagemaker-notebook-instance-lifecycle-config-samples/).
6. [Data science on Amazon EC2 with vim, tmux and zsh](https://github.com/aws-samples/ec2-data-science-vim-tmux-zsh/)
hosts a simple template to set up basic Vim, Tmux, Zsh for the Deep Learning
AMI Amazon Linux 2 for data scientists.
## 7. Security
See [CONTRIBUTING](CONTRIBUTING.md#security-issue-notifications) for more information.
## 8. License
This library is licensed under the MIT-0 License. See the LICENSE file.
## 9. Acknowledgements
[@yapweiyih](https://github.com/yapweiyih) (EFS, Streamlit), [@josiahdavis](https://github.com/josiahdavis) and [@kianho](https://github.com/kianho) (vim), [@theoldfather](https://github.com/theoldfather) (docker relocation), [@aws/amazon-sagemaker-examples](https://github.com/aws/amazon-sagemaker-examples) (SageMaker local mode), [@yinsong1986](https://github.com/yinsong1986) (persistent custom conda environment), [@verdimrc](https://github.com/verdimrc) (misc.), the originator of git lol & lola (earlier traceable could be this
[blog](http://blog.kfish.org/2010/04/git-lola.html).
Once installed, everytime you access a newly restarted notebook instance, you
just need to perform these three short, simple steps to see and experience the
customizations:
1. open a terminal,
2. run a one-liner command line `~/SageMaker/initsmnb/setup-my-sagemaker.sh`,
3. [restart the Jupyter process](#51-restart-jupyterlab).
By supporting a simple one-liner command line, we hope that you can quickly test
this repo as a *data scientist* (with your notebook instance as all that you
need), rather than as an *infrastructure engineer* which typically works with
more sophisticated automation tools or services.
We hope that you find this repo useful to adopt into your daily work habits.
## 2. Non-exhaustive list of customizations
Please note that tweaks marked with **\[Need sudo\]** can only be in-effect when
your notebook instance enables
[root access for notebook users](https://aws.amazon.com/blogs/machine-learning/control-root-access-to-amazon-sagemaker-notebook-instances/), and
**\[Need internet\]** requires internet connection.
- **\[Need sudo & internet\]** [code-server](https://github.com/coder/code-server) and opinionated
extensions for Python data science works.
- **\[Need sudo & internet\]** Docker: enable SageMaker local mode, and advance docker customizations.
See [here](#53-docker-tweaks) for details, and how to disable.
- Please note that you may need to increase your notebook instance's EBS to make sure that the
`~/SageMaker/` has enough space to hold docker images, docker containers, and docker temp files.
- Jupyter Lab:
- **\[Need sudo & internet\]** Use the newest release of Jupyter Lab (3.x or newer), with advance
customizations. See [here](#54-advance-jupyter-lab-tweaks) for details, and how choose to stay
with the stock Jupyter Lab from the notebook instance.
- **\[Need sudo\]** In addition to SageMaker's built-in conda environments, Jupyter Lab to also
auto-scan `/home/ec2-user/SageMaker/envs/` for custom conda environments.
This allows for a "persistent" conda environment under `/home/ec2-user/SageMaker/envs` that
survives instance reboot.
You can create a new custom conda environment as follows:
`conda create --prefix /home/ec2-user/SageMaker/envs/MY_CUSTOM_ENV_NAME python=3.10 ipykernel`.
Replace the environment name and python version with your choice. Please note that conda
environment must have `ipykernel` package installed. Once the environment is created, you may
need to [restart JupyterLab](#51-restart-jupyterlab) before you can see the environment
listed as one of the kernels.
- Reduce font size on Jupyter Lab, and show line numbers on editors.
- **\[Need sudo\]** Terminal defaults to `bash` shell, dark theme, and smaller font.
- Git:
- Optionally change committer's name and email, which defaults to `ec2-user`
- git aliases: `git lol`, `git lola`, `git lolc`, and `git lolac`
- New repo (i.e., `git init`) defaults to branch `main`
- `nbdime` for notebook-friendly diffs
- Terminal:
- `bash` shortcuts: `alt-.`, `alt-b`, `alt-d`, and `alt-f` work even when
connecting from OSX.
- **\[Need sudo & internet\]** Install command lines: `htop`, `tree`, `dos2unix`,
`dstat`, `tig` (alinux only), `ranger` (the CLI file explorer),
[cookiecutter](https://pypi.org/project/cookiecutter/),
[pre-commit](https://pre-commit.com/),
[s4cmd](https://github.com/bloomreach/s4cmd),
[black-nb](https://github.com/tomcatling/black-nb),
[black](https://github.com/psf/black),
[jupytext](https://github.com/mwouts/jupytext), and
[AWS CDK CLI](https://docs.aws.amazon.com/cdk/v2/guide/home.html).
- `pre-commit` caches of hook repositories survive reboots
- `ranger` is configured to use relative line numbers
- Whenever possible, commands are installed to the persistent area under
`~/SageMaker/.initsmnb.d/`, so that on reboot, the tweaking script can
skip re-installing those commands to speed-up the tweaking time.
- ipython run from Jupyter Lab's terminal:
- shortcuts: `alt-.`, `alt-b`, `alt-d`, and `alt-f` work even when connecting
from OSX.
- recolor `o.__class__` from dark blue (nearly invisible on the dark theme) to
a more sane color.
- Some customizations on `vim`:
- Notably, change window navigation shortcuts from `ctrl-w-{h,j,k,l}` to
`ctrl-{h,j,k,l}`.
Otherwise, `ctrl-w` is used by most browsers on Linux (and Windows?) to
close a browser tab, which renders windows navigation in `vim` unusable.
- Other opinionated changes; see `init-vim.sh`.
- **\[Need sudo\]** Optionally mount one or more EFS.
## 3. Installation
This step needs to be done **once** on a newly *created* notebook instance.
You can choose to have the installation process automatically download the
necessary files from this repo, provided that your SageMaker classic notebook
instance has the necessary network access to this repo.
Another choice is to bootstrap this repo into your SageMaker classic notebook
instance, then invoke the install script in its local mode.
### 3.1. Installation from github
Go to the Jupyter Lab on your SageMaker notebook instance. Open a terminal,
then run this command:
```bash
curl -sfL \
https://raw.githubusercontent.com/aws-samples/amazon-sagemaker-notebook-instance-customization/main/initsmnb/install-initsmnb.sh \
| bash -s -- --git-user 'First Last' --git-email 'ab@email.abc'
```
Both the `--git--user 'First Last` and `--git-email ab@email.abc` arguments are
optional. If you're happy with SageMaker's preset (which uses `ec2-user` as
the commiter name), you can drop these two arguments from the install command.
If you want to auto-mount one or more EFS, install as follows:
```bash
curl -sfL \
https://raw.githubusercontent.com/aws-samples/amazon-sagemaker-notebook-instance-customization/main/initsmnb/install-initsmnb.sh \
| bash -s -- \
--git-user 'First Last' \
--git-email 'ab@email.abc' \
--efs 'fs-123,fsap-123,my_efs_01' \
--efs 'fs-456,fsap-456,my_efs_02'
```
All mount points will live under `/home/ec2-user/mnt/`. Thus, the above example
will install a script that can mount two EFS, the first one `fs-123` will be
mounted as `/home/ec2-user/mnt/my_efs_01/`, while the second one `fs-456` will
be mounted as `/home/ec2-user/mnt/my_efs_02/`.
After the installation step finishes, you should see a new directory created: `/home/ec2-user/SageMaker/initsmnb/`.
Your next step is to jump to section [Usage](#4-usage).
### 3.2. Installation from local source
On your SageMaker notebook instance, open a terminal and run these commands:
```bash
cd ~/SageMaker
git clone https://github.com/aws-samples/amazon-sagemaker-notebook-instance-customization.git
cd amazon-sagemaker-notebook-instance-customization/initsmnb
./install-initsmnb.sh --from-local --git-user 'First Last' --git-email 'ab@email.abc'
```
After the installation step finishes, you should see a new directory created: `/home/ec2-user/SageMaker/initsmnb/`.
Your next step is to jump to section [Usage](#4-usage).
## 4. Usage
Once installed, you should see file `/home/ec2-user/SageMaker/initsmnb/setup-my-sagemaker.sh`.
To apply the customizations to the current session, open a terminal and run
`~/SageMaker/initsmnb/setup-my-sagemaker.sh`. Once the script finishes, please
follow the on-screen instruction to restart the Jupyter server (and after that,
do remember to reload your browser tab).
Due to how SageMaker notebook works, please re-run `setup-my-sagemaker.sh` on a
newly *started* or *restarted* instance. You may even consider to automate this
step using SageMaker lifecycle config.
## 5. Appendix
### 5.1. Restart JupyterLab
On the Jupyter Lab's terminal, run this command:
```bash
# For notebook instance with alinux
sudo initctl restart jupyter-server --no-wait
# Use this instead, for notebook instance with alinux2
sudo systemctl restart jupyter-server
```
After issuing the command, your Jupyter interface will probably freeze, which
is expected.
Then, reload your browser tab, and enjoy the new experience.
### 5.2. Change terminal font size
To change the terminal font size, after installation
1. open `/home/ec2-user/SageMaker/initsmnb/change-jlab-ui.sh` in a text editor,
2. go to the section that customizes the terminal,
3. then change the fontsize (default is 10) to another value of your choice.
### 5.3. Docker Tweaks
- Enable SageMaker local mode.
- Relocate docker's data-root to persistent area `~/SageMaker/.initsmnb.d/docker/`, so that after
reboot, your `docker images` won't show empty images anymore (provided you've docker build or pull
before).
- Relocate docker's tmpdir to persistent area `~/SageMaker/.initsmnb.d/tmp/`, so that you can build
large custom images that require more space than what `/tmp` (i.e., on root volume) provides.
- A secondary benefit is to allow SageMaker local mode to run with S3 input that's larger than
what `/tmp` (i.e., on root volume) provides. Please note SageMaker local mode will copy the
S3 input to the docker's tmpdir, but upon completion the SDK won't remove the tmp dir. Hence,
you need to manually remove the temporary S3 inputs from the persistent docker's tmpdir.
Should you choose not to apply the docker tweaks, make sure to pass `--no-config-docker` to the
`install-initsmnb.sh` script.
### 5.4. Advance Jupyter Lab Tweaks
- Upgrade to the latest release of Jupyter Lab.
- Tree-like file explorer (thanks to
[jupyterlab-unfold](https://github.com/jupyterlab-contrib/jupyterlab-unfold)).

- Enable code formatting (thanks to
[jupyterlab-code-formatter](https://github.com/ryantam626/jupyterlab_code_formatter)),
[black](https://github.com/psf/black), and [isort](https://github.com/PyCQA/isort).
- Press `ctrl-shift-b` to reformat a notebook or text editor with `black`.
- Press `ctrl-shift-i` to reformat a notebook or text editor with `isort`.
- To apply `black` + `isort` at the same time to a notebook, you can also click a button on the
toolbar as shown
[here](https://ryantam626.github.io/jupyterlab_code_formatter/usage.html#for-the-entire-document).

- Centralize notebook checkpoints to `/tmp/.ipynb_checkpoints/`. This prevents
`.ipynb_checkpoints/` from making its way into the tarballs generated by
SageMaker SDK for training, inference, and framework processing scripts, and
model repack.
- Disable the git extension for Jupyter Lab. This is aimed for power users who primarily use git
from CLI, and do not want to be distracted by Jupyter Lab's frequent refreshes on the lower-left
status bar.
Should you choose not to apply these advance JLab tweaks (hence, continue to use the JLab version
provided by the notebook instance), make sure to pass `--plain-old-jlab` to the
`install-initsmnb.sh` script.
## 6. Related Projects
Once you've customized your development environment on your SageMaker classic
notebook instance, we invite you to explore related samples.
1. [aws-samples/python-data-science-template](https://github.com/aws-samples/python-data-science-template/)
shows a one-liner command line that instantenously auto-generate a modular
structure for your new Python-based data science project.
2. [aws-samples/amazon-sagemaker-entrypoint-utilities](https://github.com/aws-samples/amazon-sagemaker-entrypoint-utilities)
is a sample library to help you quickly write a SageMaker **meta**-entrypoint
script for training. This approach aims to reduce the amount of boilerplate
codes you need to write for model training, such as argument parsings and
logger configurations, which are repetitive and tedious.
3. [ML Max](https://github.com/awslabs/mlmax/) is a set of example templates to
accelerate the delivery of custom ML solutions to production so you can get
started quickly without having to make too many design choices. At present,
it covers four pillars: training pipeline, inference pipeline, development
environment, and data management/ETL.
4. Learn about a different mechanism to create custom Jupyter kernel on a SageMaker
classic notebook instance, described in
[aws-samples/aws-sagemaker-custom-jupyter-kernel](https://github.com/aws-samples/aws-sagemaker-custom-jupyter-kernel/).
5. *Wearing an "infrastructure engineer" hat* -- when you're ready or allowed to
implement the customizations as a lifecycle configuration for your SageMaker
notebook instance, feel free to further explore these
[examples](https://github.com/aws-samples/amazon-sagemaker-notebook-instance-lifecycle-config-samples/).
6. [Data science on Amazon EC2 with vim, tmux and zsh](https://github.com/aws-samples/ec2-data-science-vim-tmux-zsh/)
hosts a simple template to set up basic Vim, Tmux, Zsh for the Deep Learning
AMI Amazon Linux 2 for data scientists.
## 7. Security
See [CONTRIBUTING](CONTRIBUTING.md#security-issue-notifications) for more information.
## 8. License
This library is licensed under the MIT-0 License. See the LICENSE file.
## 9. Acknowledgements
[@yapweiyih](https://github.com/yapweiyih) (EFS, Streamlit), [@josiahdavis](https://github.com/josiahdavis) and [@kianho](https://github.com/kianho) (vim), [@theoldfather](https://github.com/theoldfather) (docker relocation), [@aws/amazon-sagemaker-examples](https://github.com/aws/amazon-sagemaker-examples) (SageMaker local mode), [@yinsong1986](https://github.com/yinsong1986) (persistent custom conda environment), [@verdimrc](https://github.com/verdimrc) (misc.), the originator of git lol & lola (earlier traceable could be this
[blog](http://blog.kfish.org/2010/04/git-lola.html).