# Create a deployment pipeline between VSTS and AWS Elastic Beanstalk
### Tools/Services used
1. Visual Studio Team Services a.k.a VSTS
1. Git for source control
1. Build and Deployment pipeline
1. [AWS Elastic Beanstalk](https://aws.amazon.com/elasticbeanstalk/)
1. VSTS Toolkit for Visual Studio
1. [AWS Tools for Visual Studio Team Services](https://aws.amazon.com/vsts/)
### Goal
Use VSTS as a CI/CD platform and build a pipeline to build and deploy an
ASP.NET Core application to AWS Elastic Beanstalk.
### Assumptions
This guide assumes that:
1. The reader already has an account on Microsoft Visual Studio Team
Services
1. Has basic understanding of Git source control system
1. Has knowledge on DevOps and CICD pipelines
1. Has basic knowledge about AWS Elastic Beanstalk
### Environment Preparation
1. [Install Git on your Windows Machine](https://git-scm.com/download) if it's not installed already
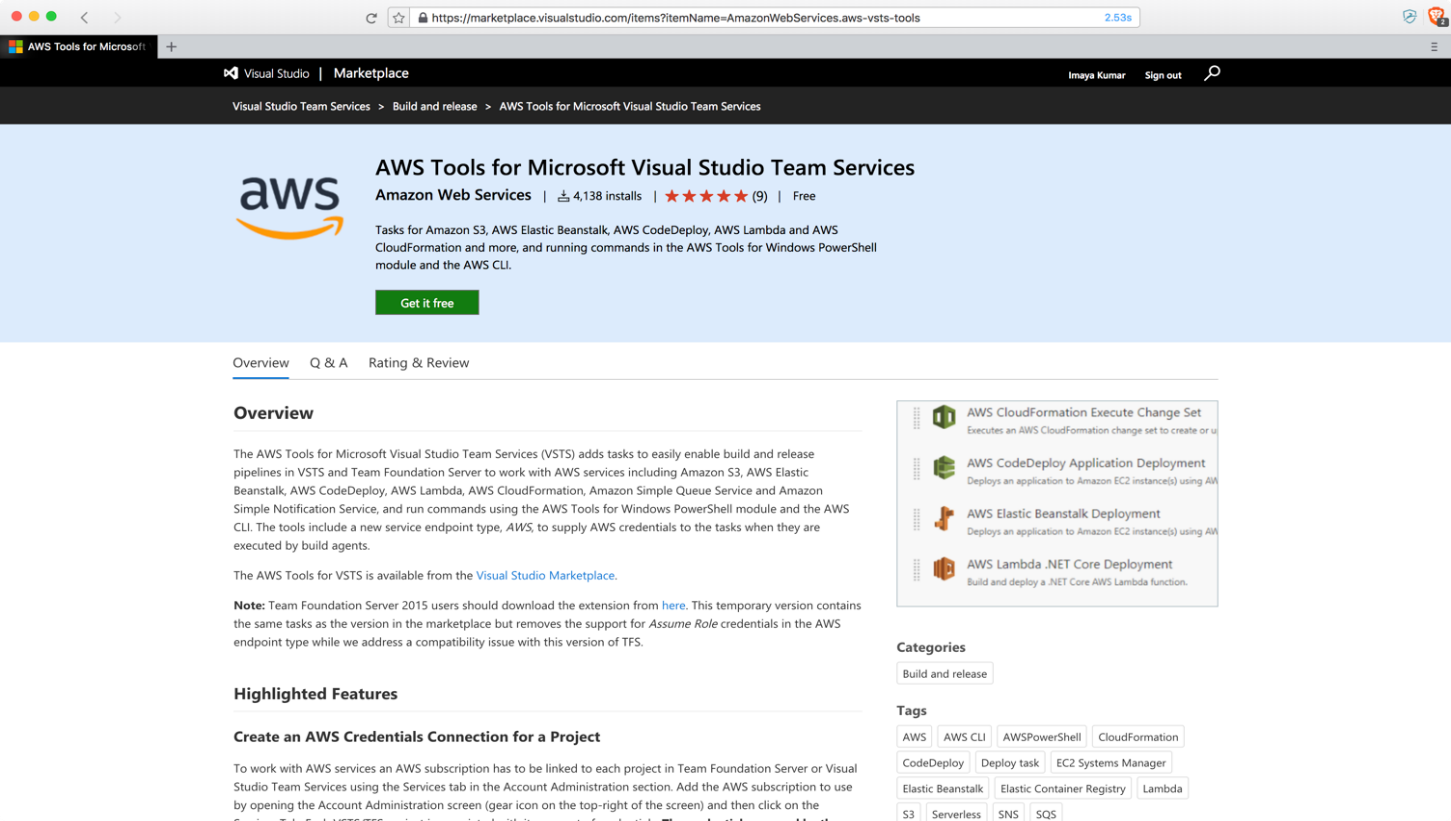
2. [Install AWS Tools for Visual Studio Team Services](https://marketplace.visualstudio.com/items?itemName=AmazonWebServices.aws-vsts-tools)
### Installation
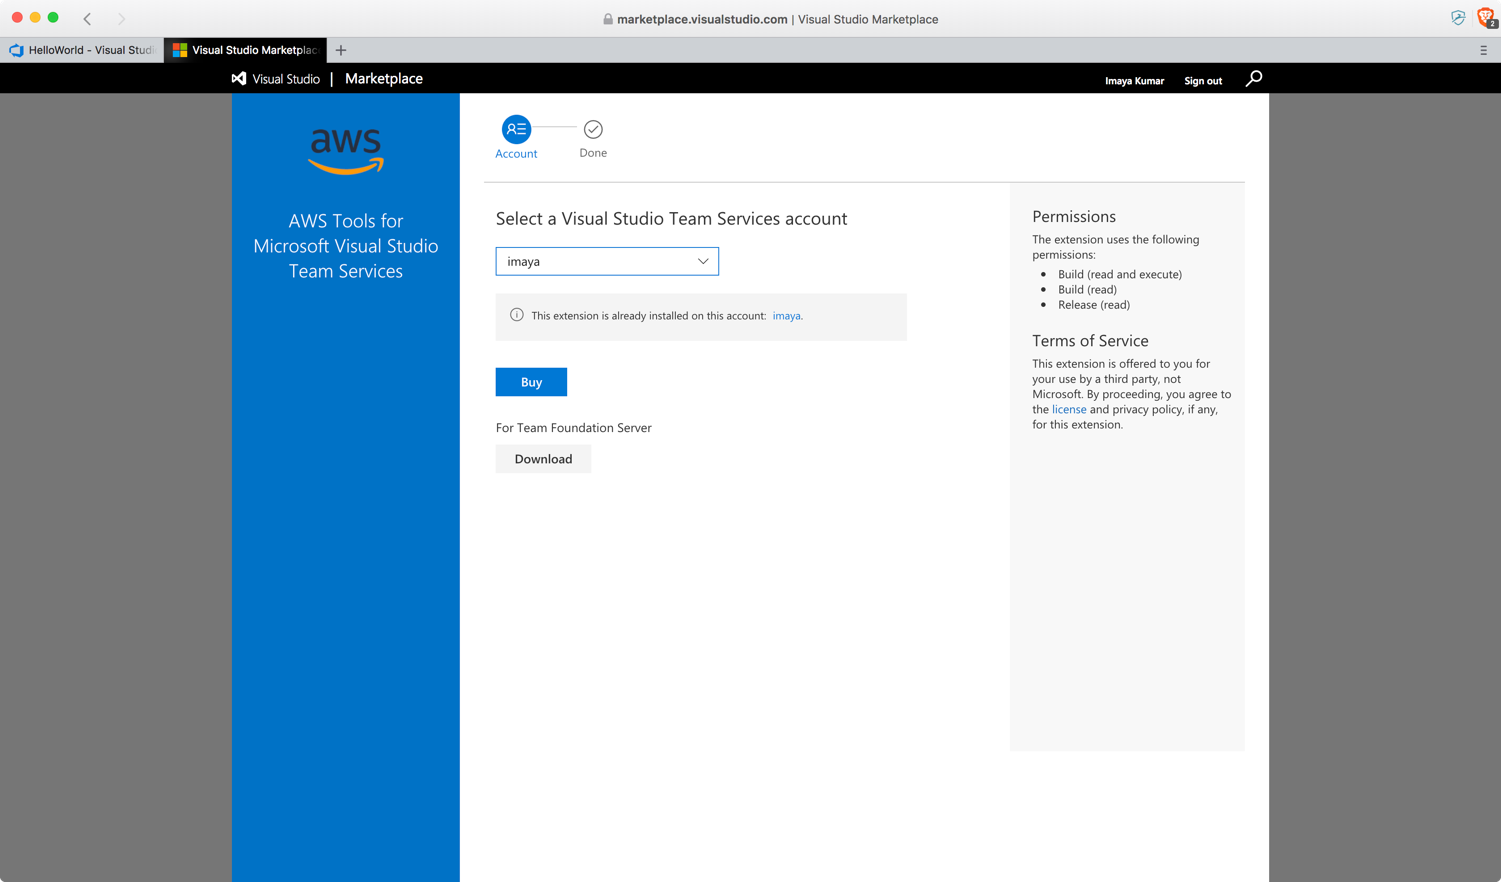
1. Follow the installation process
[here](https://docs.aws.amazon.com/vsts/latest/userguide/getting-started.html)
to add the extension to your VSTS account. After you add the
extension, ensure it appears under your settings pane.
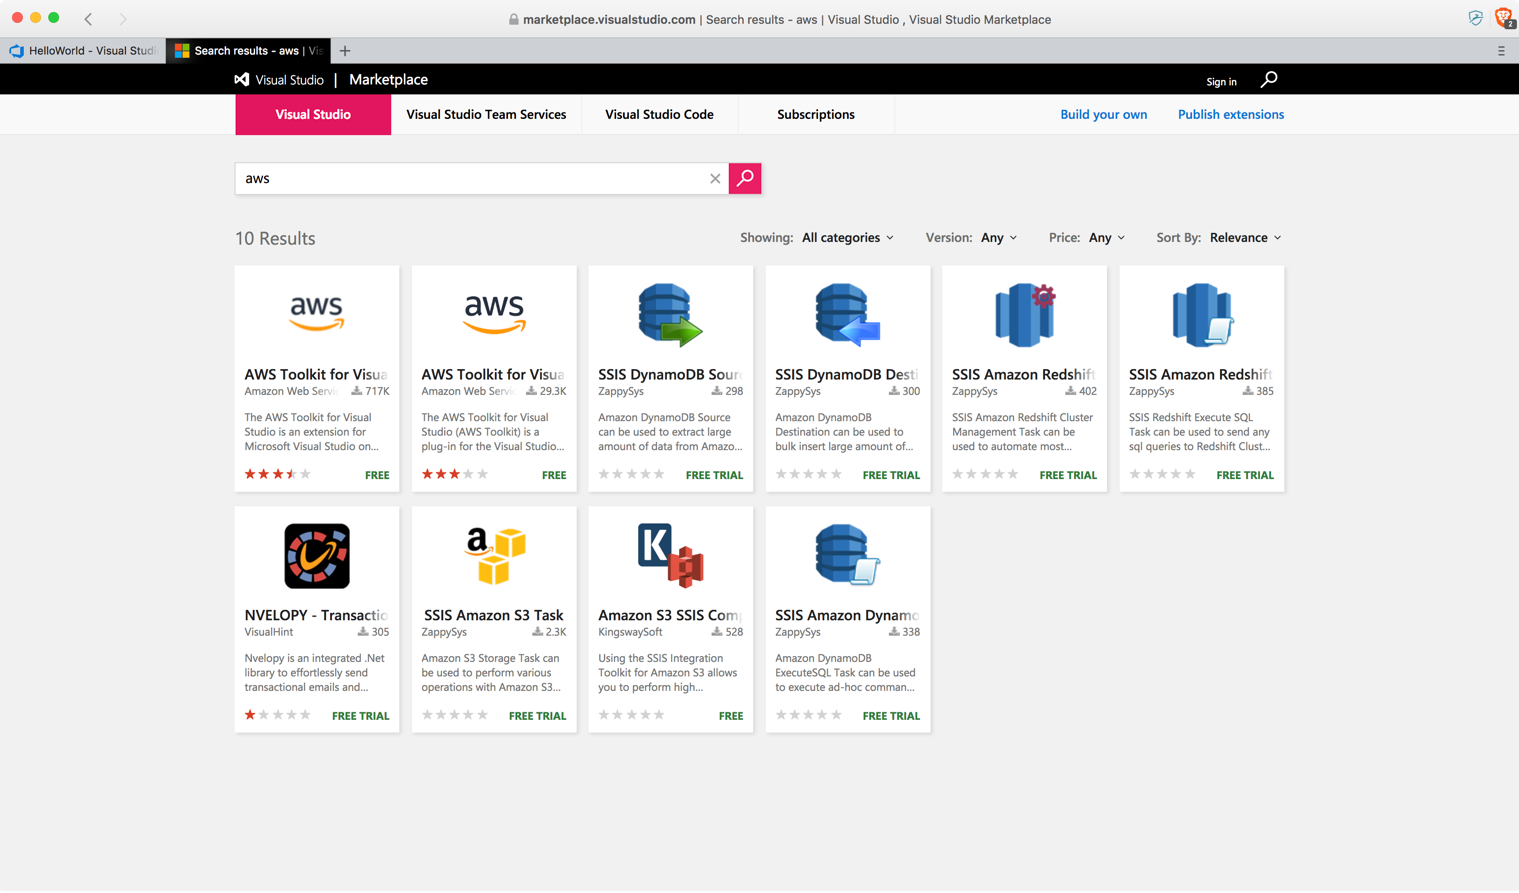
2. Though not mandatory for this exercise, we also recommend you to
install AWS Toolkit for Visual Studio because of its powerful
features that you will find useful in your development journey. It
is available as a Visual Studio add-on for Windows and can be found
under the Visual Studio tab in the Visual Studio Marketplace. In
this exercise, I installed the add-on for Visual Studio 2017
version.
### Steps
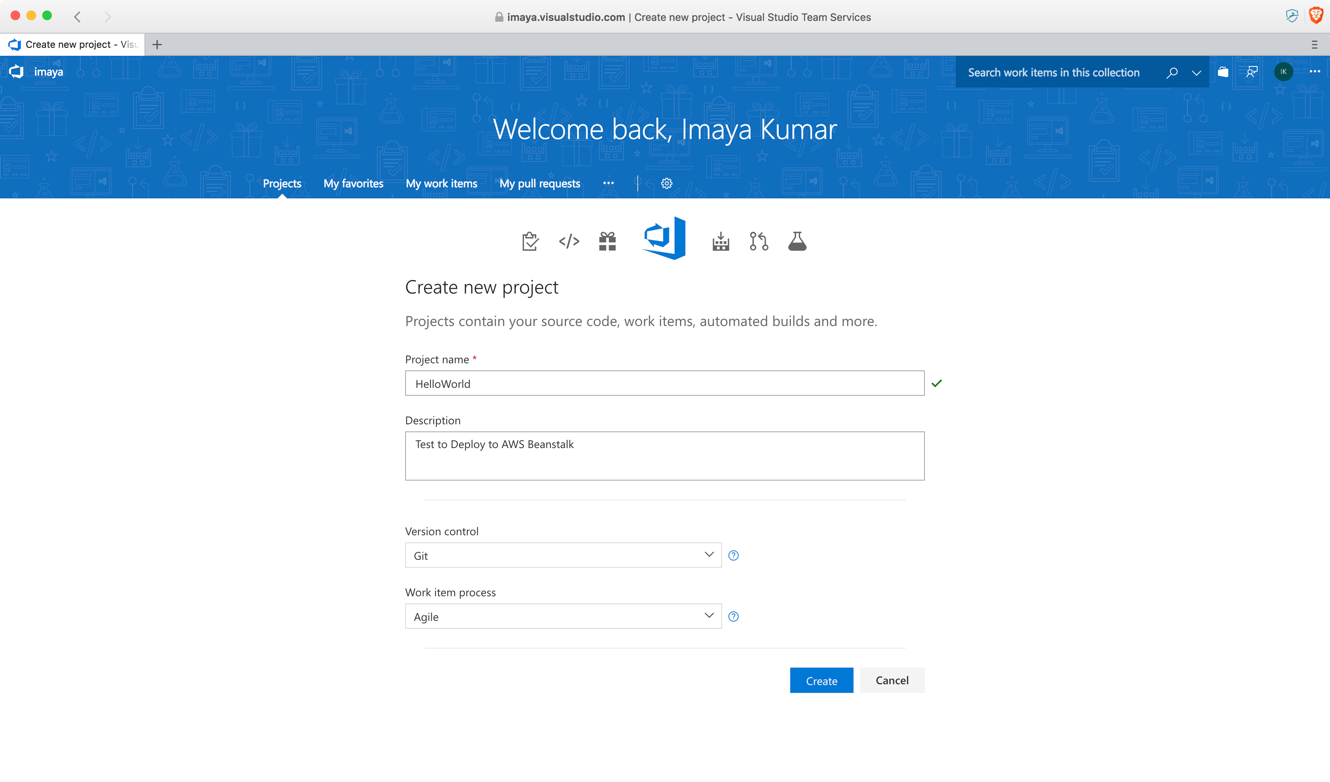
1. Head to VSTS and create a new Project and name it HelloWorld. Ensure
you choose Git as the source control option.

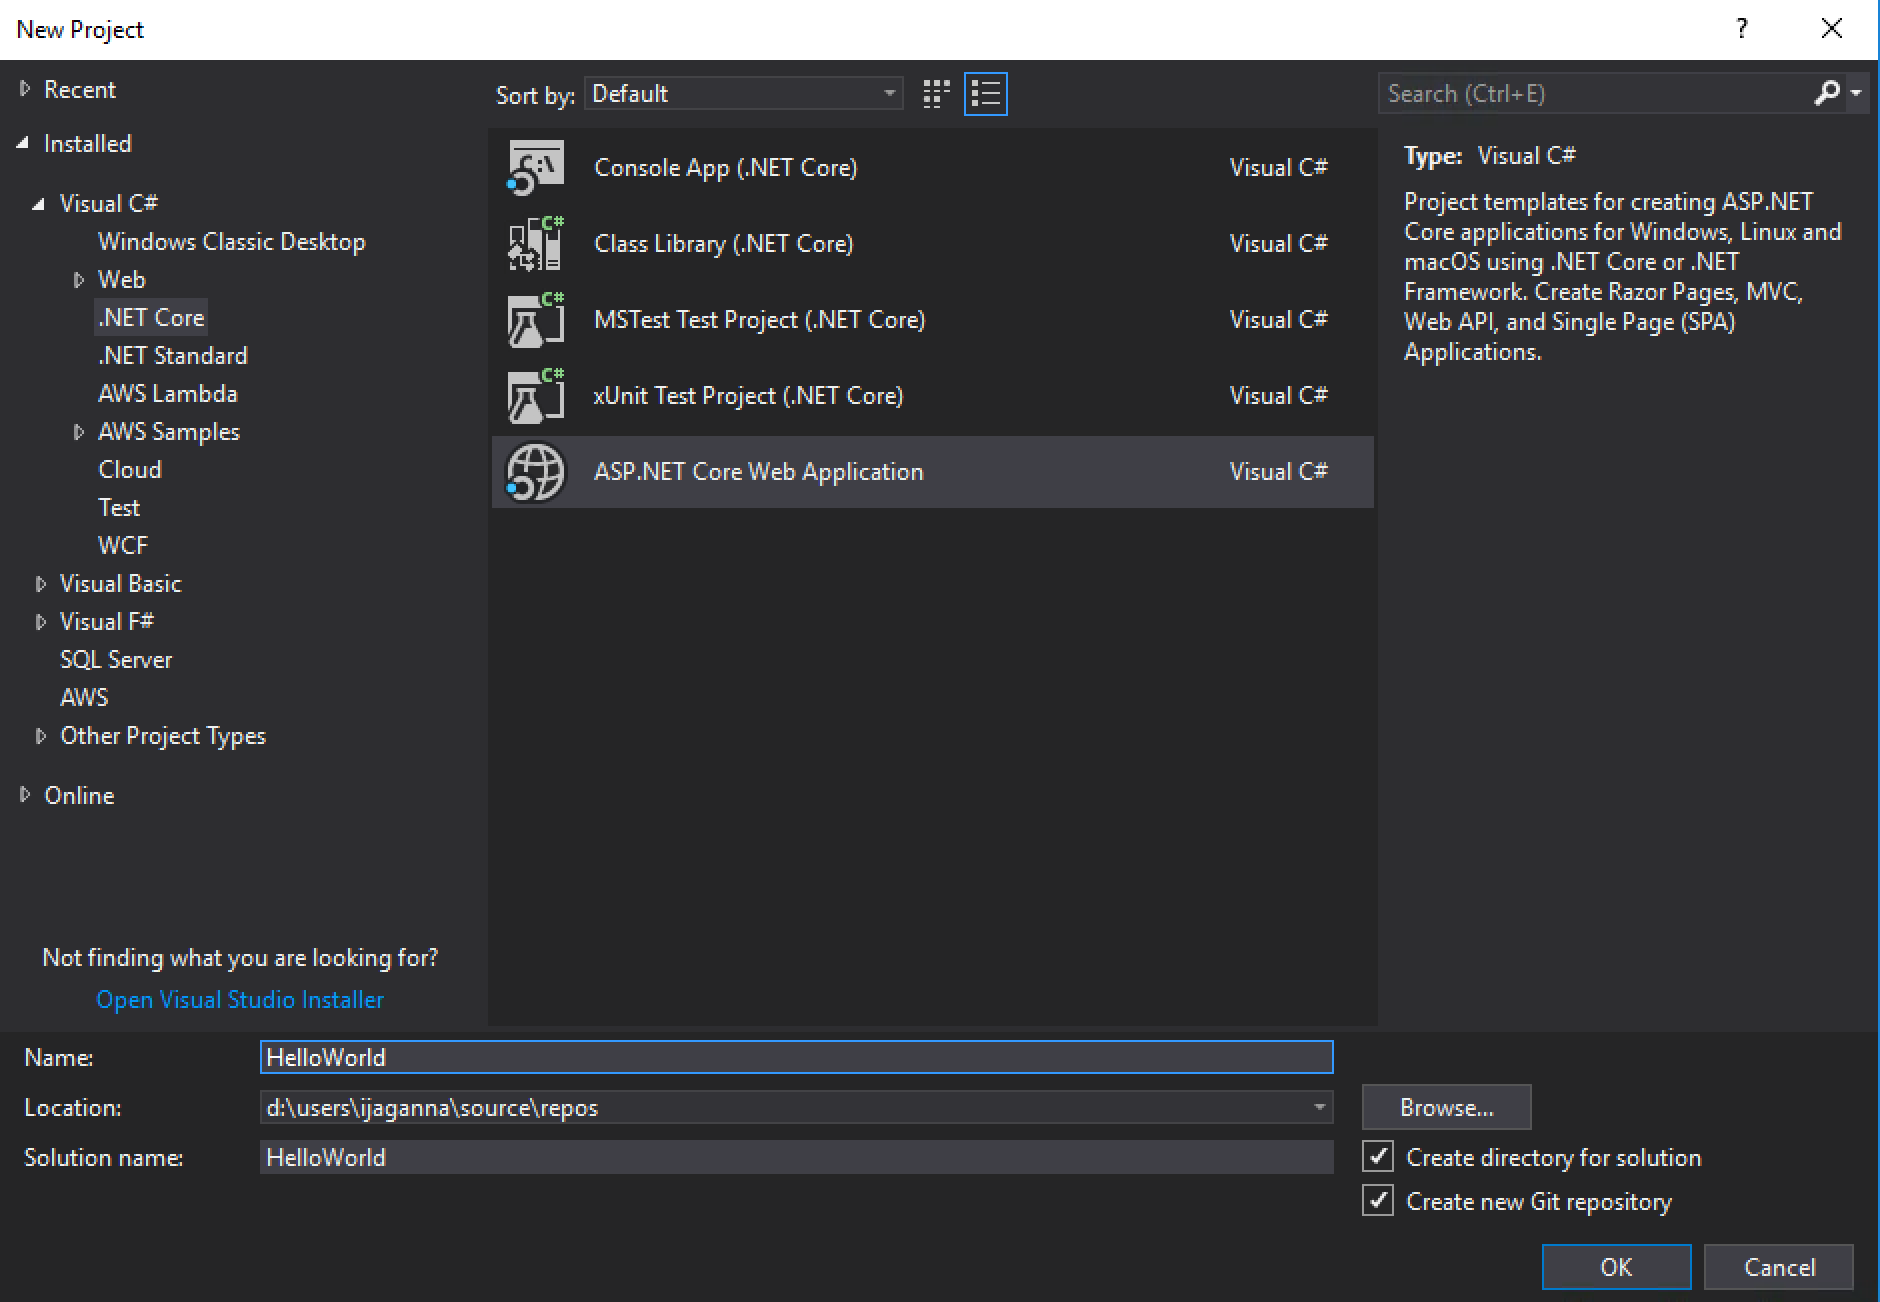
2. Open Visual Studio on Windows and create a new project choosing the
ASP.NET Core Web Application template
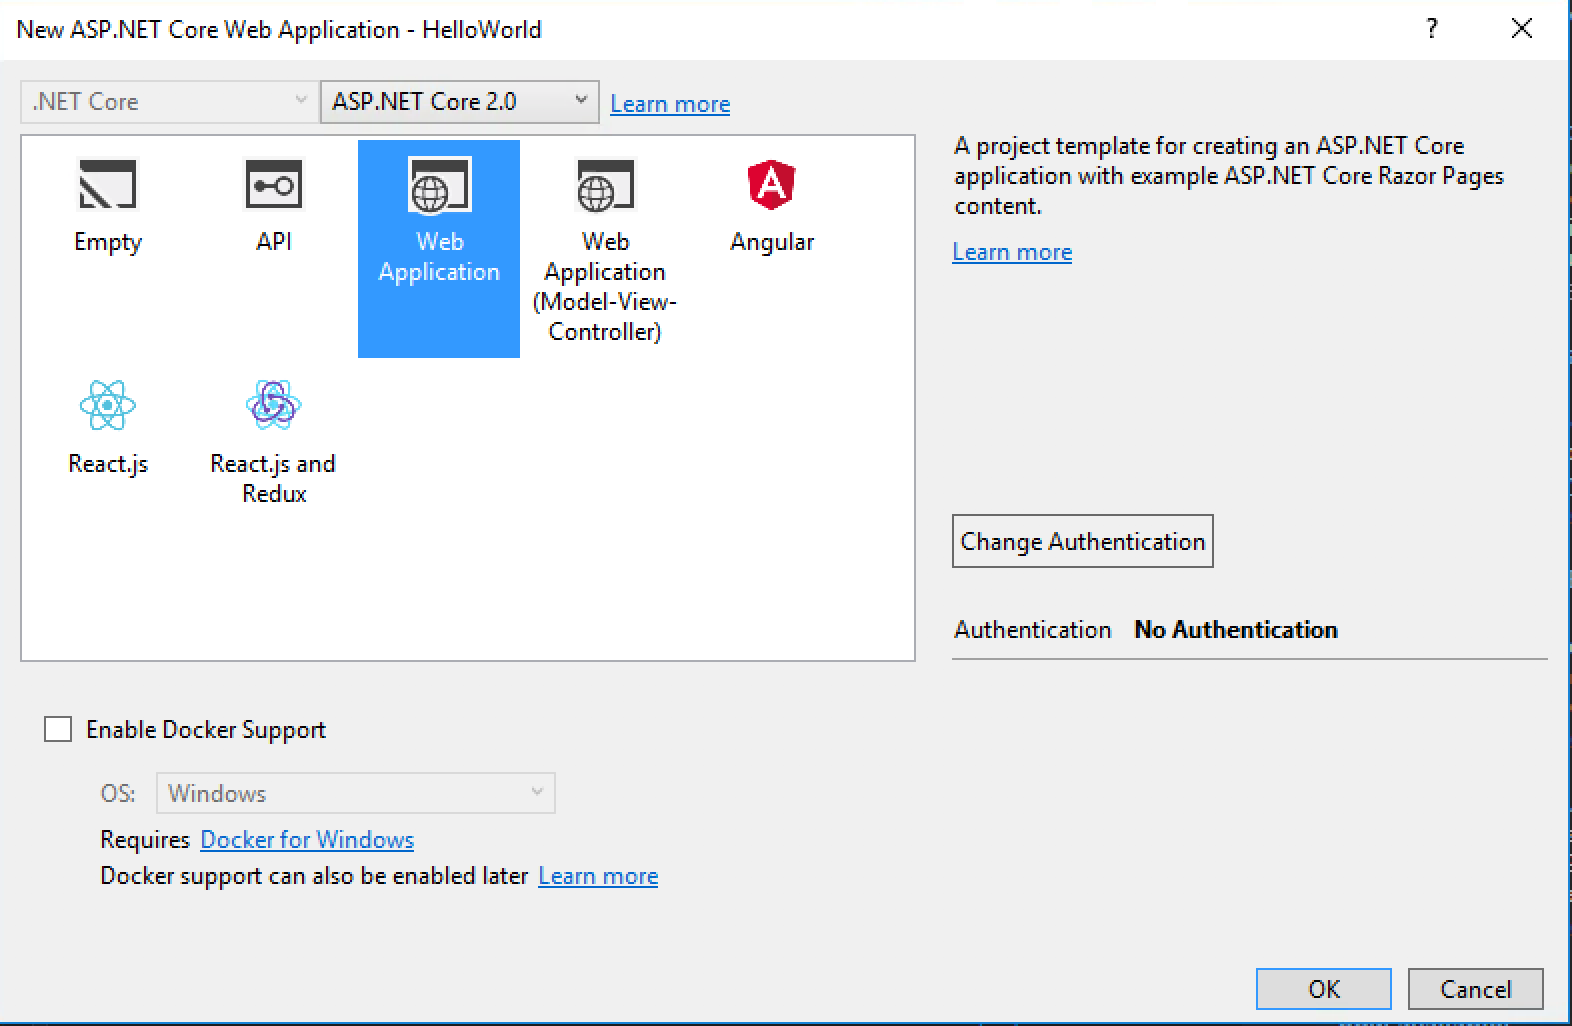
3. Make sure ASP.NET Core 2.0 is selected in the drop down and Web Application template is selected as well
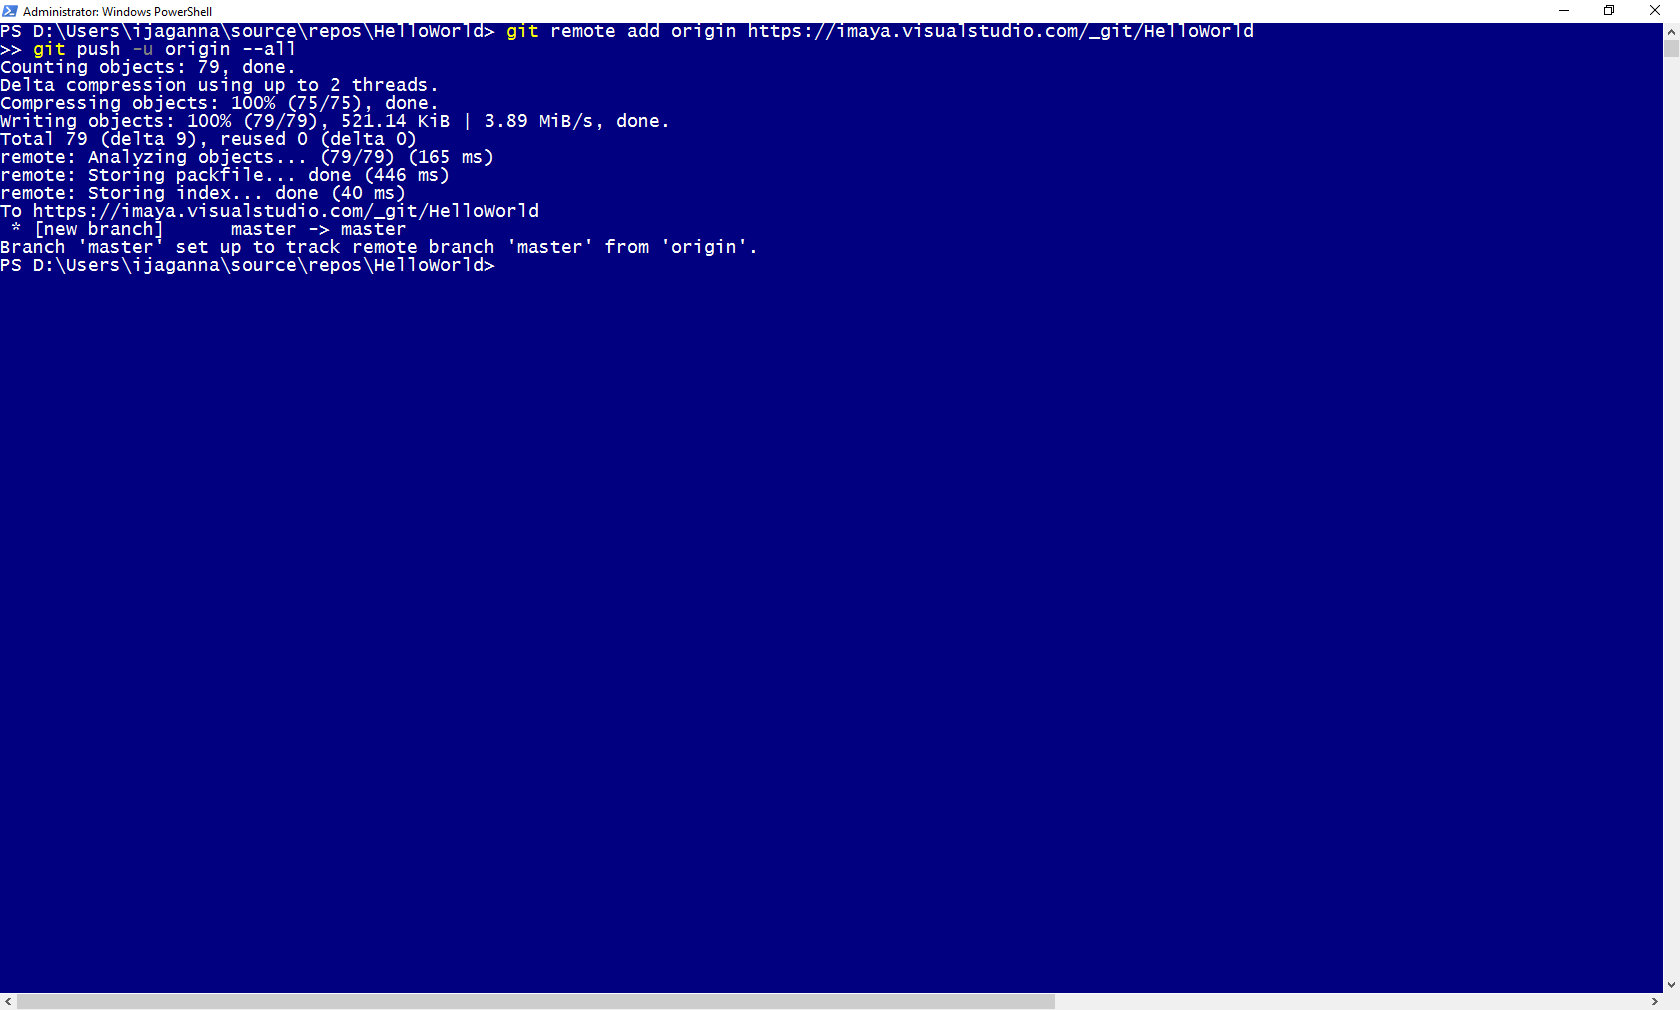
4. Once the project is created, open *Powershell* and navigate to the
project source folder and push the source code to the VSTS Git
repository you just created
```
git remote add origin https://.visualstudio.com/_git/HelloWorld
git push -u origin \--all
```
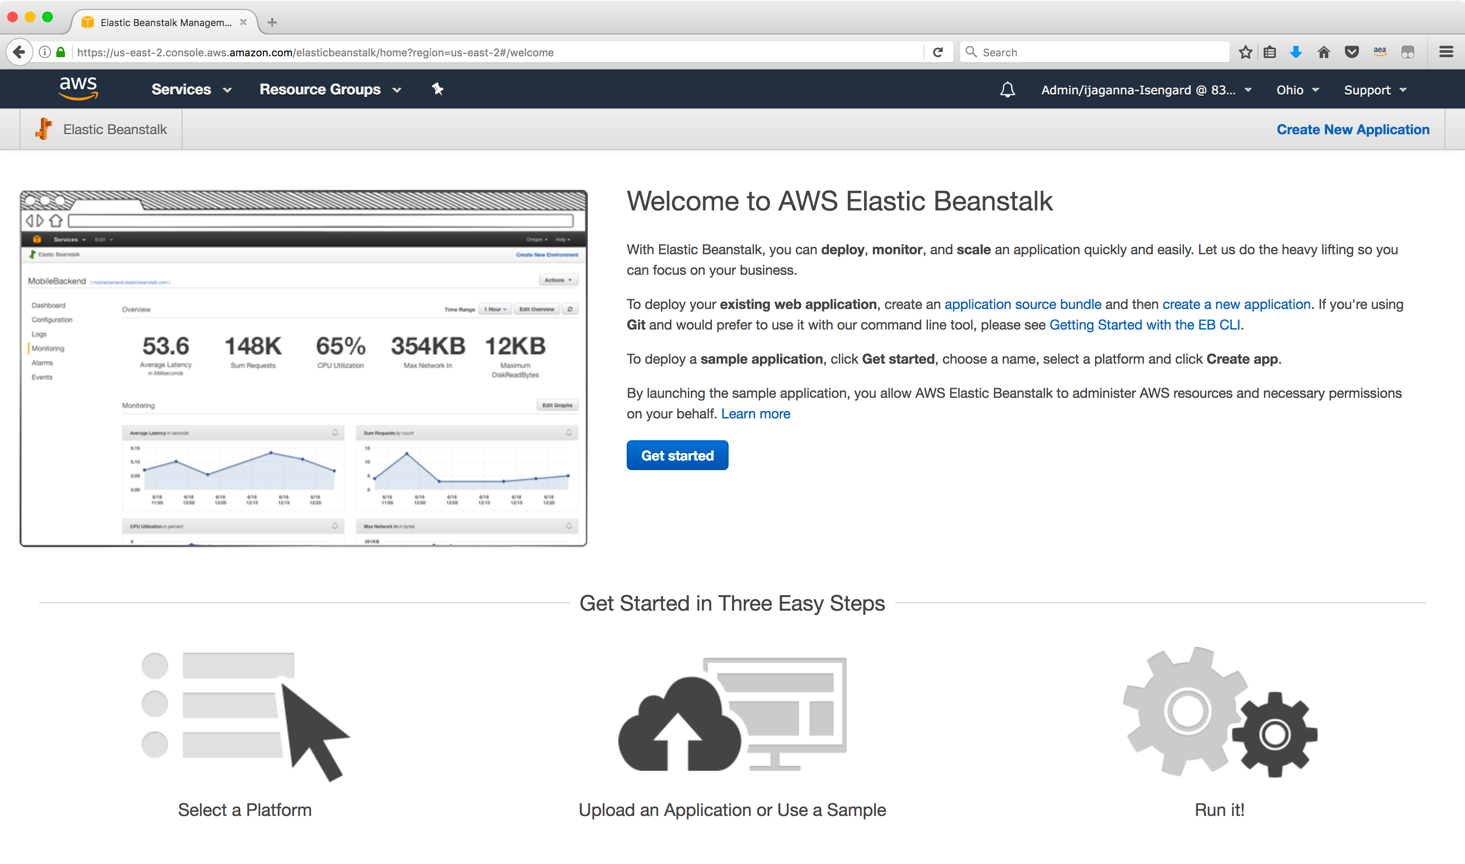
5. Open AWS Console and navigate to Beanstalk service home page and
click on **Create New Application**
6. Give the application a name and select other options as shown in the
screenshot below.
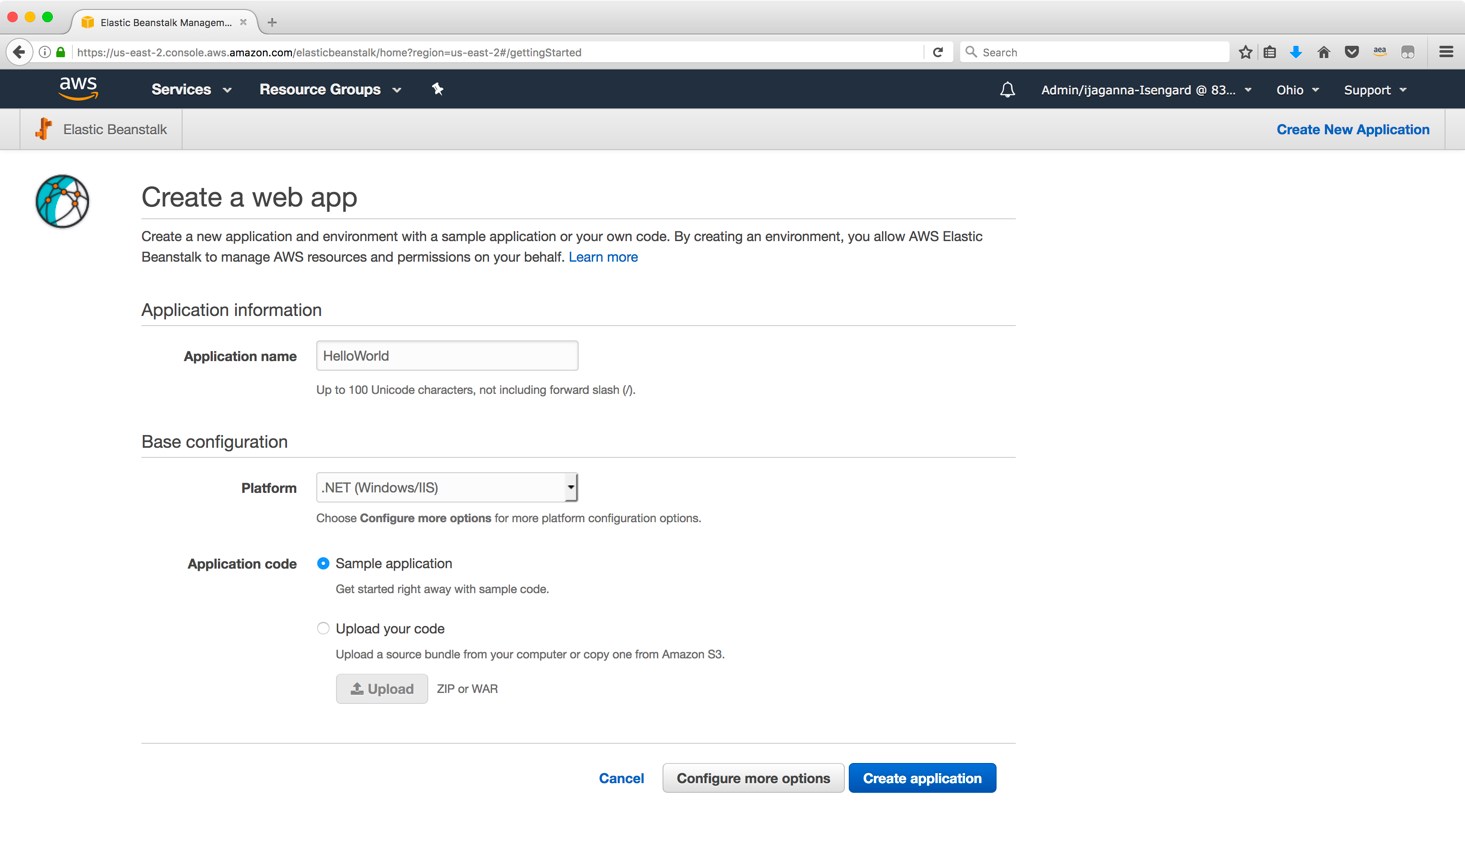
7. After you click on **Create application,** AWS will start
provisioning all required components for your Beanstalk application.
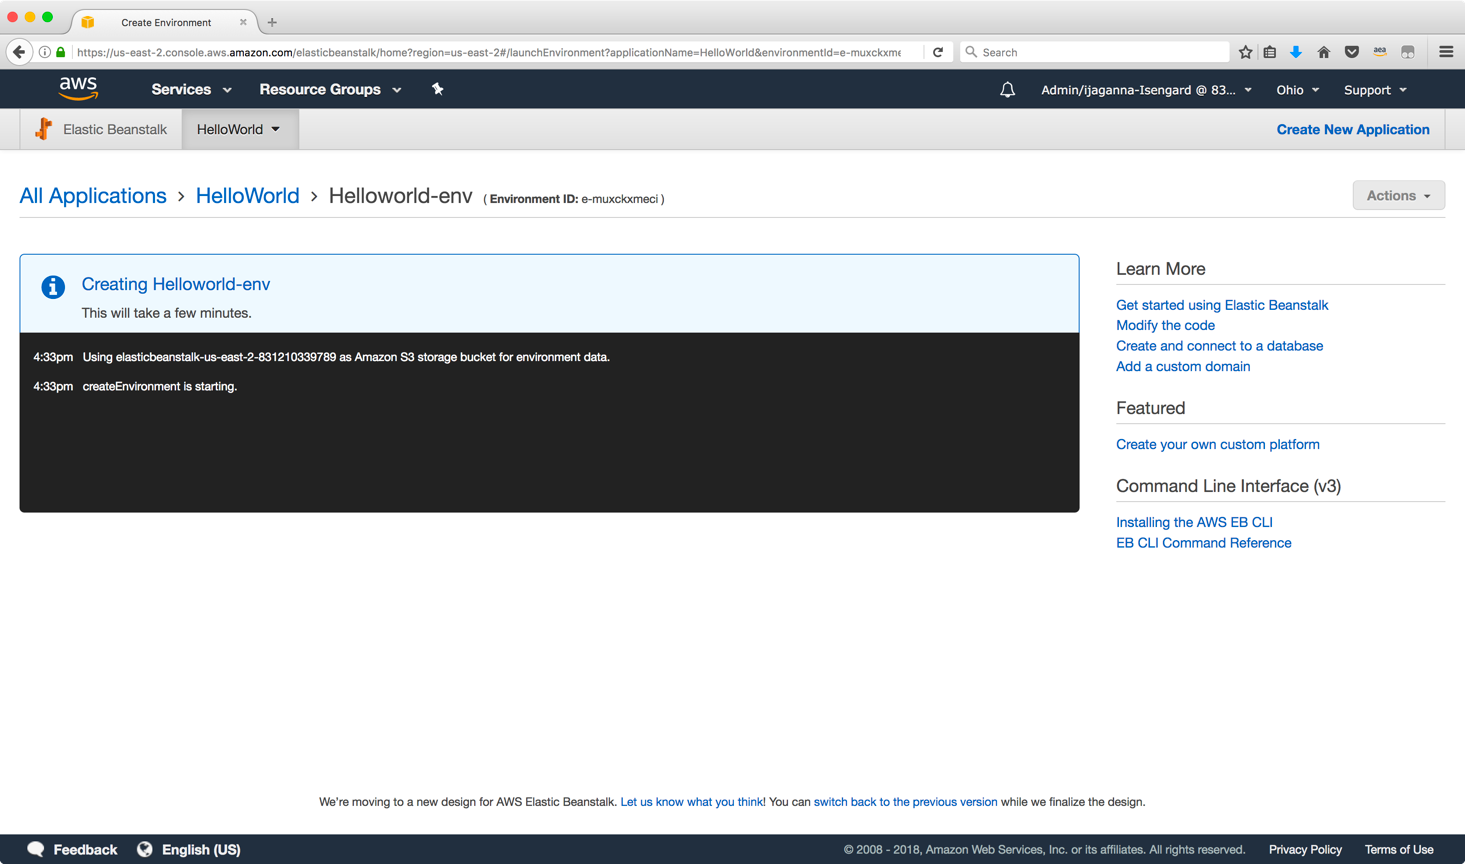
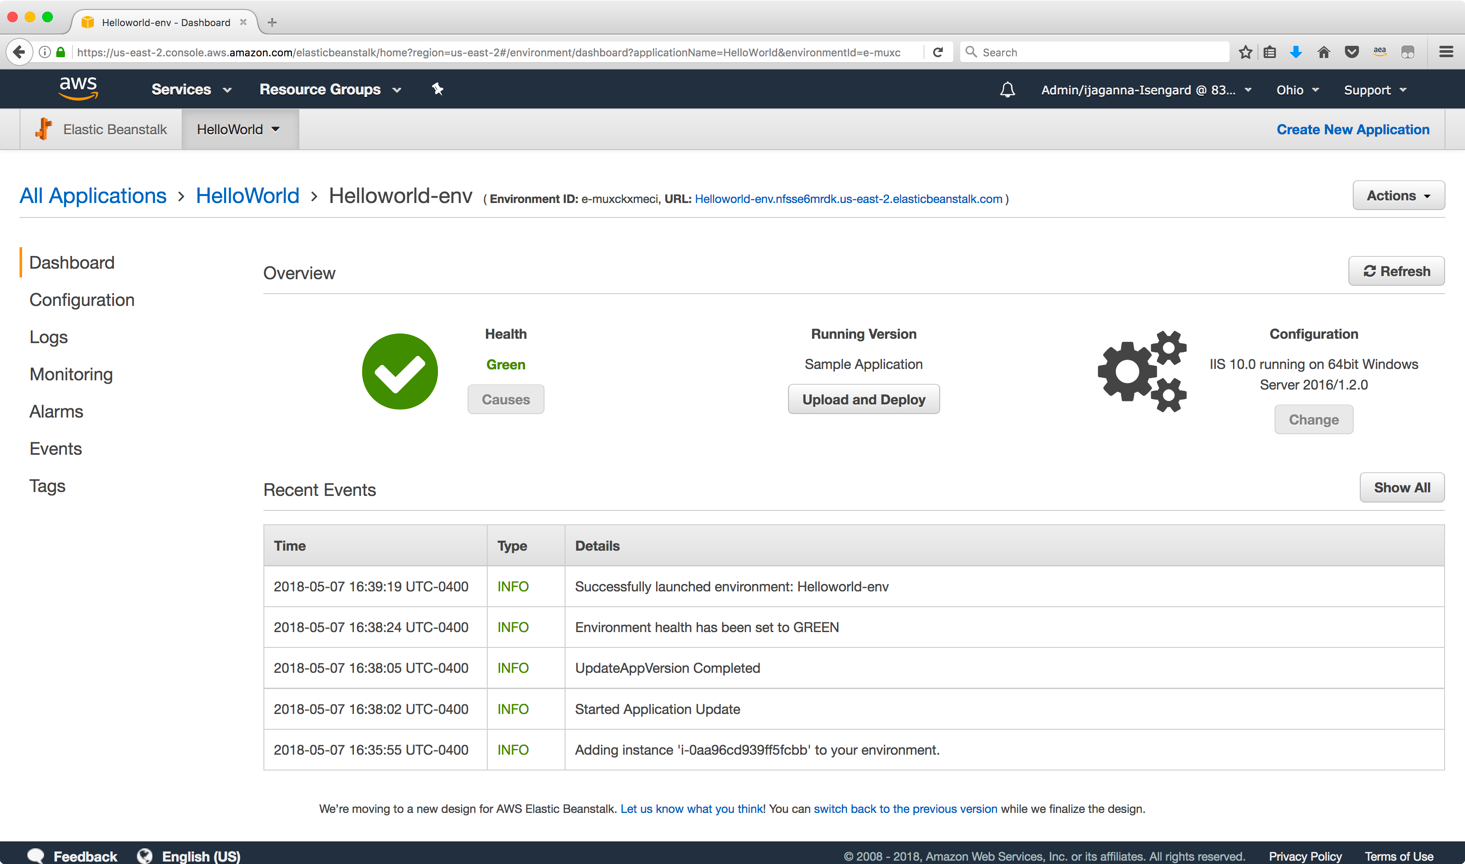
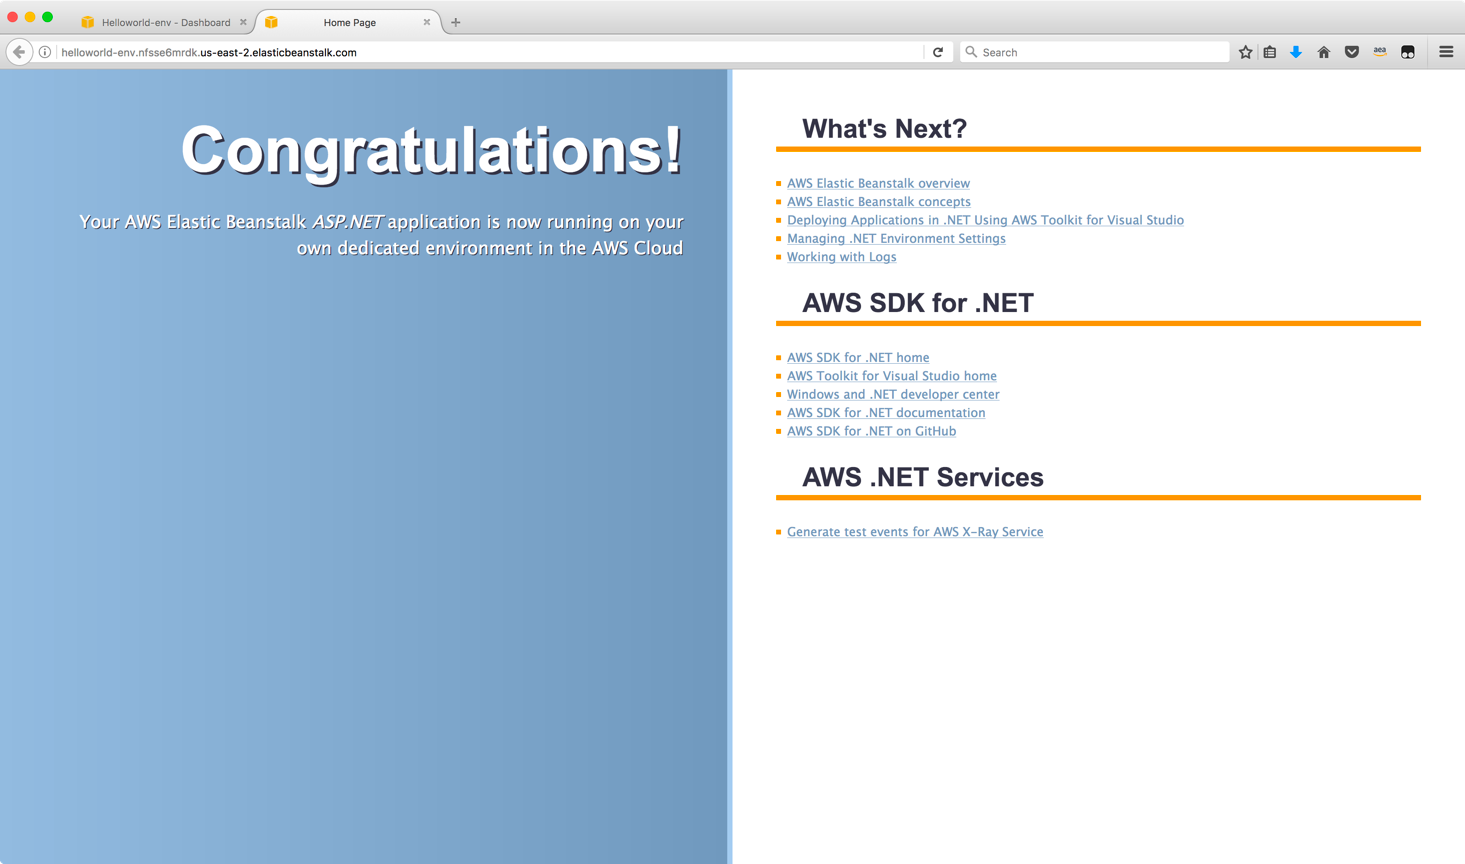
8. After you see this green check mark, click on the generated URL for
your Beanstalk application that has the sample app built in. Your
browser should open a new tab and show a page similar to the one
below. This indicates successful creation of your new Beanstalk
application.
9. Now that you have the target environment with sample application
setup and also your code pushed to VSTS, it's time to setup the
Build and Deploy pipeline.
10. Navigate to your project home page on VSTS and you should see
something similar to the screen below
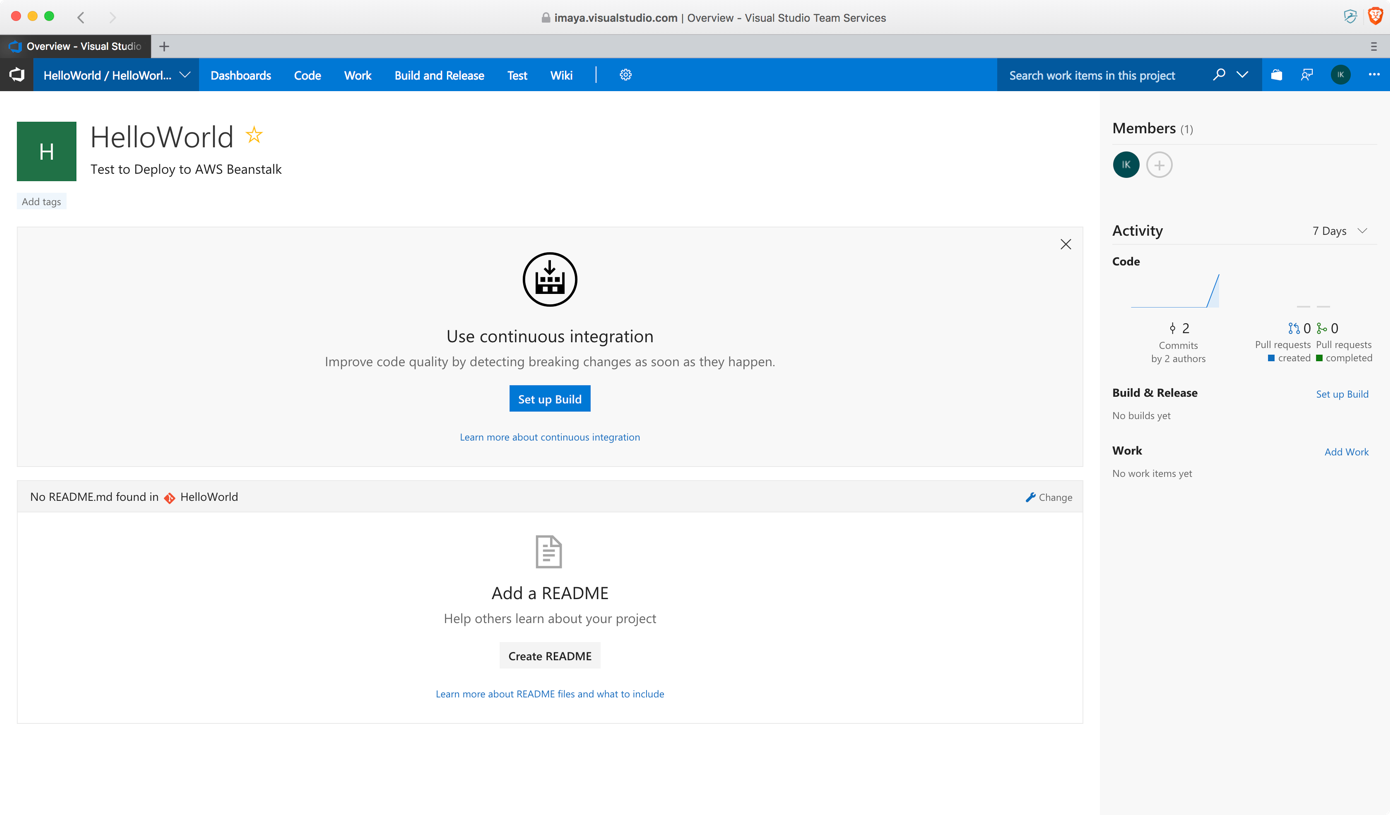
11. Click on **Set up Build** and it should take you to a screen like
the one below. Select **VSTS Git** as your source control. Rest of
the fields should be automatically populated. Leave the default
values as is and click **Continue.**

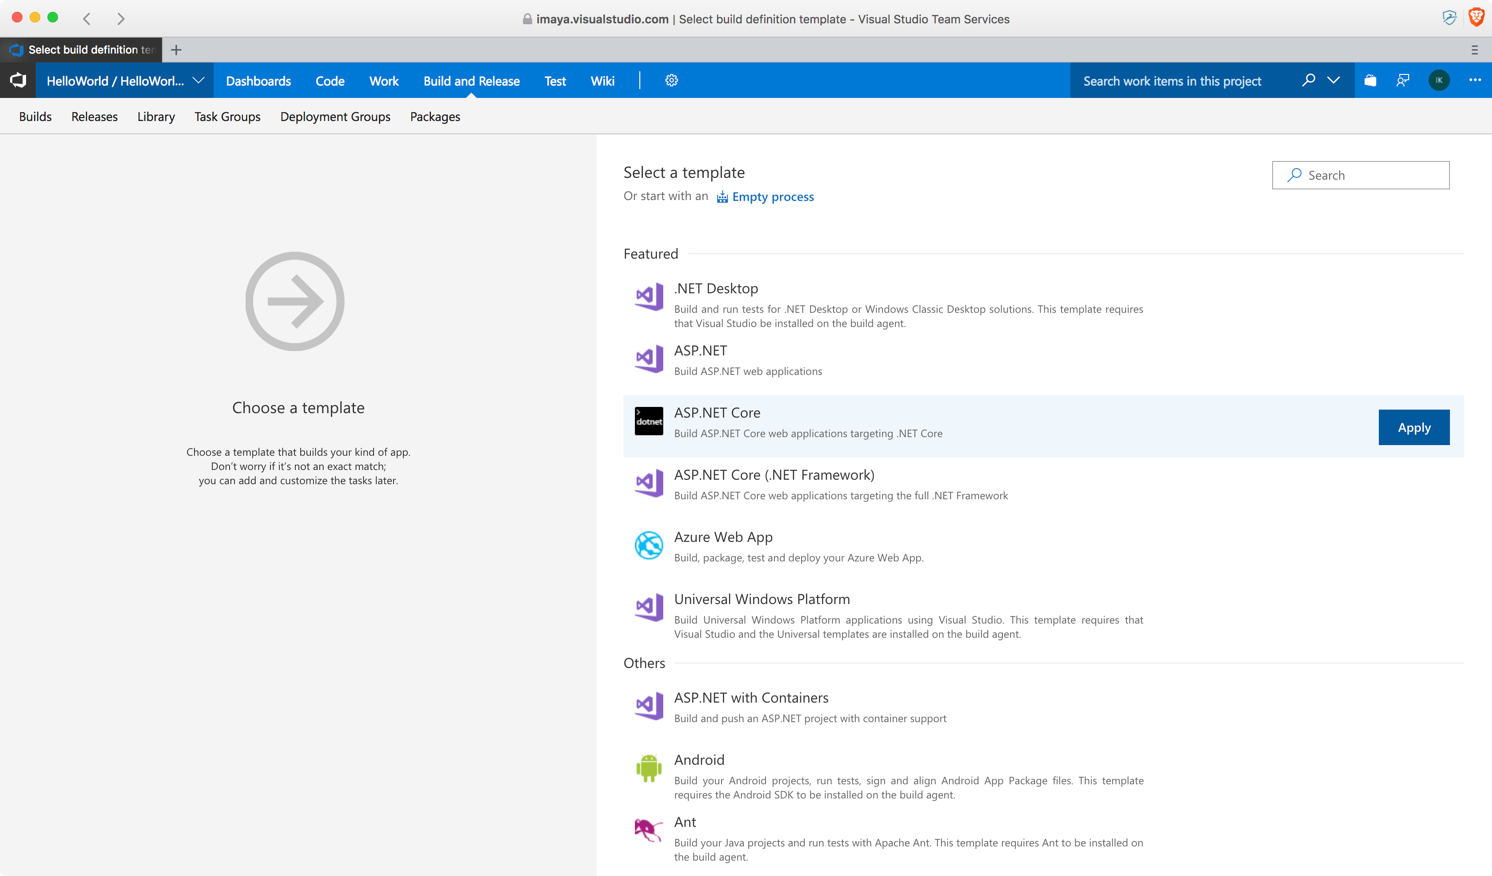
12. The next screen allows you to select the template that is already
built into VSTS. Choose **ASP.NET Core** option and click **Apply**
since that is the framework our solution is based on.
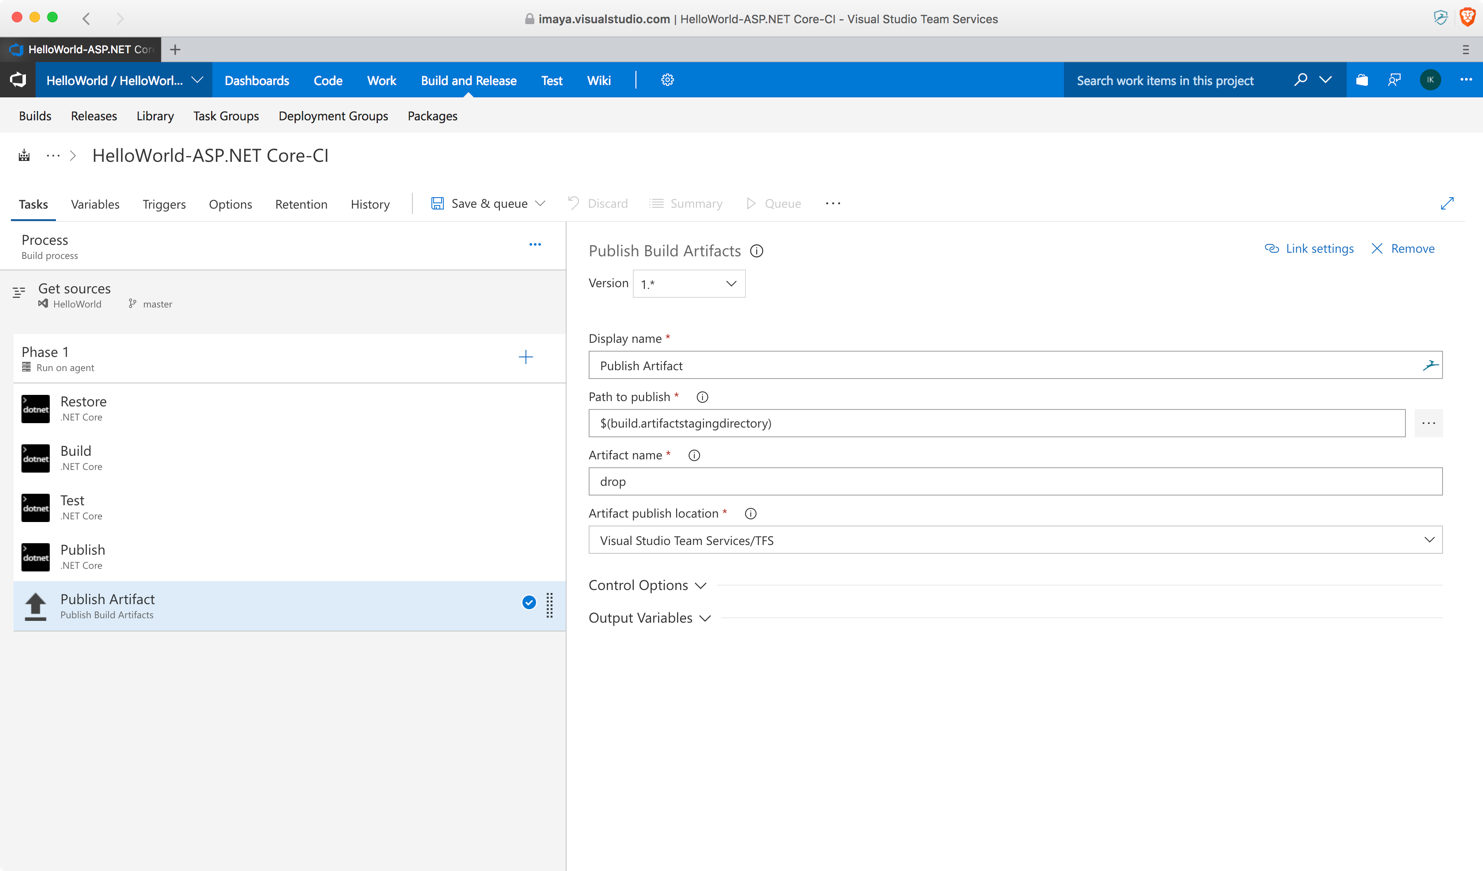
13. The next screen should look similar to the one below. It contains
all the tasks that the **Build** process will go through. All fields
in this screen should be automatically populated, so leave them as
is and click on **Save & queue.**
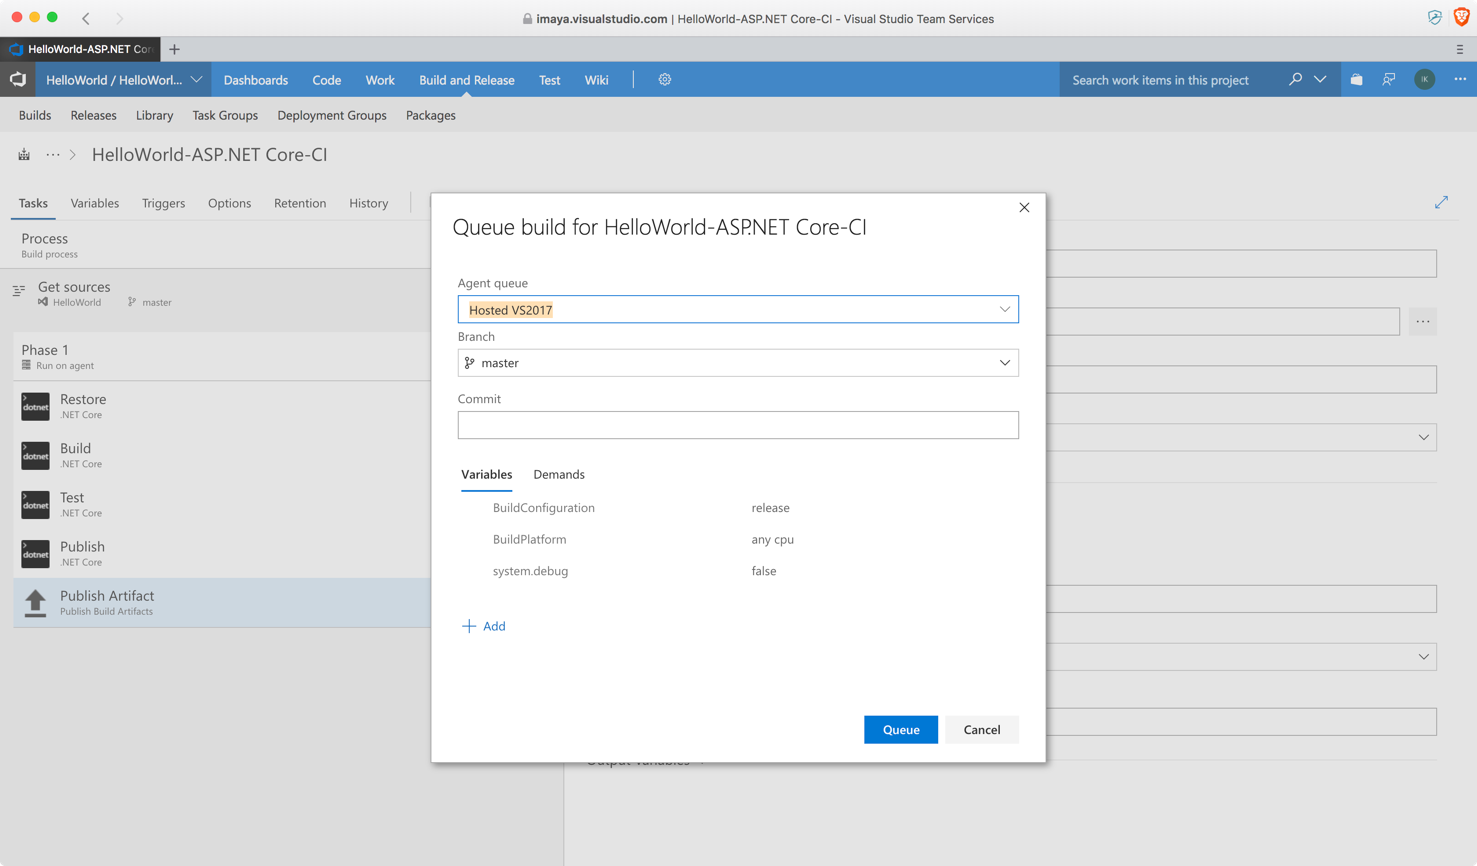
14. Save the template and click on **Queue.**
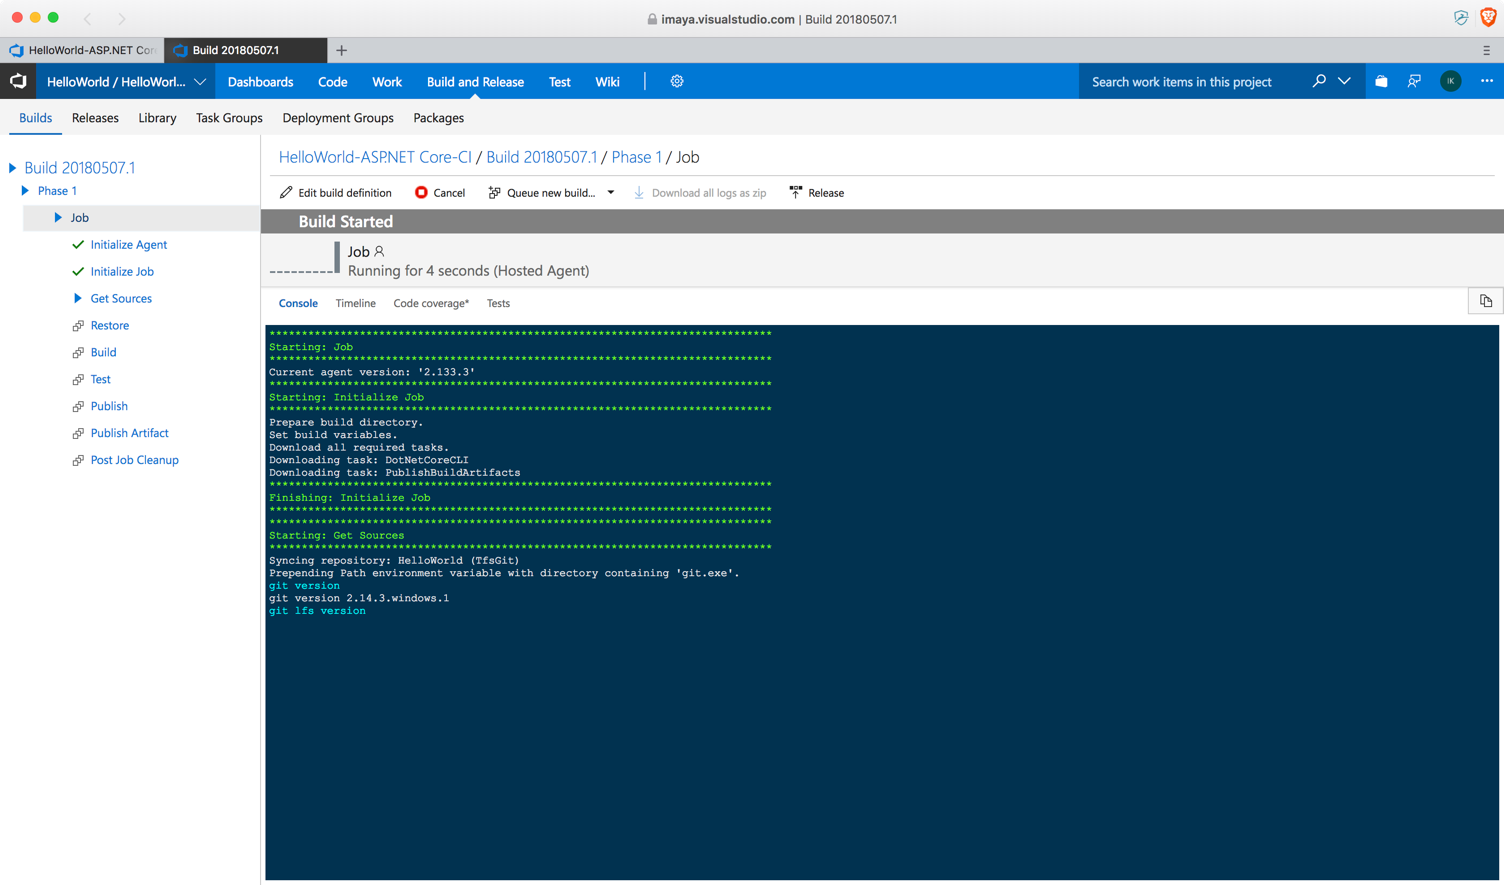
15. VSTS will start executing the Build tasks one by one in a sequential
order.
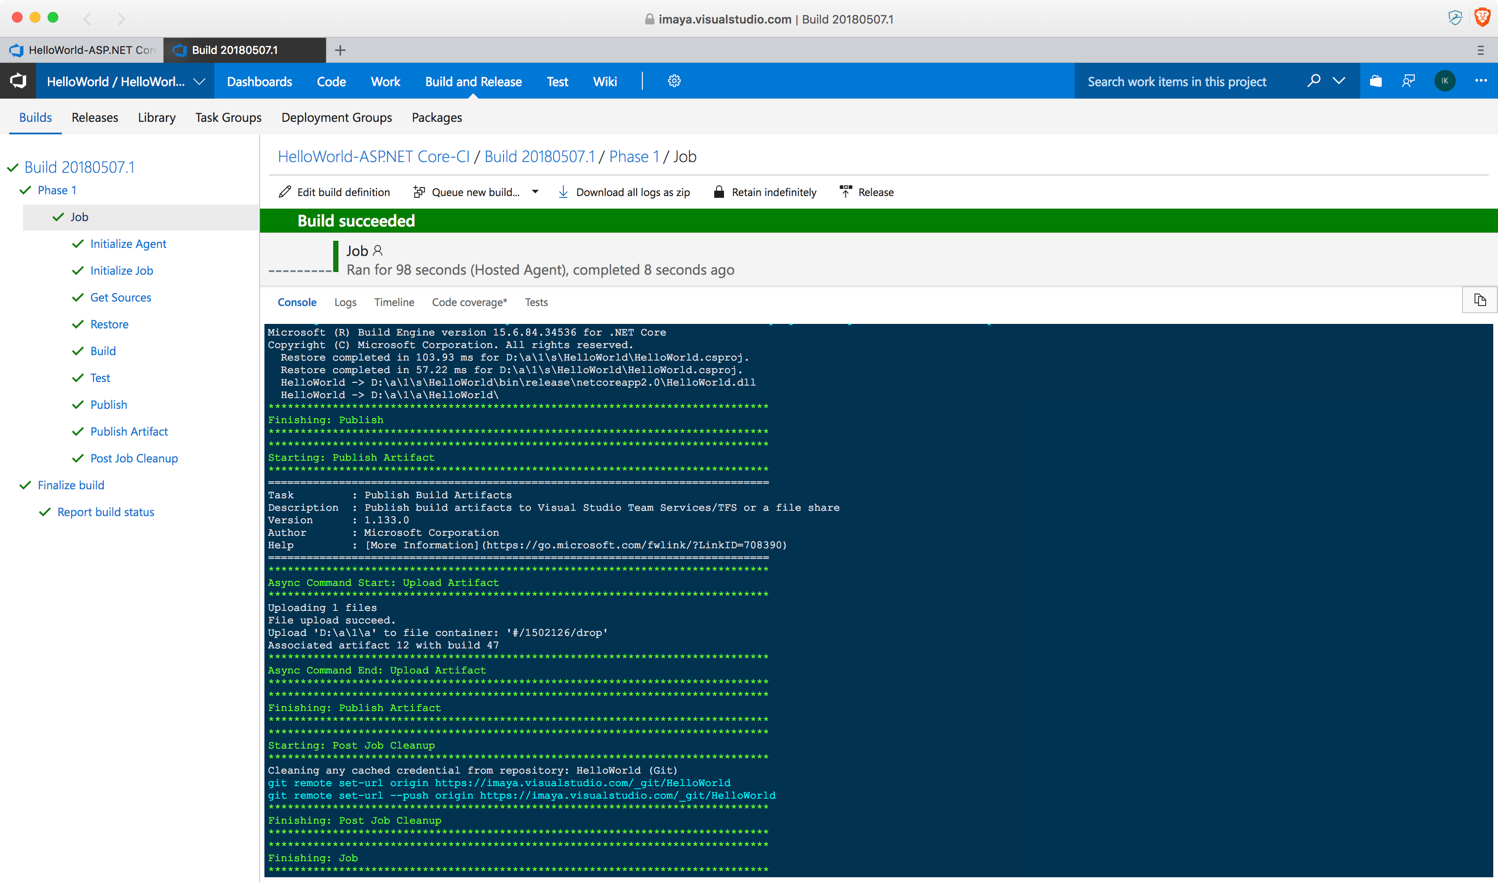
16. The below screen indicates that the Build process has been
successful and the final build output file has been placed under the
**jobs** folder on the Build server.
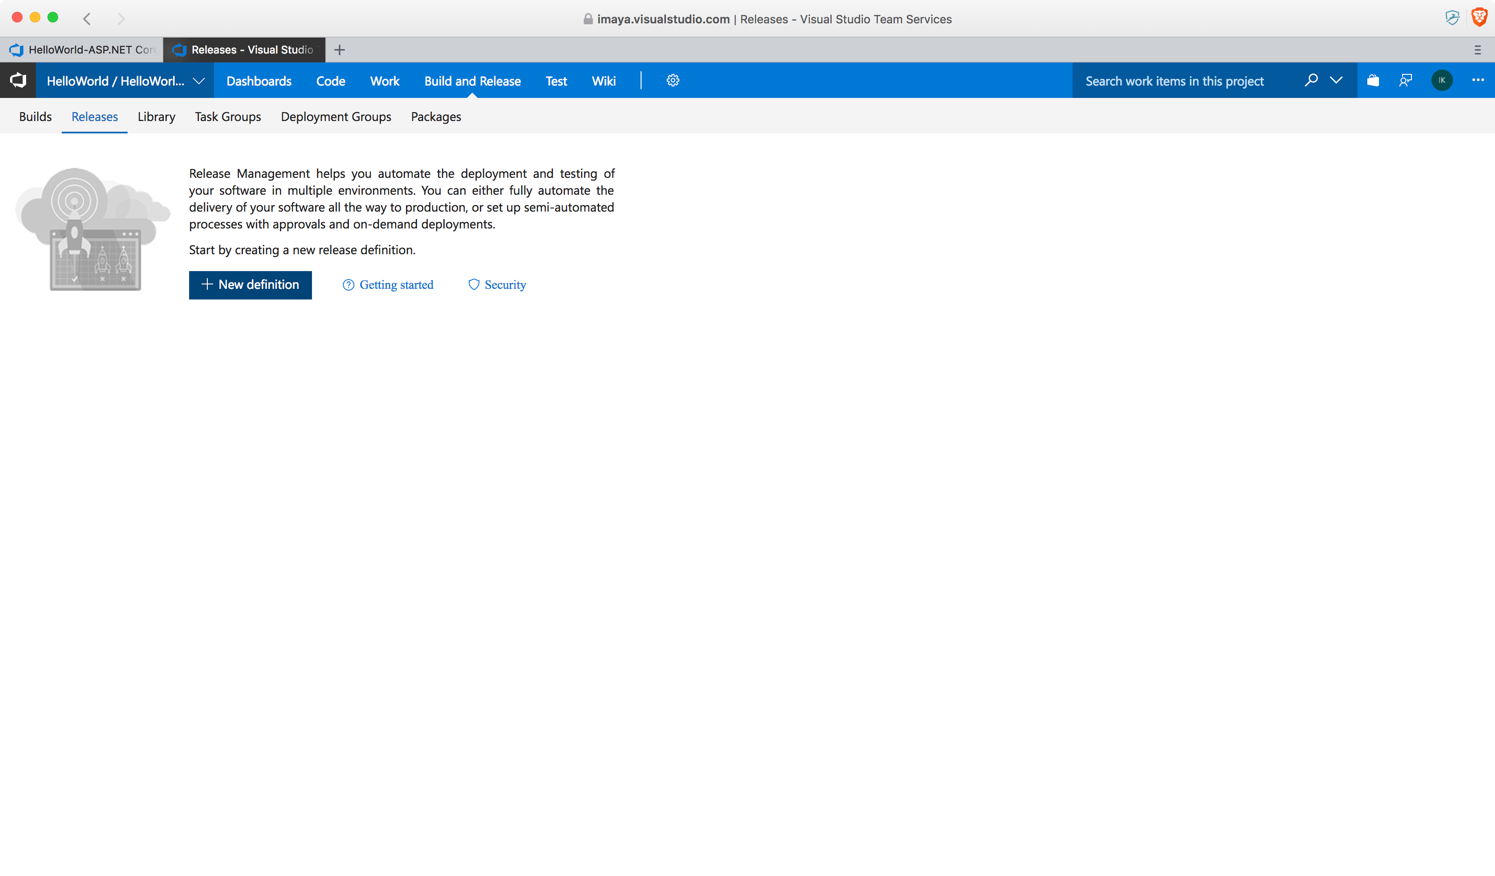
17. Next step is to create a Release template so we can deploy the build
output to our AWS Beanstalk environment. Go to the **Releases** tab
on VSTS and you should see a screen similar to this. Click on **New
definition.**
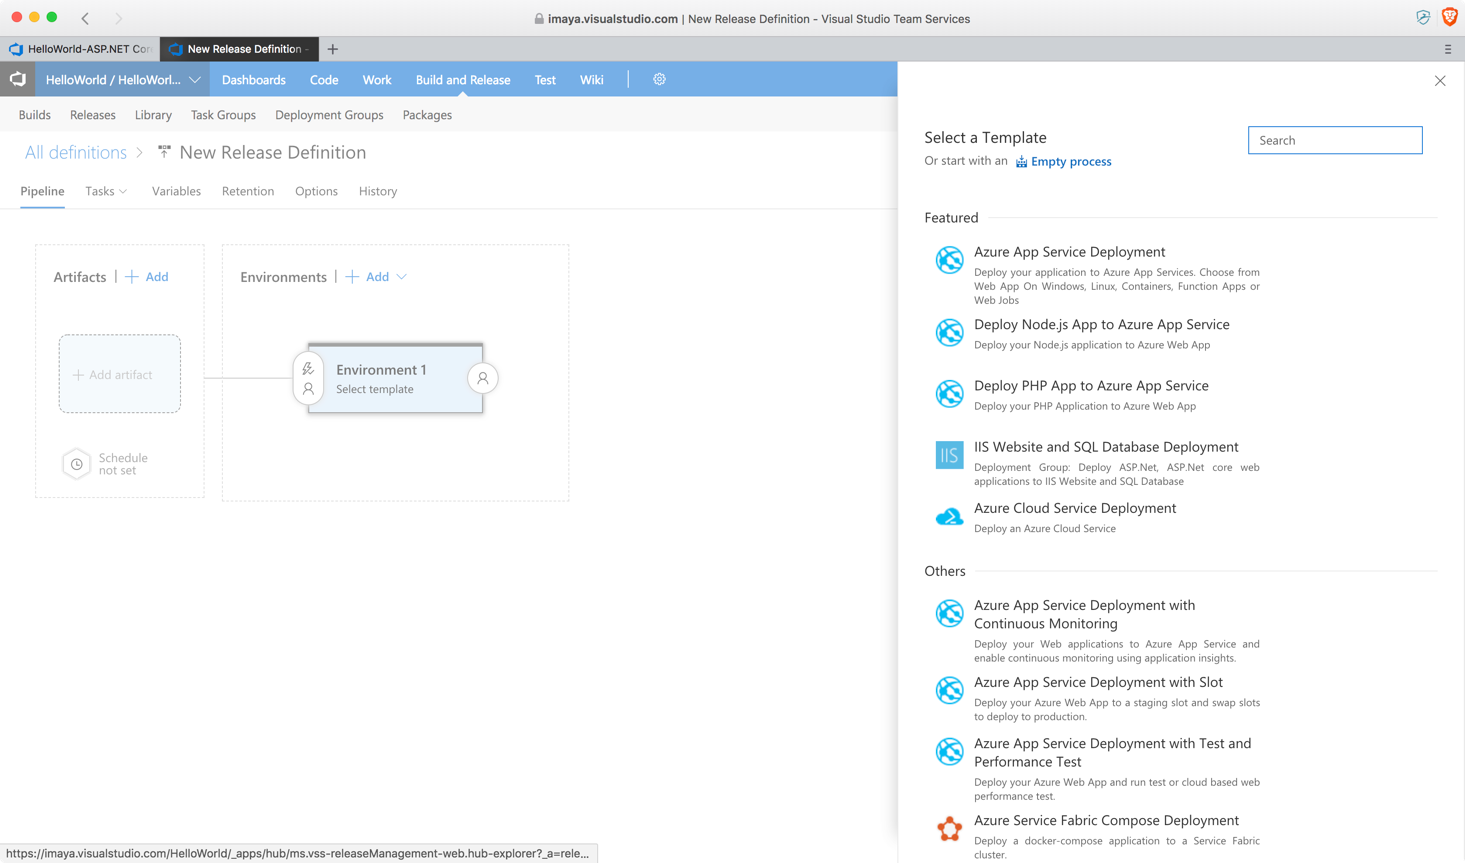
18. In the next screen, under Select a Template, click **Empty
process.**
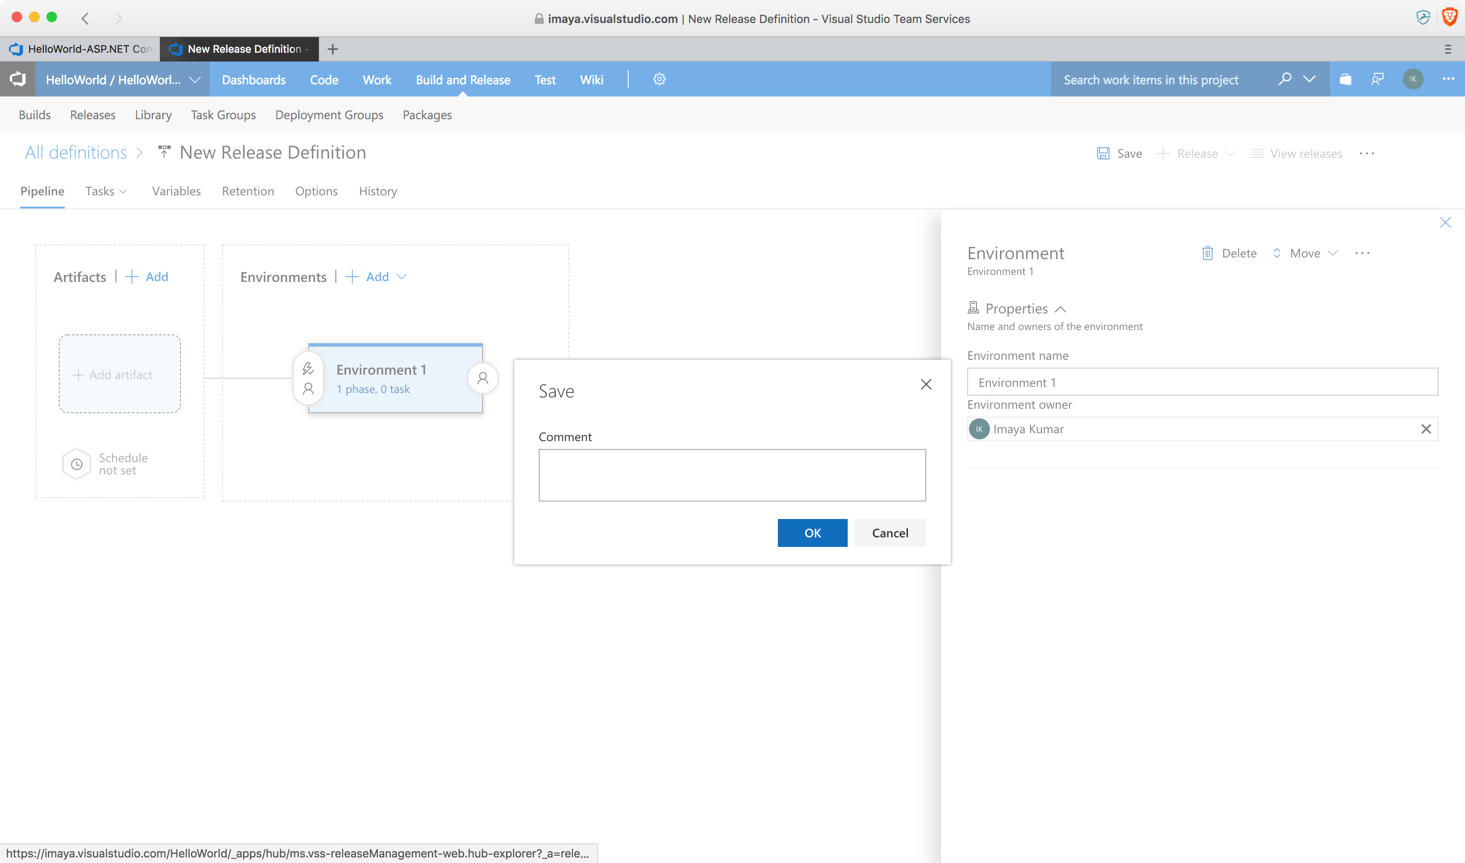
19. Click **1 phase, 0 task** link and rename the environment if you
like or leave it to default value as shown below and click **Save.**
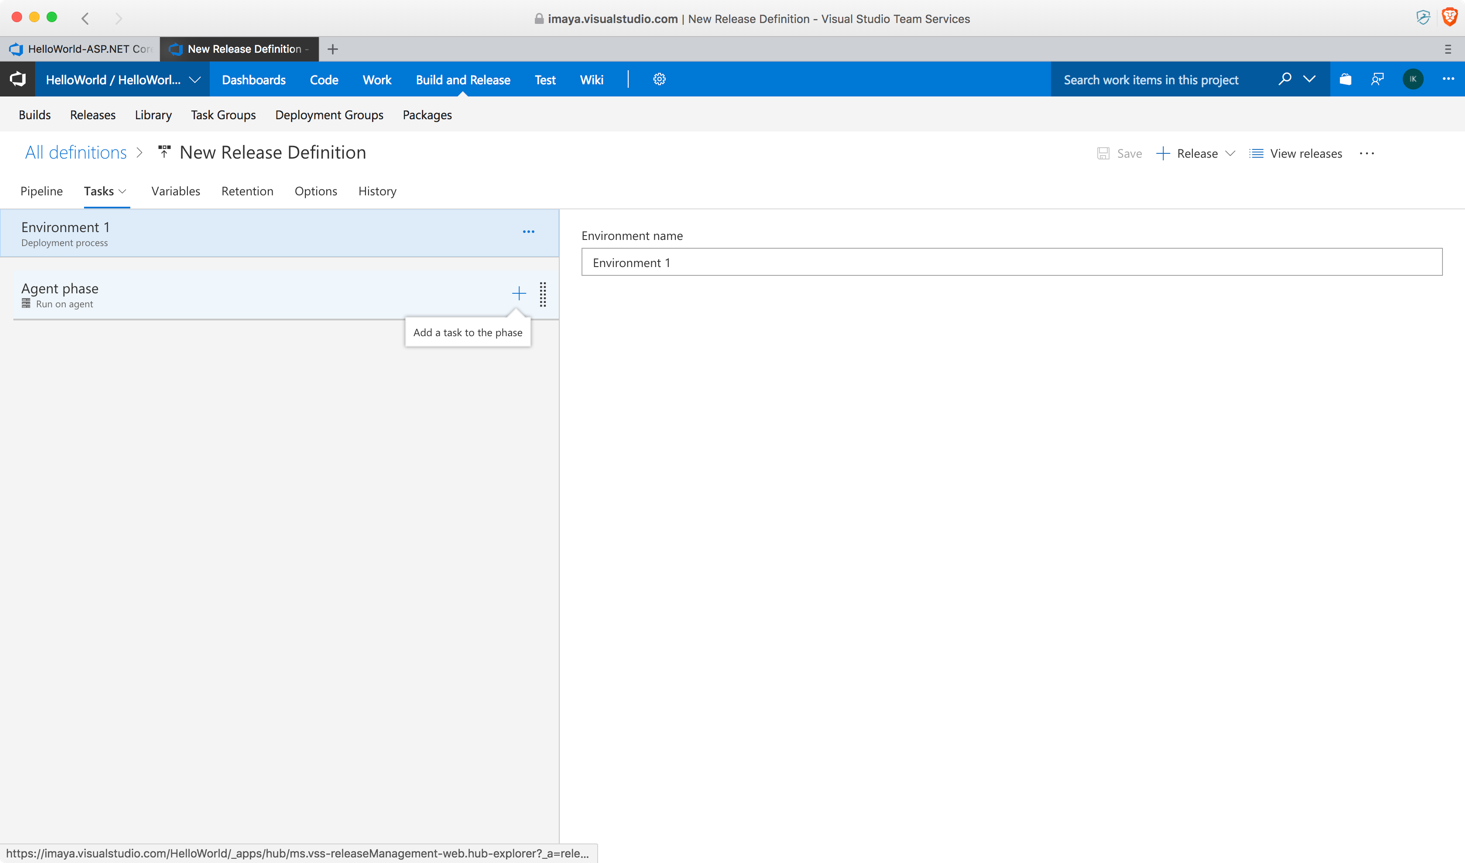
20. In this next screen, click on '**+'** to add a new task to the
Release definition.
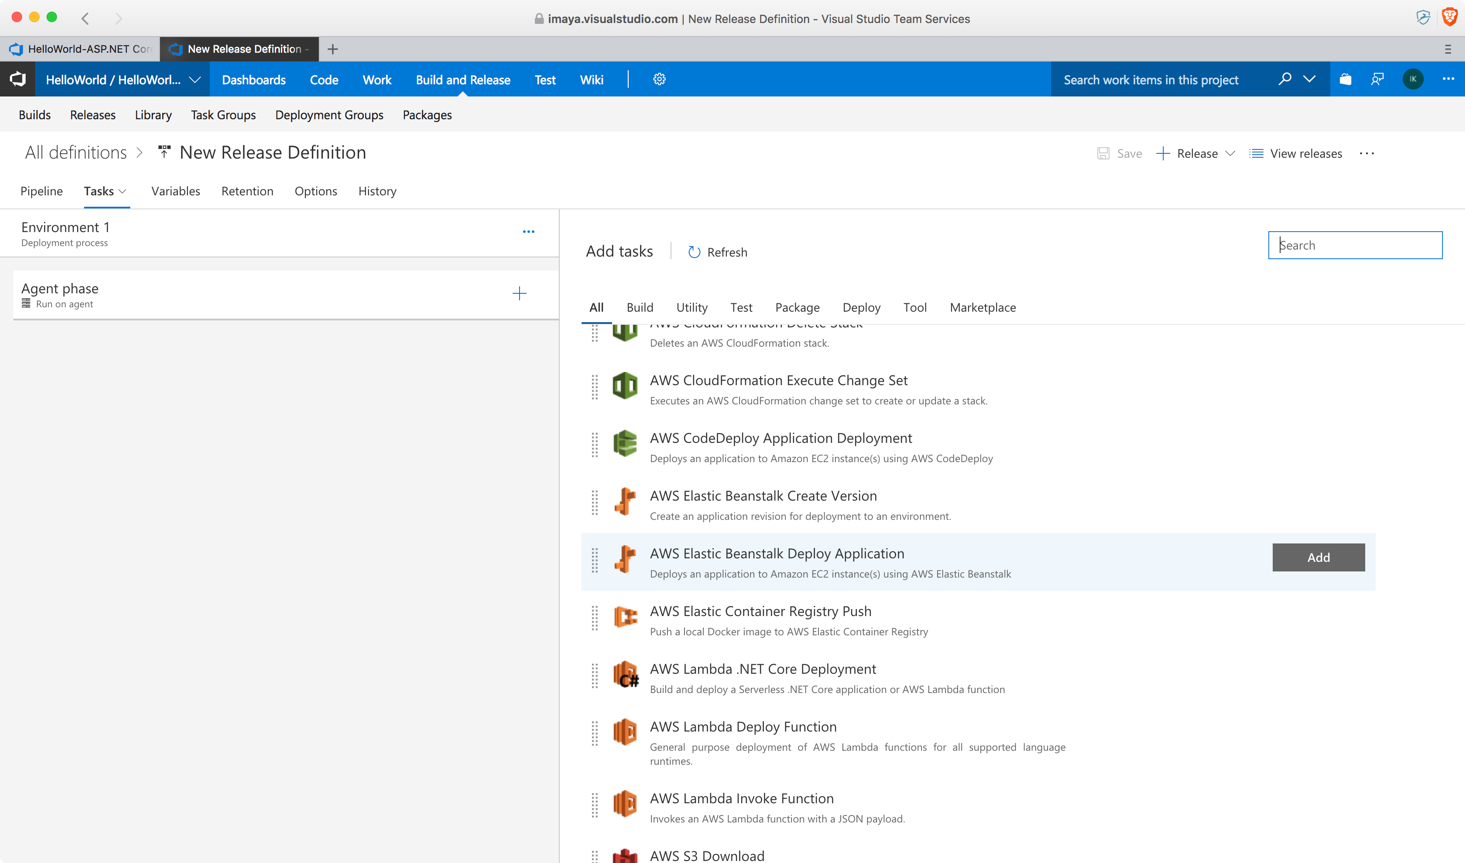
21. You will be presented with several options as shown below. Scroll
down until you see **AWS Elastic Beanstalk Deploy Application** and
click **Add.** You will only see the AWS related tasks in the list
if you had already installed the AWS Tools for VSTS add-in as
mentioned earlier in this post.
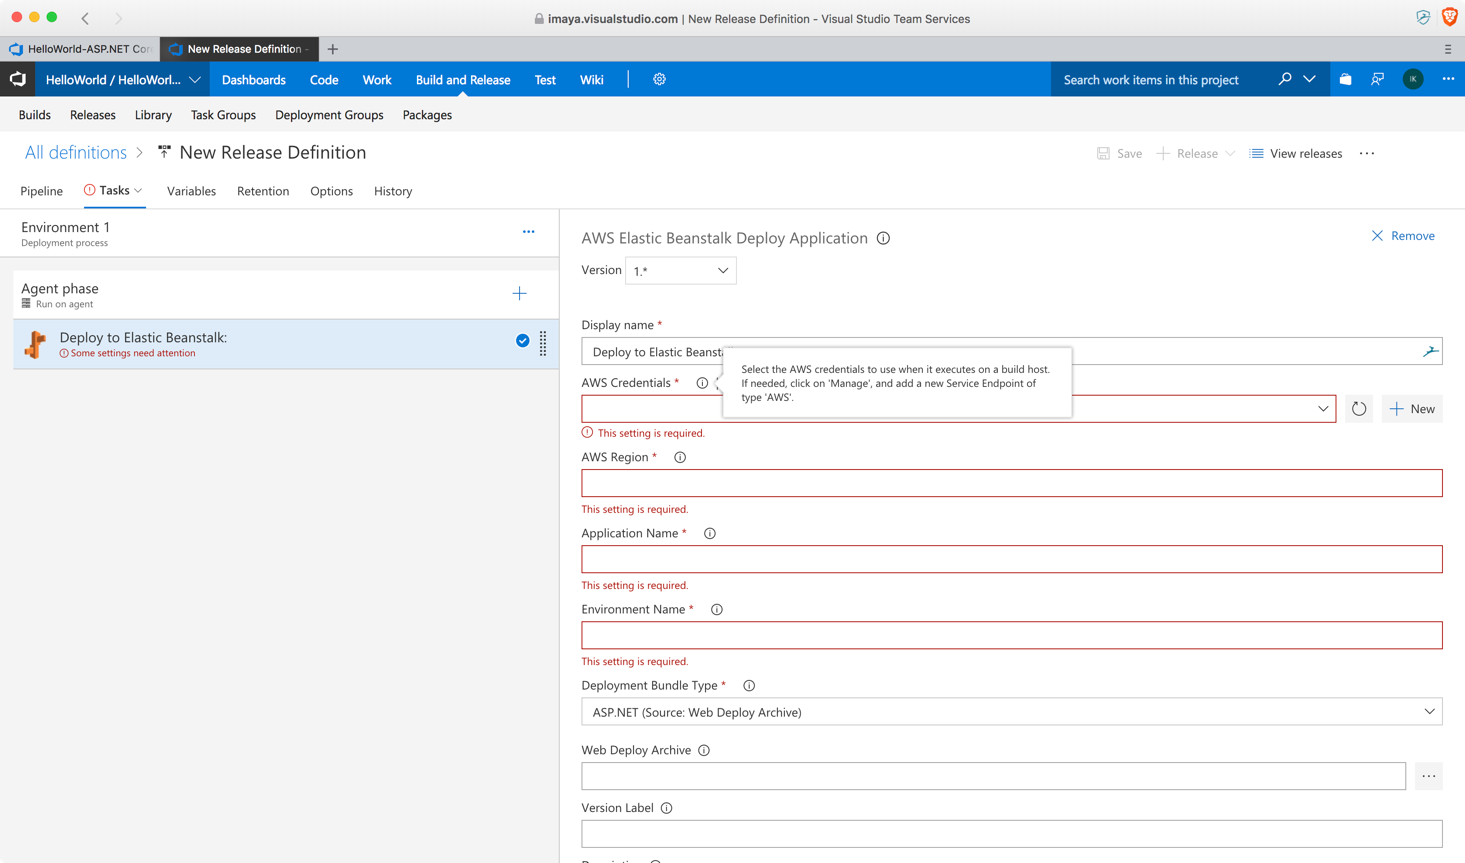
22. You will have to configure your AWS Credentials on VSTS for this
task to deploy the application on your Elastic Beanstalk instance.
To configure the credentials, click on **+ New** button.
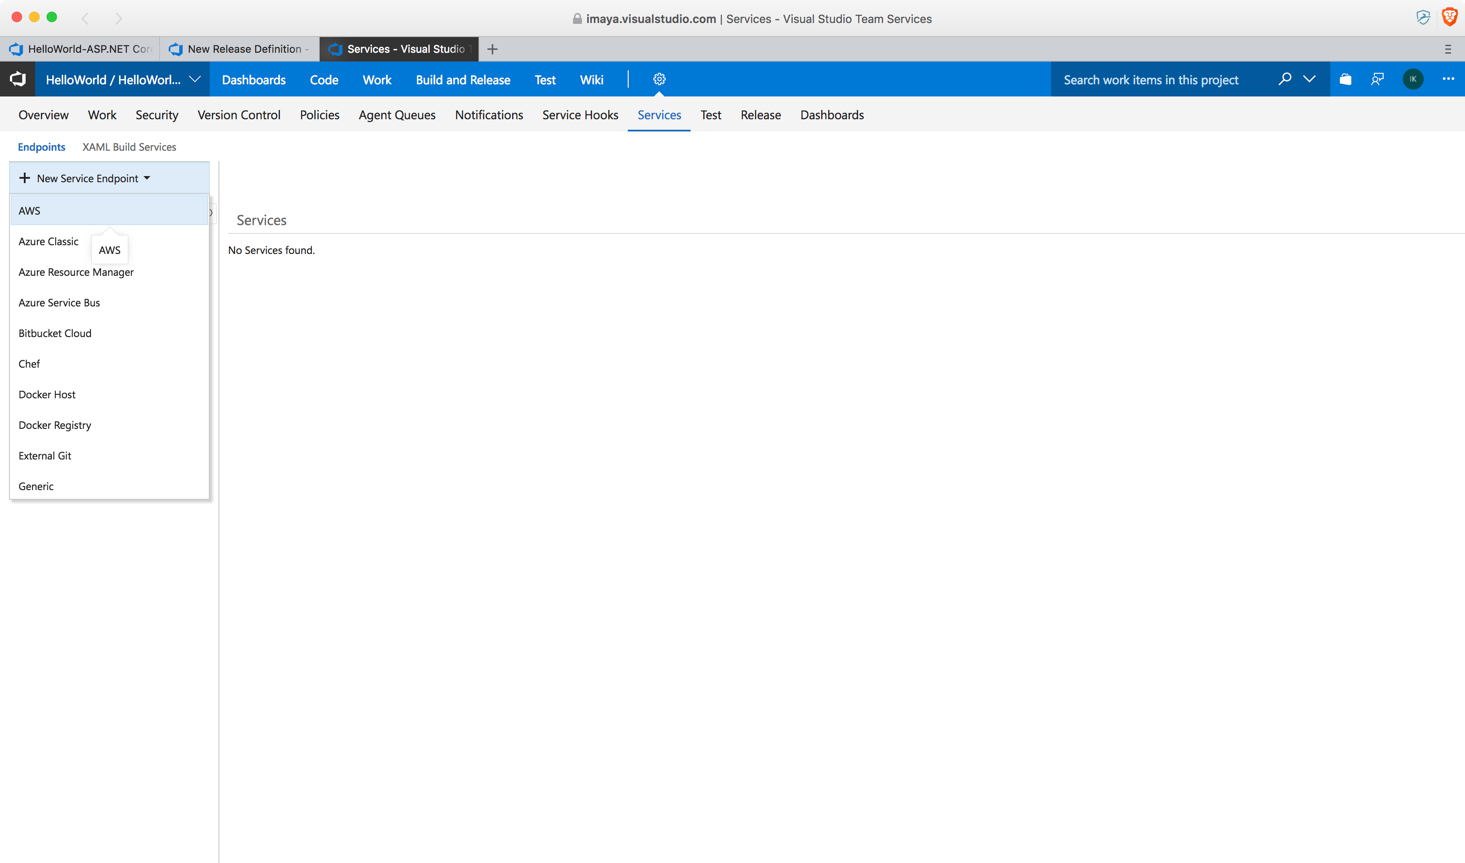
23. In the next screen, select **AWS** from the drop down.
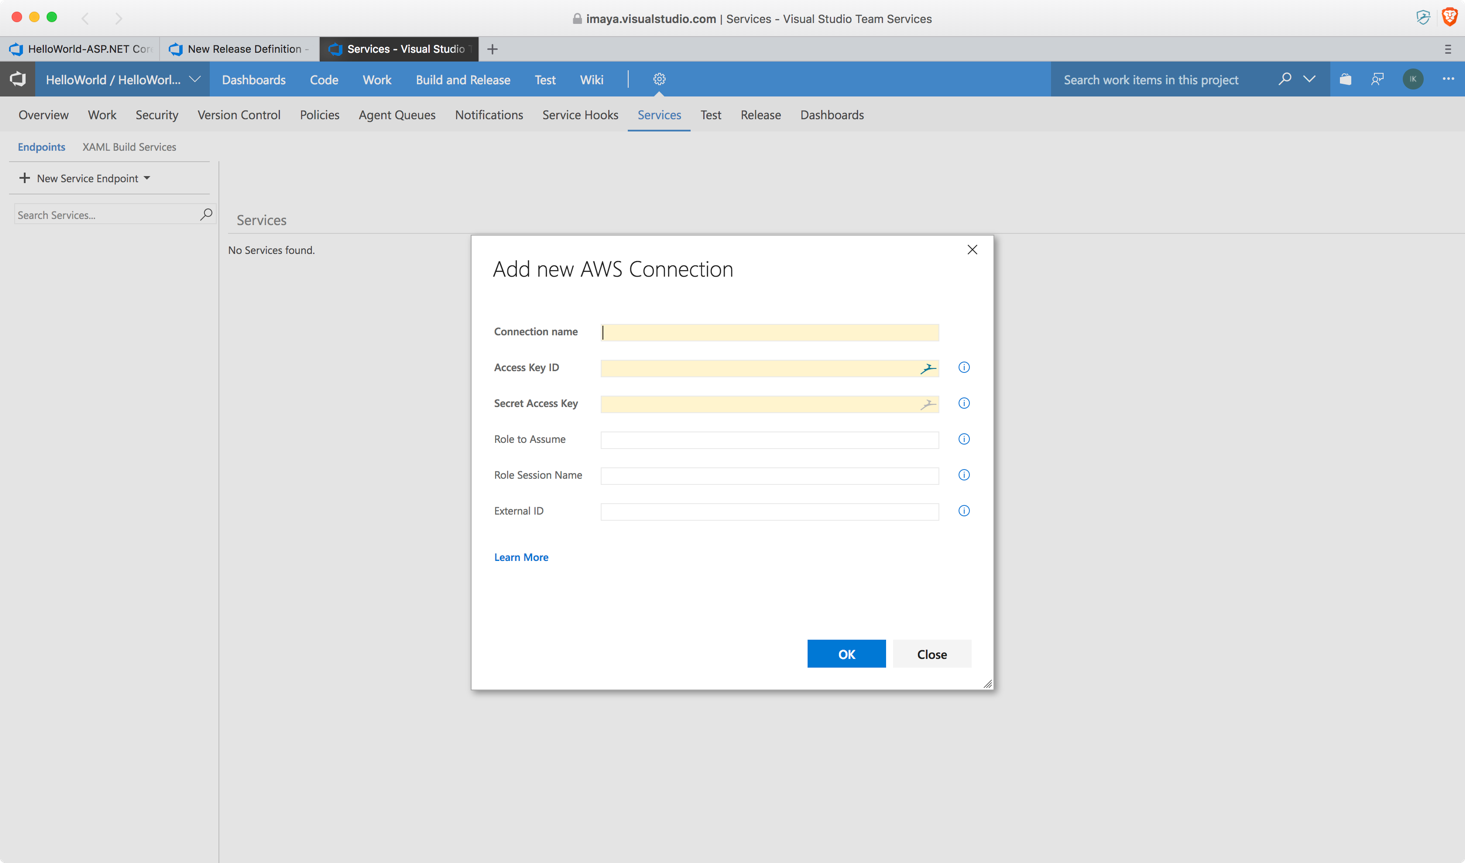
24. VSTS will show this screen where you can enter the **Access Key ID**
and **Secret Access Key** that belongs to your IAM user account on
AWS portal. Give the connection a name and fill in the Access Key ID
and Secret Access Key fields only. Leave others blank as they are
not mandatory.
25. Once you click **OK** and save, you should see a screen similar to
this.
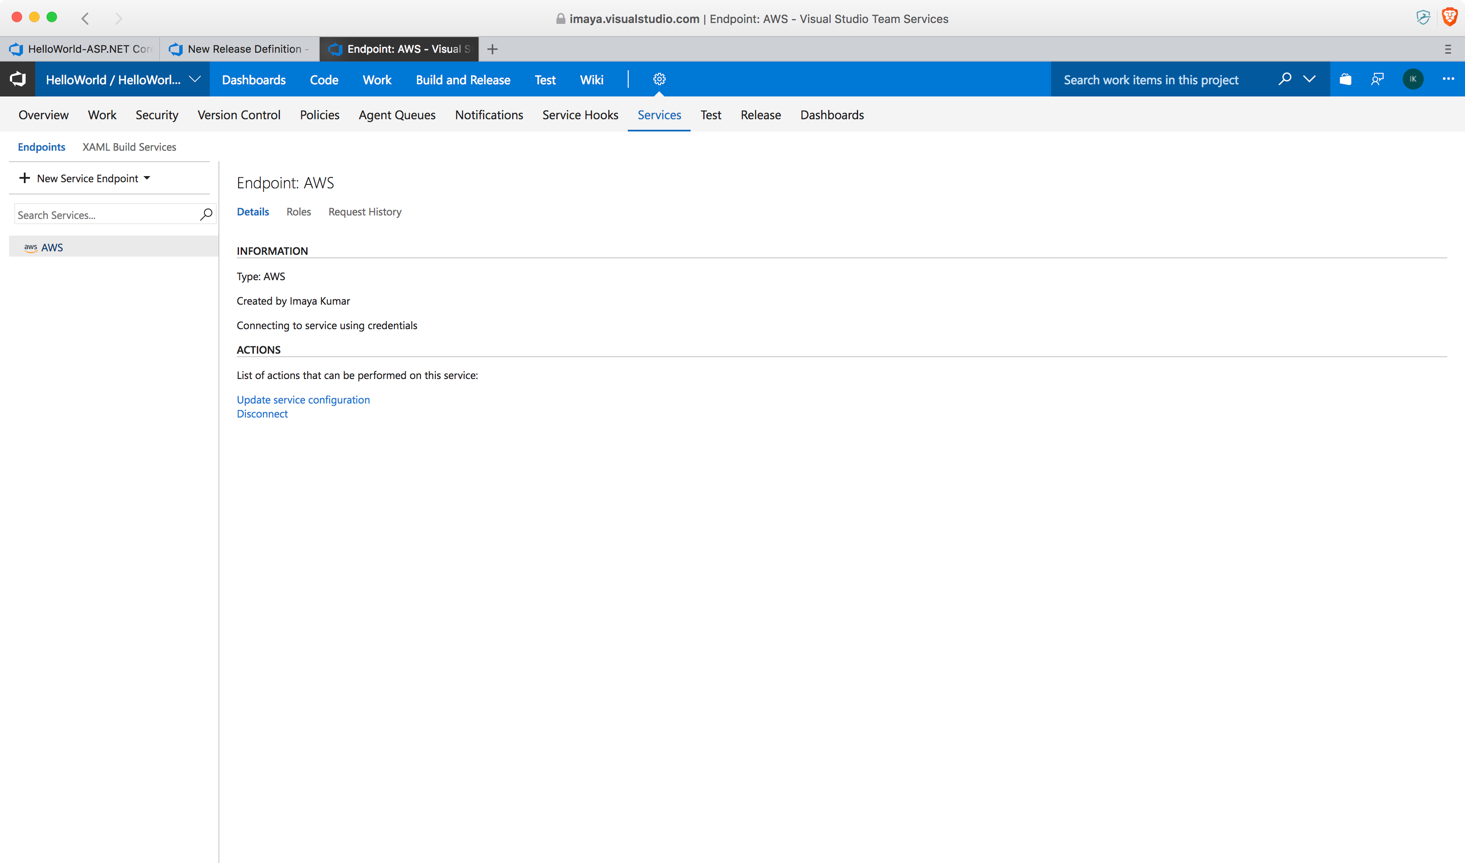
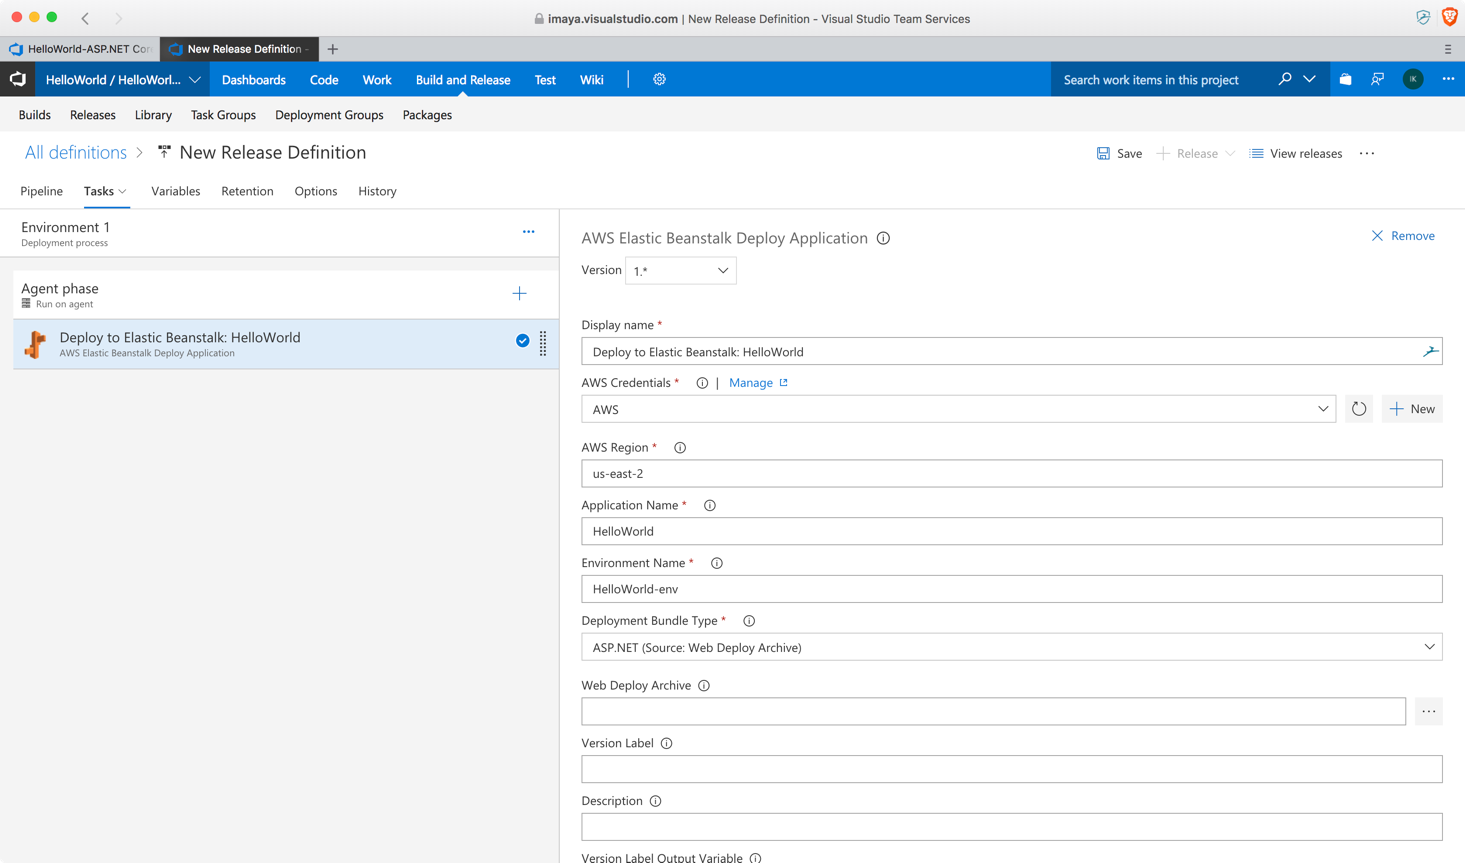
26. Now, go back to your Release definition screen and give the new
service endpoint name you just created. VSTS should automatically
resolve the name from its configuration. Enter the region in which
your sample Beanstalk application was created. Fill in the
Application name and Environment name from the AWS console. Select
**ASP.NET (Source Web Deploy Archive)** option under Deployment Bundle Type drop down options. Make sure this is selected correctly, otherwise the deployment will fail.
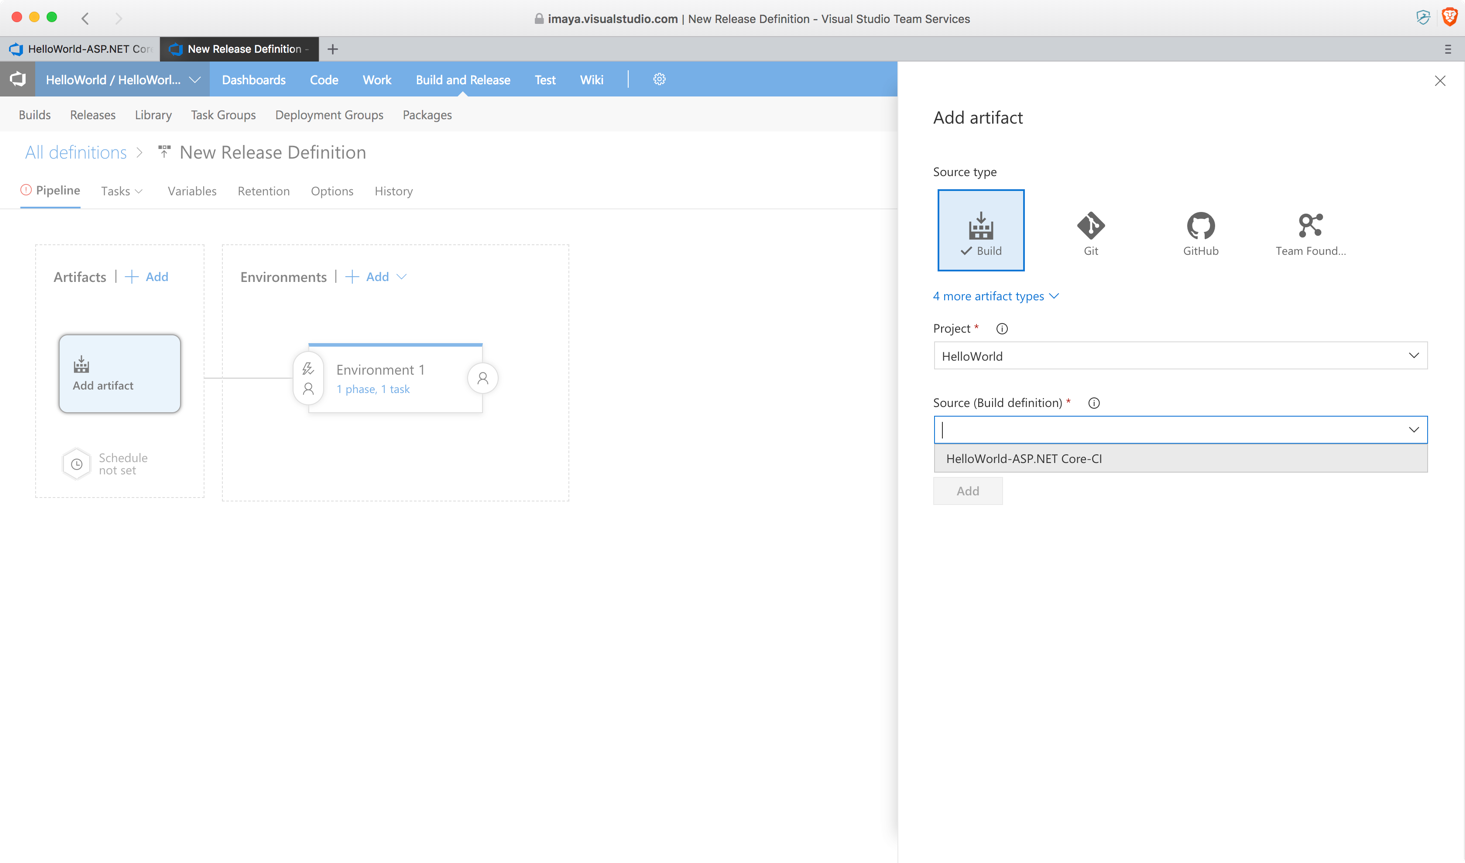
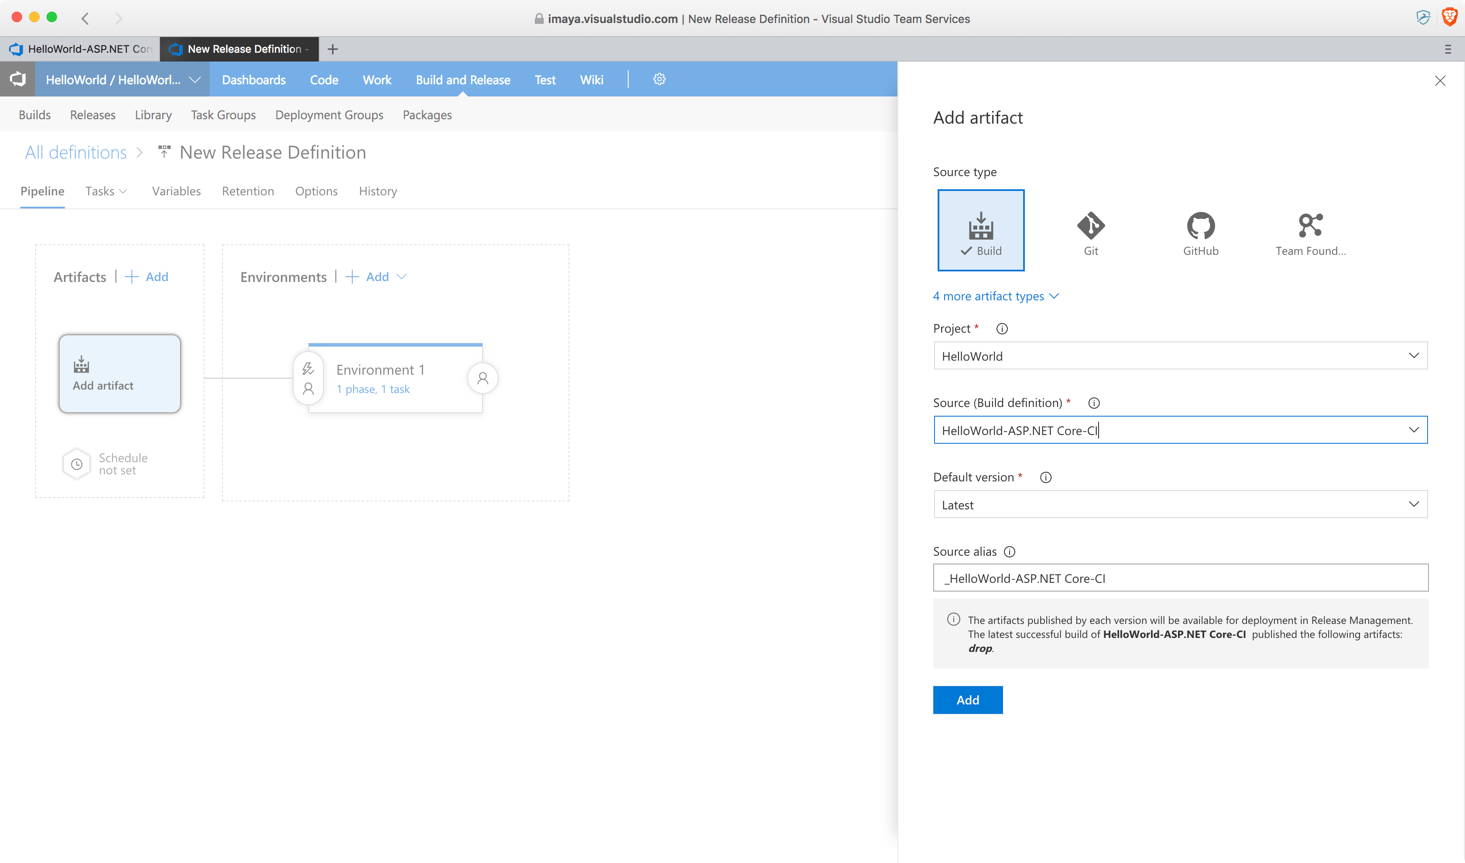
27. Now let\'s configure the location of the Build artifact for the
Release definition to pick up. Click on **Artifacts** and select the
options as shown below.
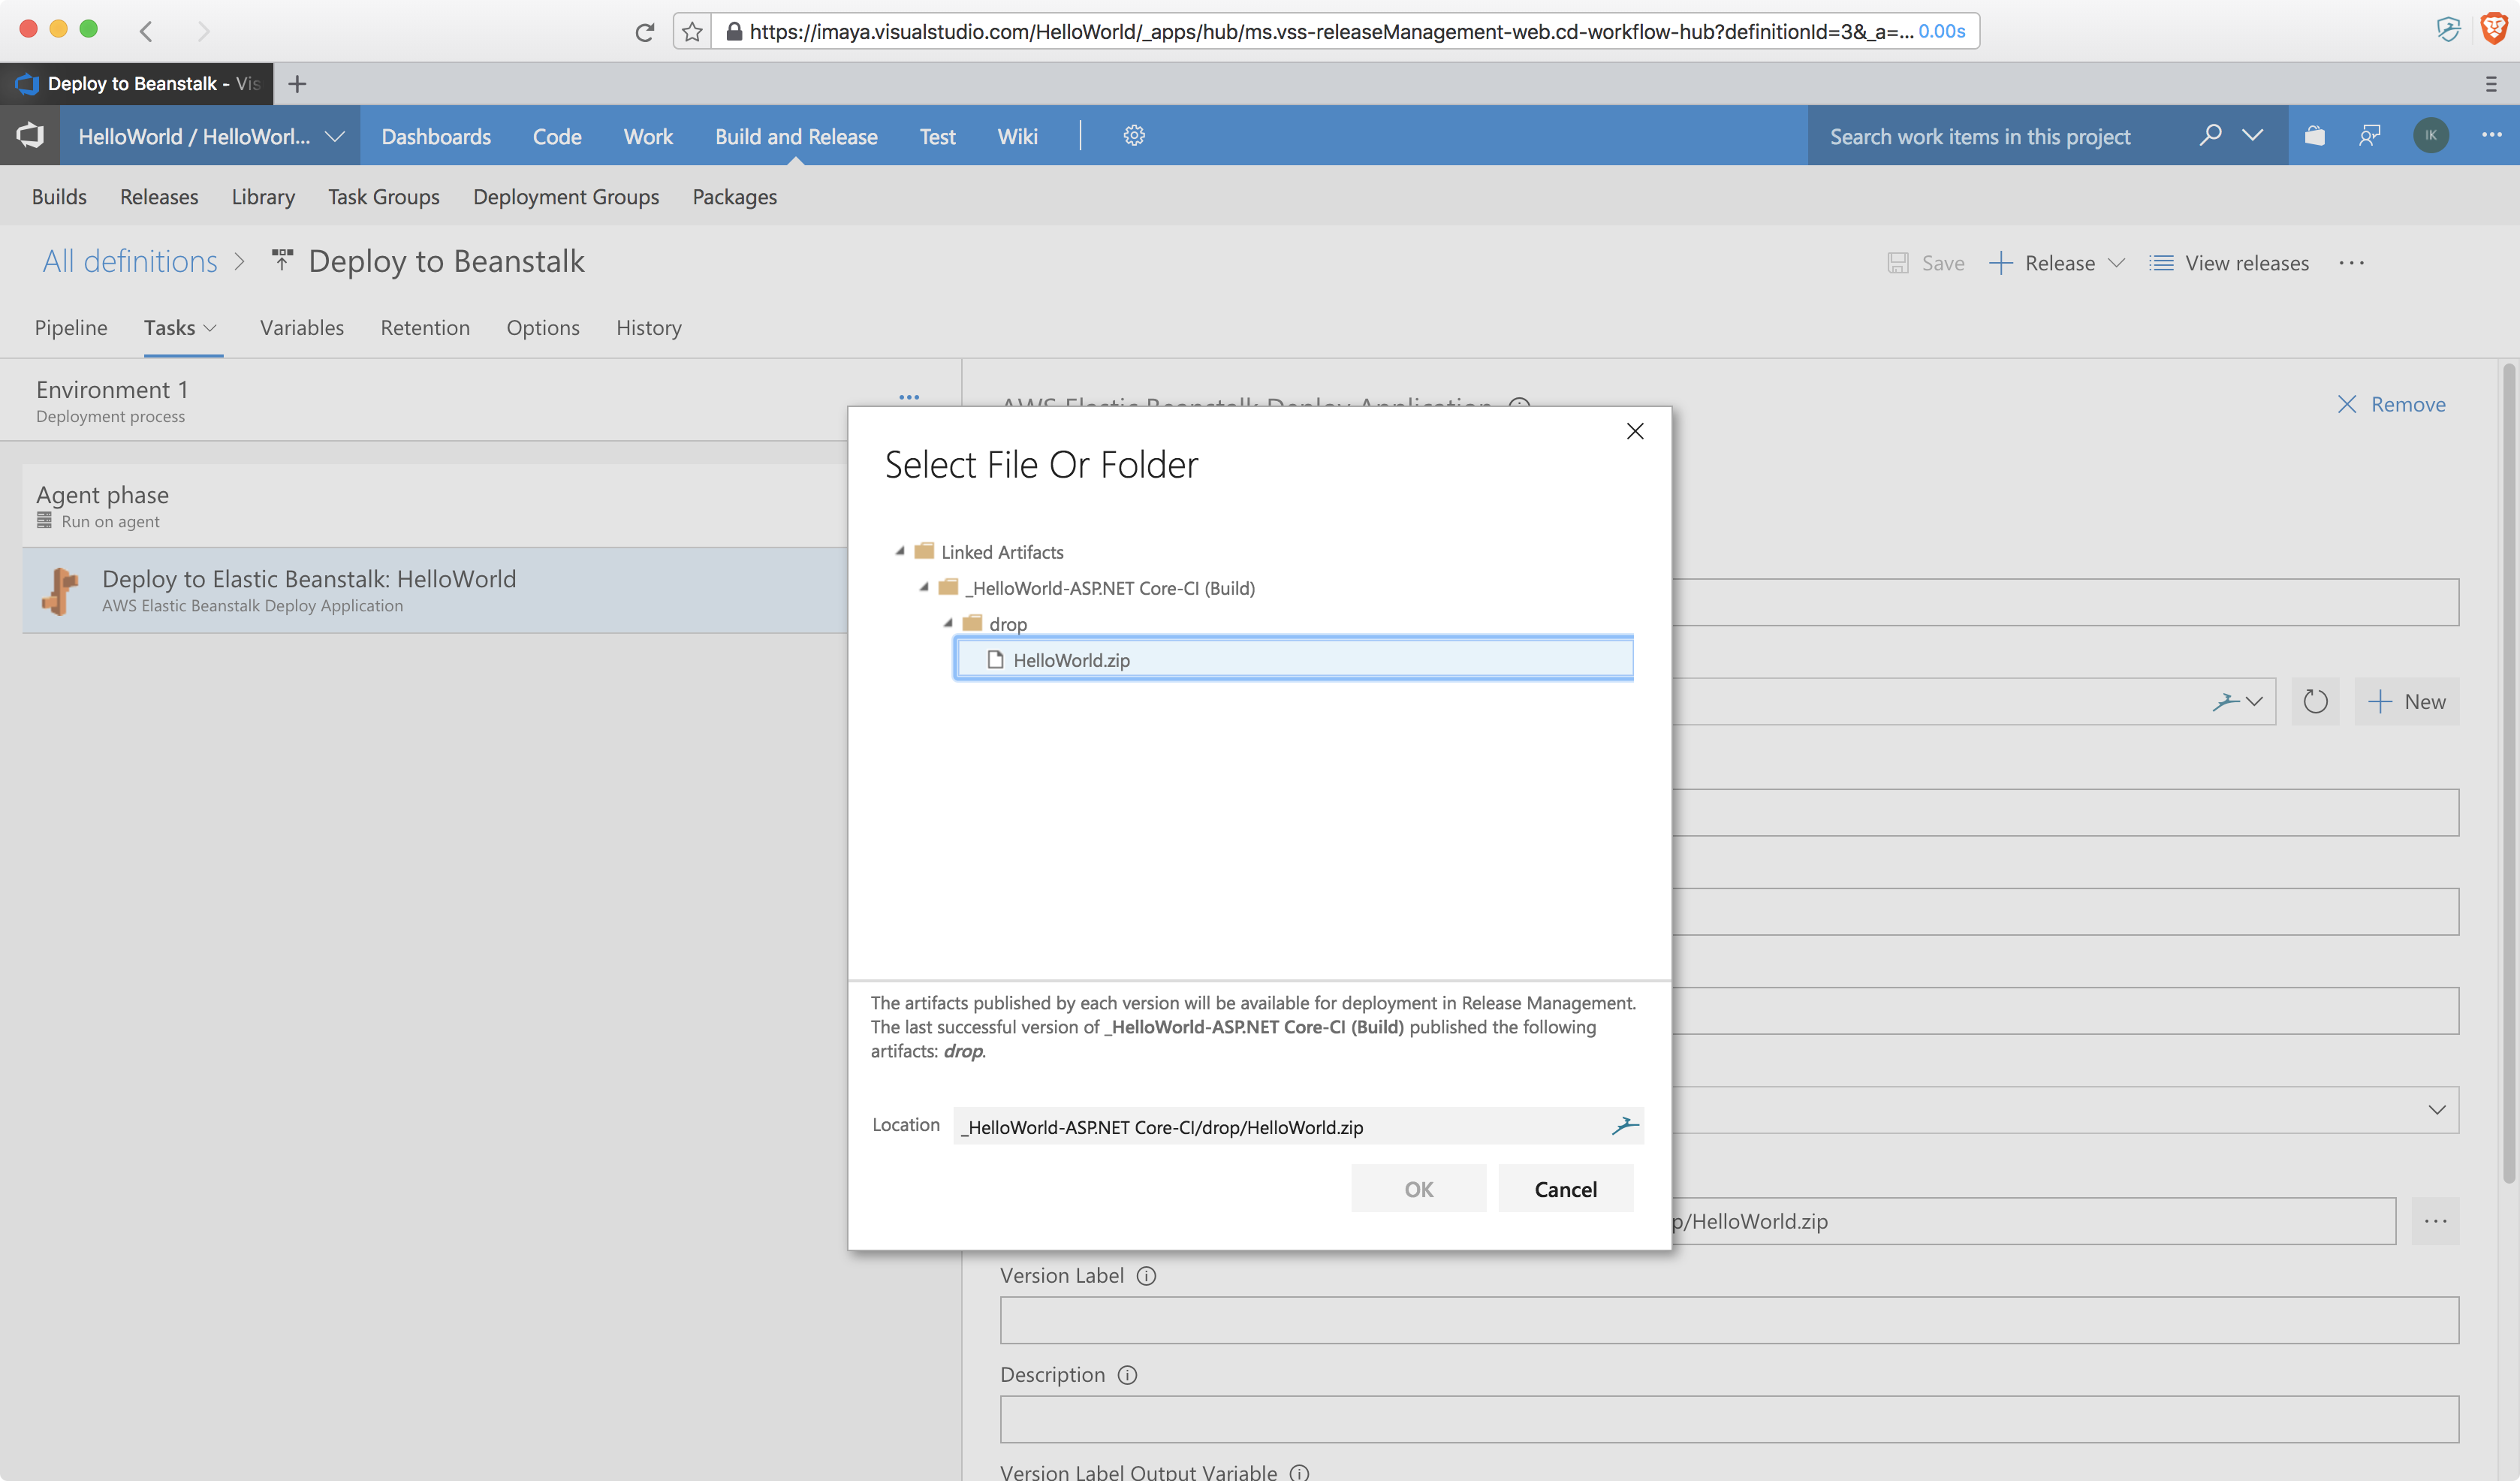
28. Now that we have configured the artifact location, go back to the
Deploy task and click on the location picker button in the
**Published Application Path** field. You should see a screen like
this. Select the HelloWorld.zip file as the option and click **OK.
**
29. Your final configuration screen should look like this. Rename the
release definition if you like and save.

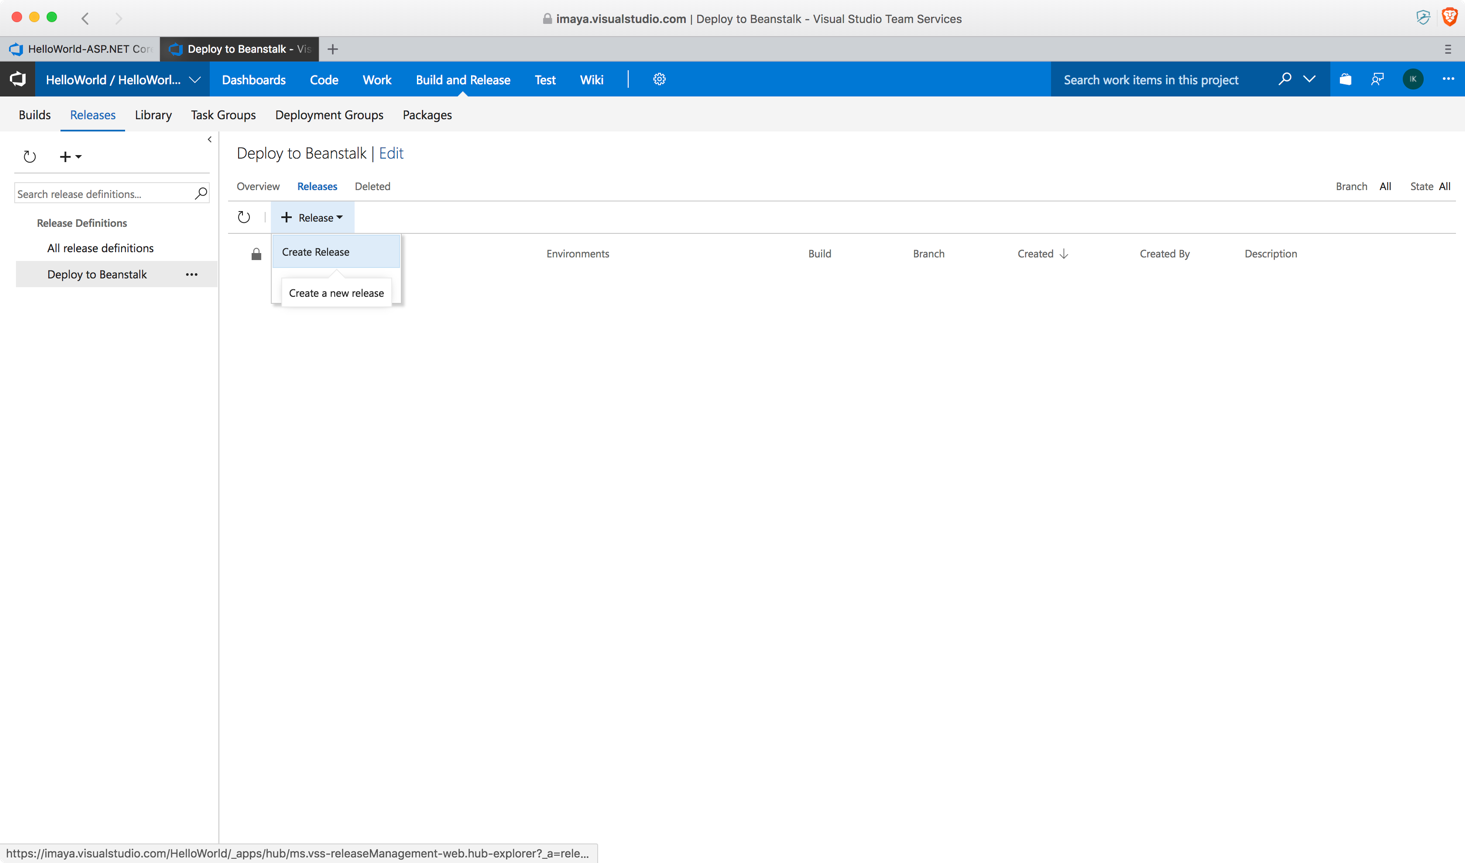
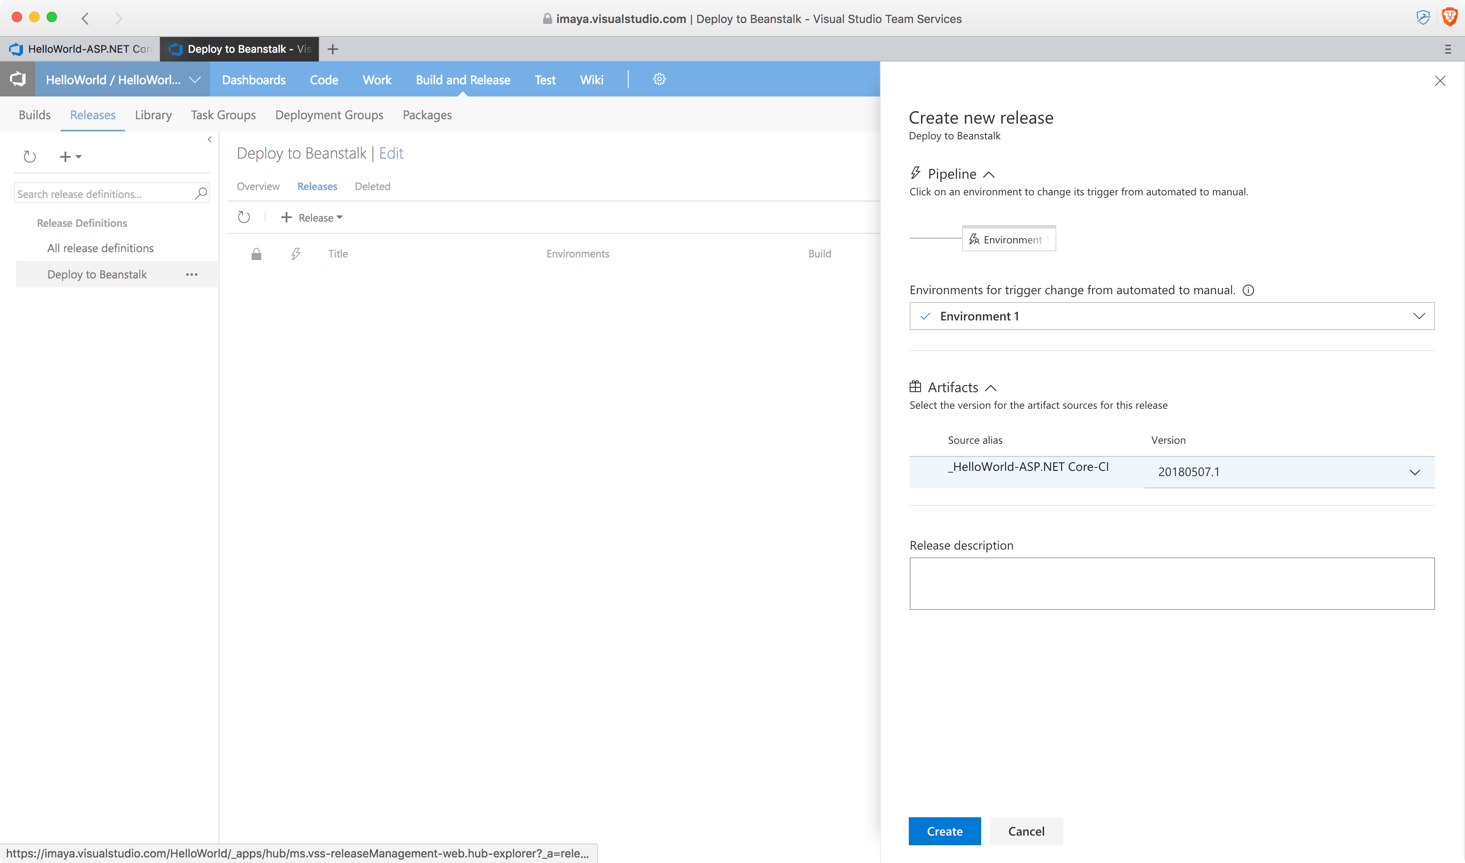
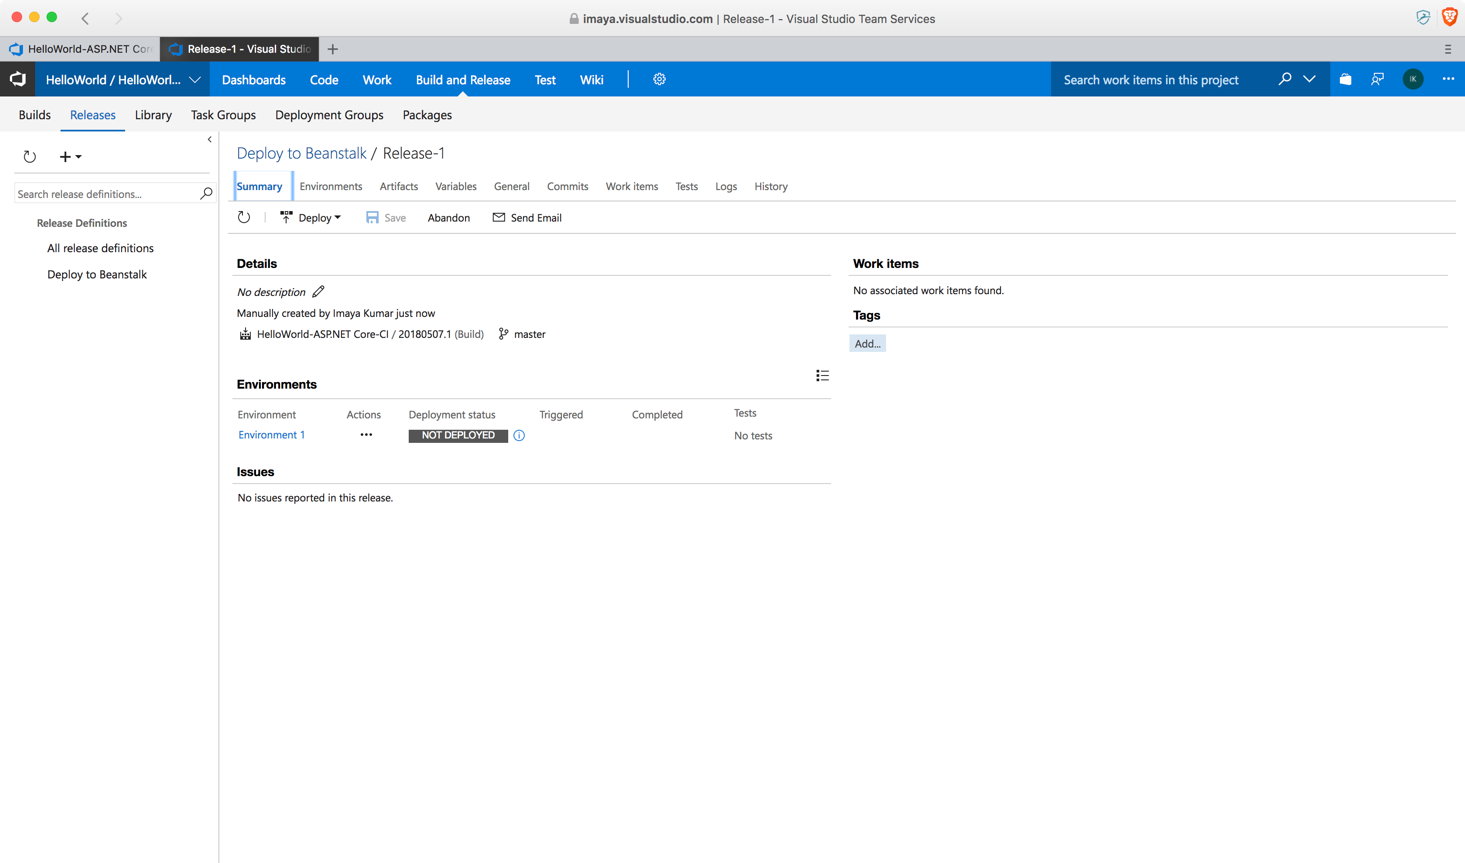
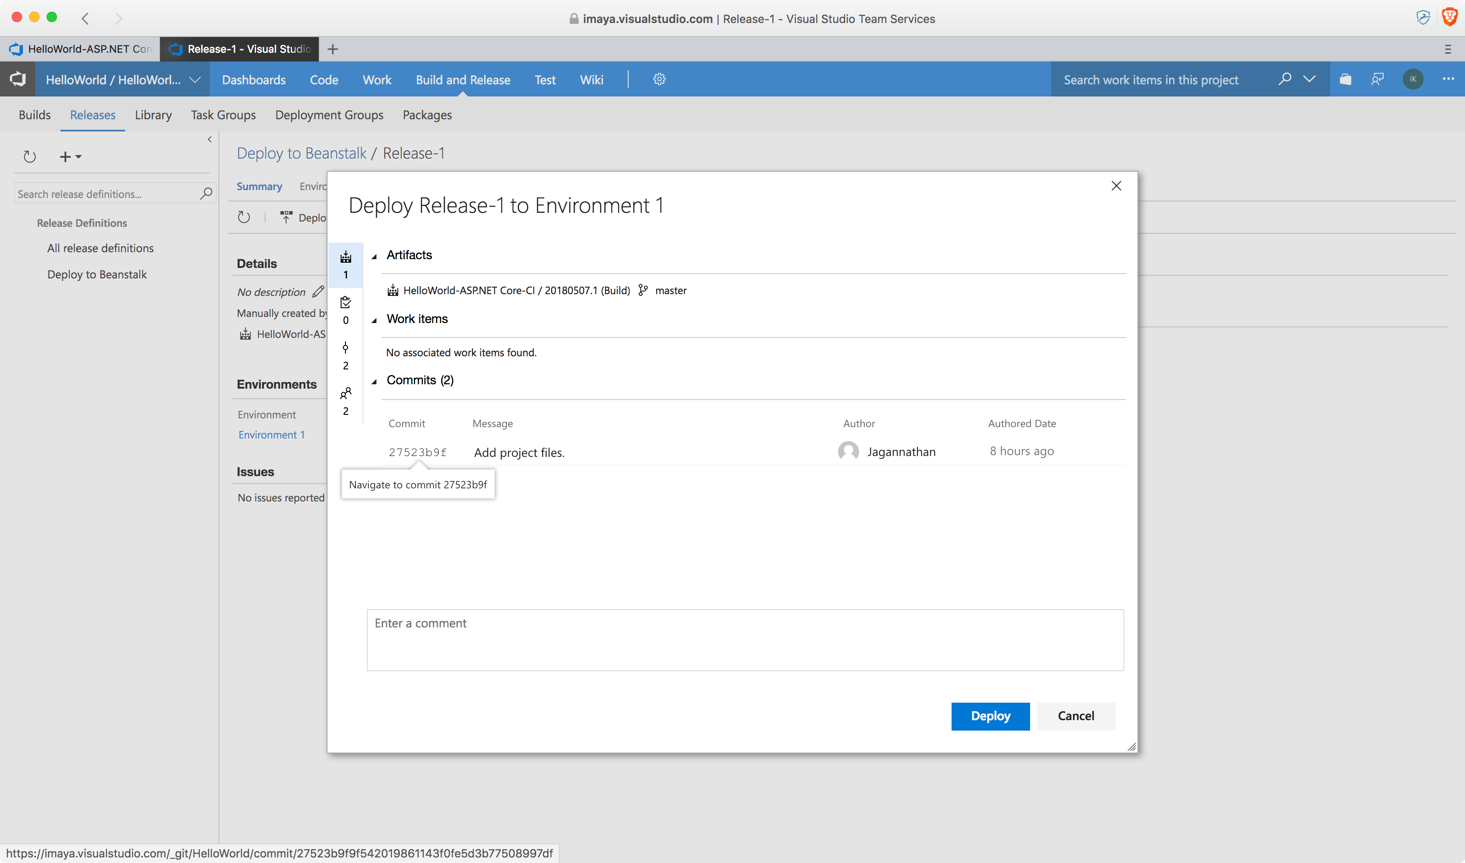
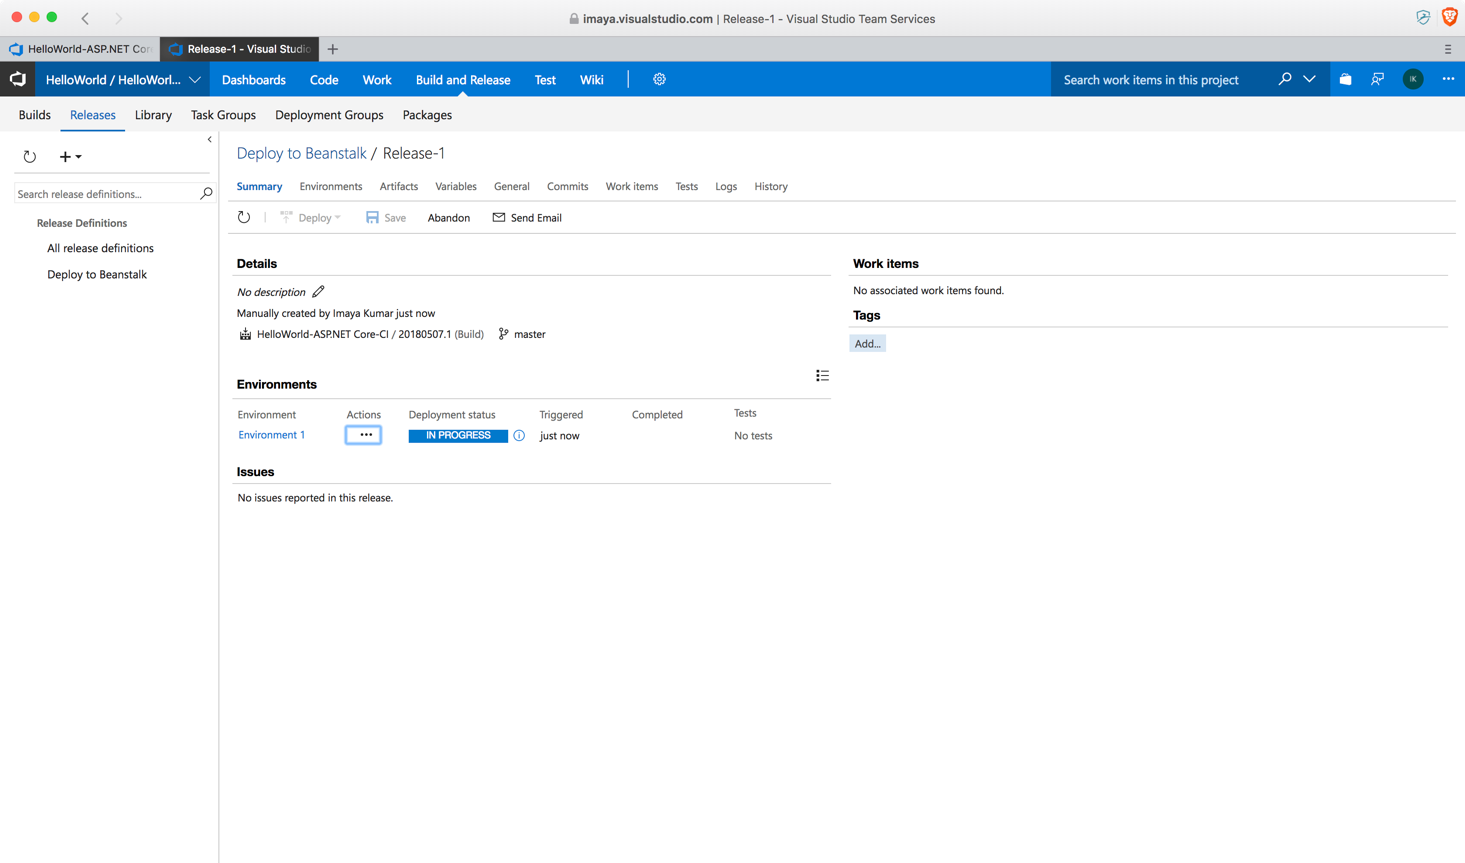
30. Go to your release definition and follow the steps below as shown in
the screenshots to create a new release/deployment to the AWS
Beanstalk instance.
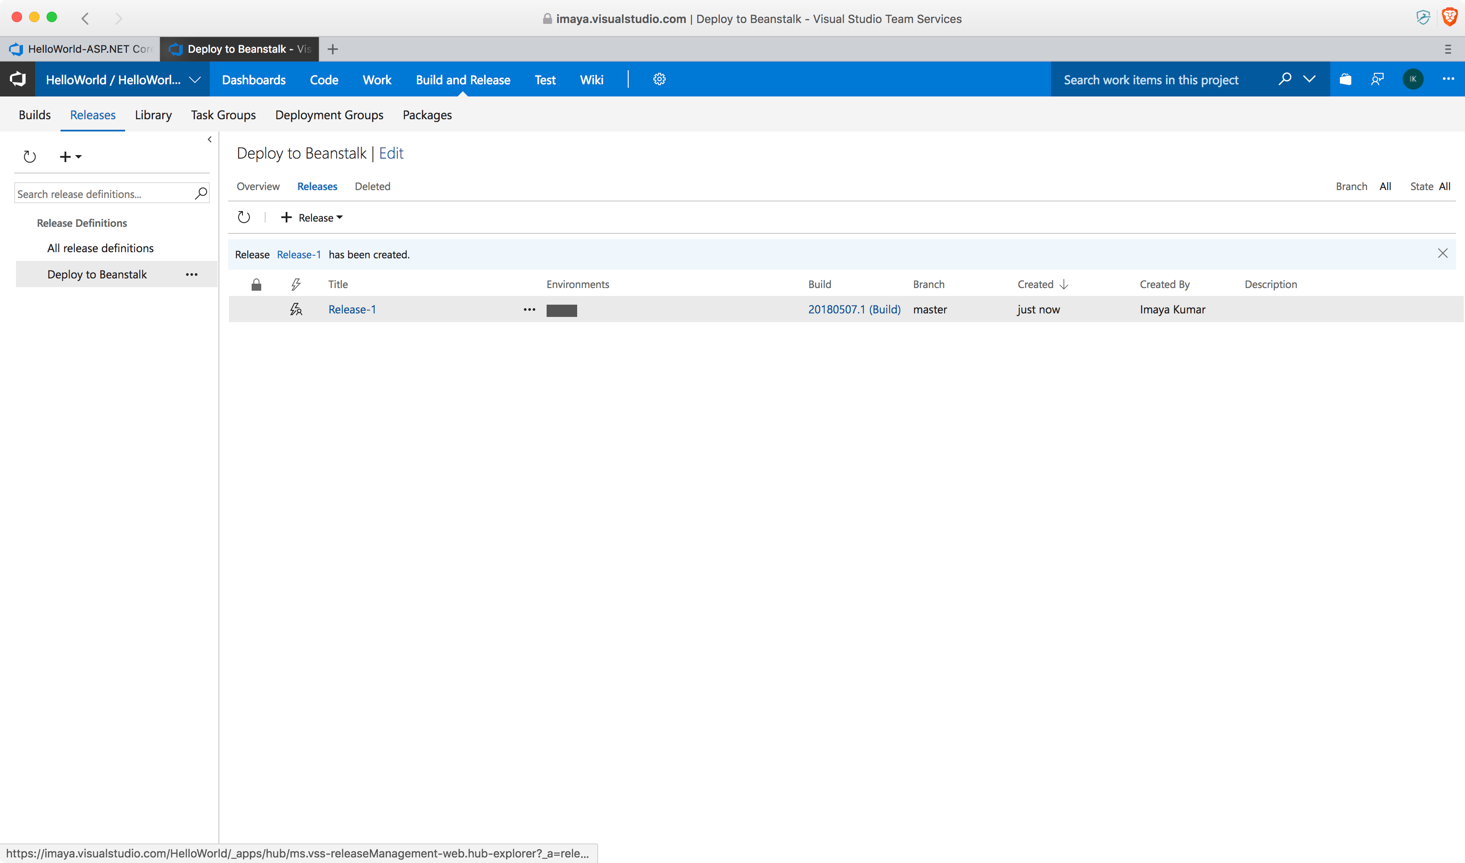

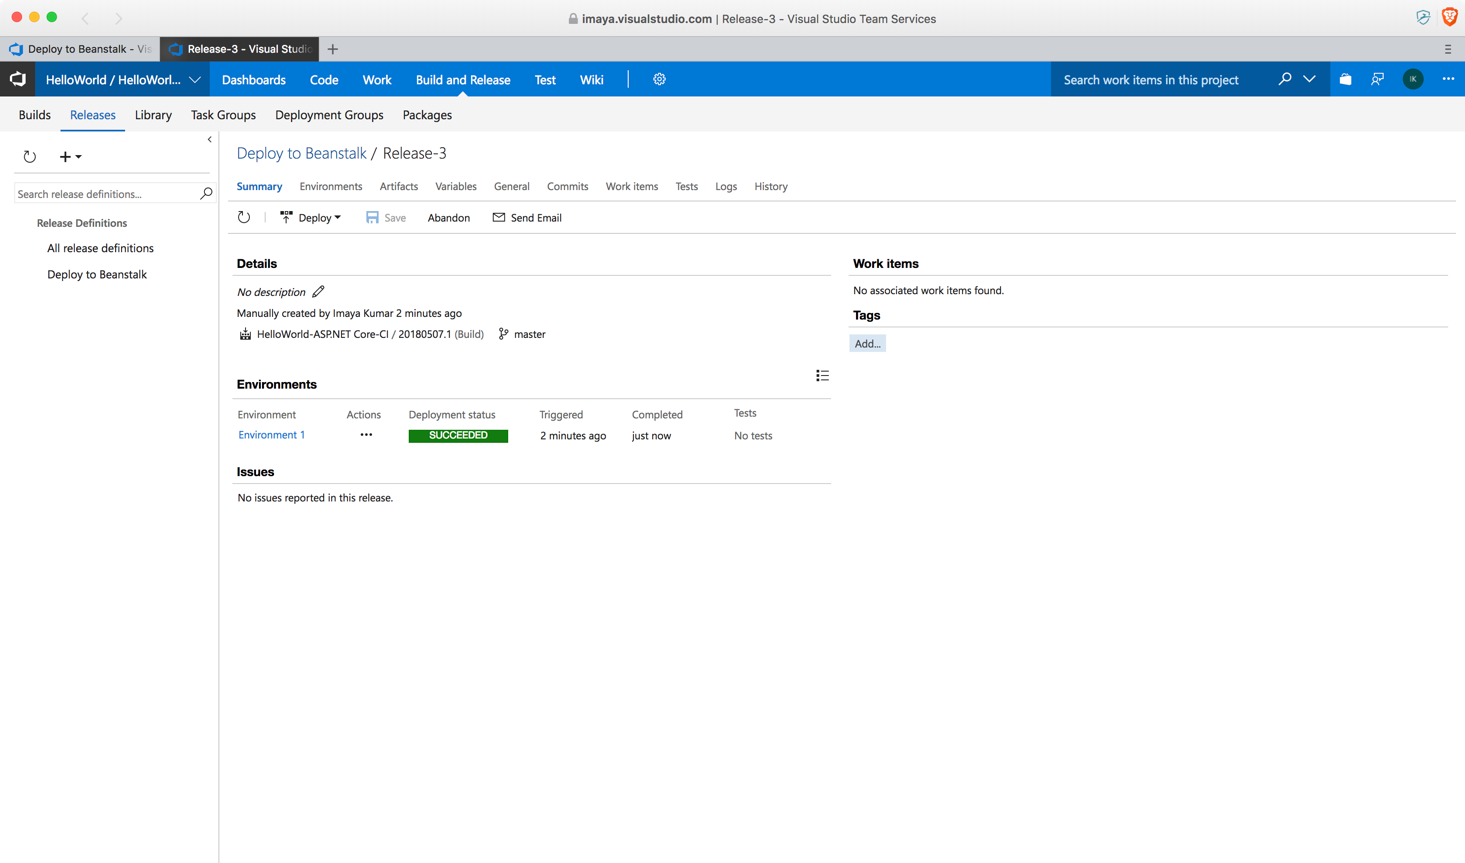
31. If the deployment is successful, your VSTS screen will look like
this.
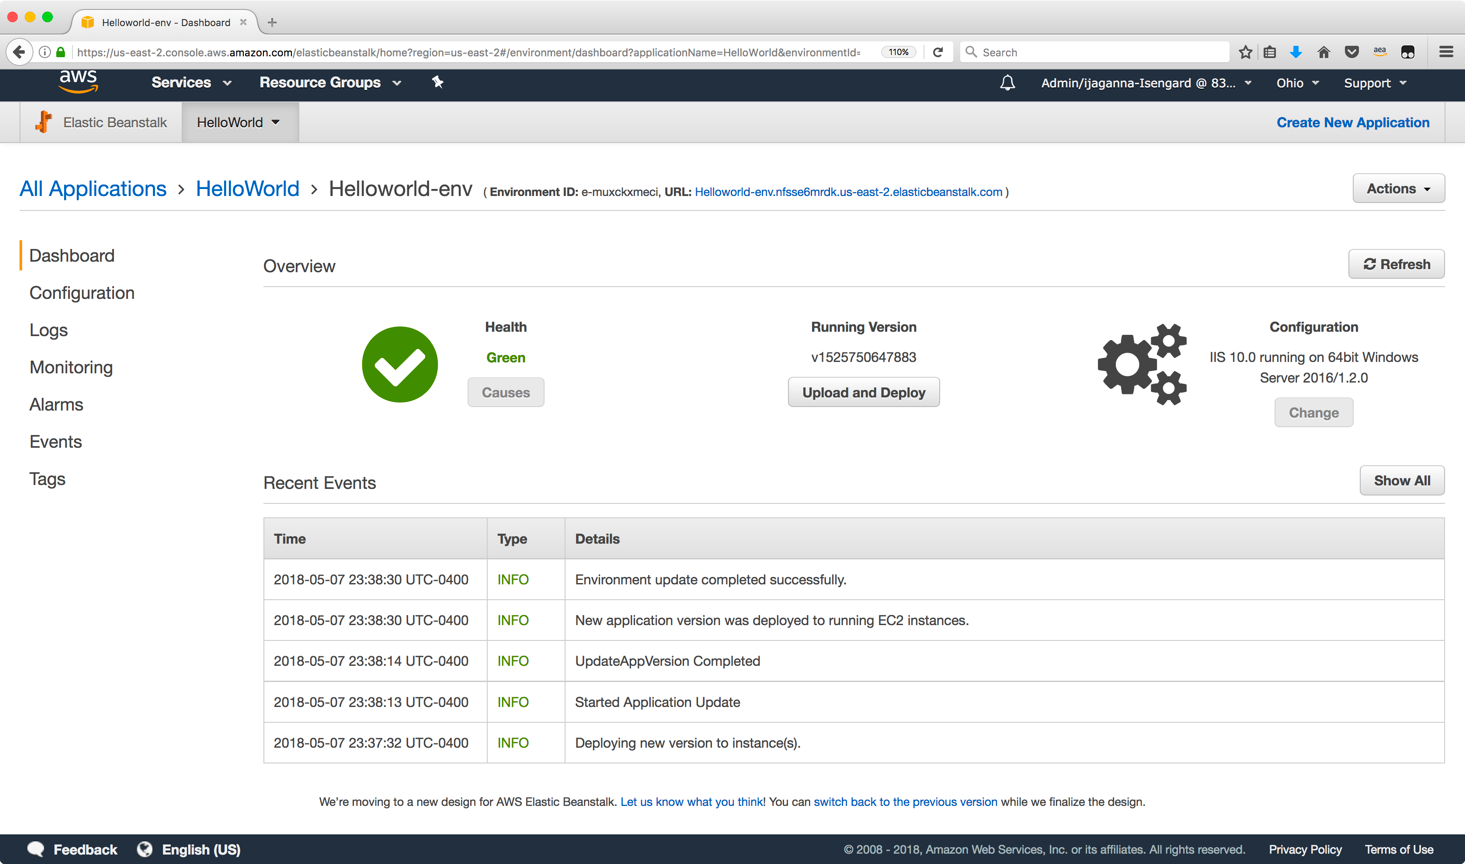
32. Head over to your AWS Console and you should see a screen like this.
Notice that the **Recent Events** table is indicating a successful
deployment.
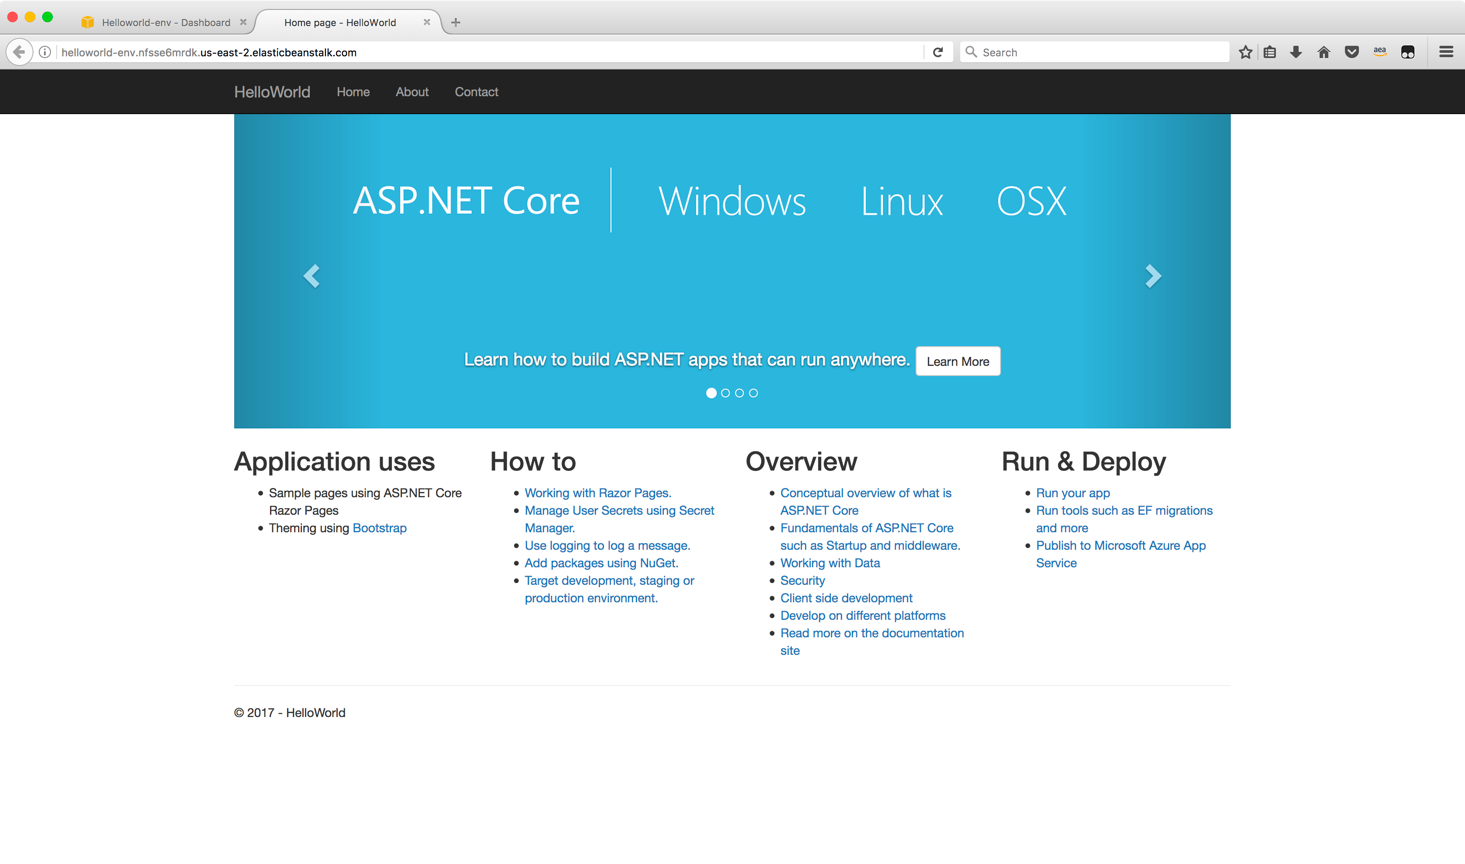
33. Once you click on the URL, your browser should now show the default
ASP.NET Core application that you pushed through the CICD pipeline
instead of the sample Beanstalk application that was originally
created.
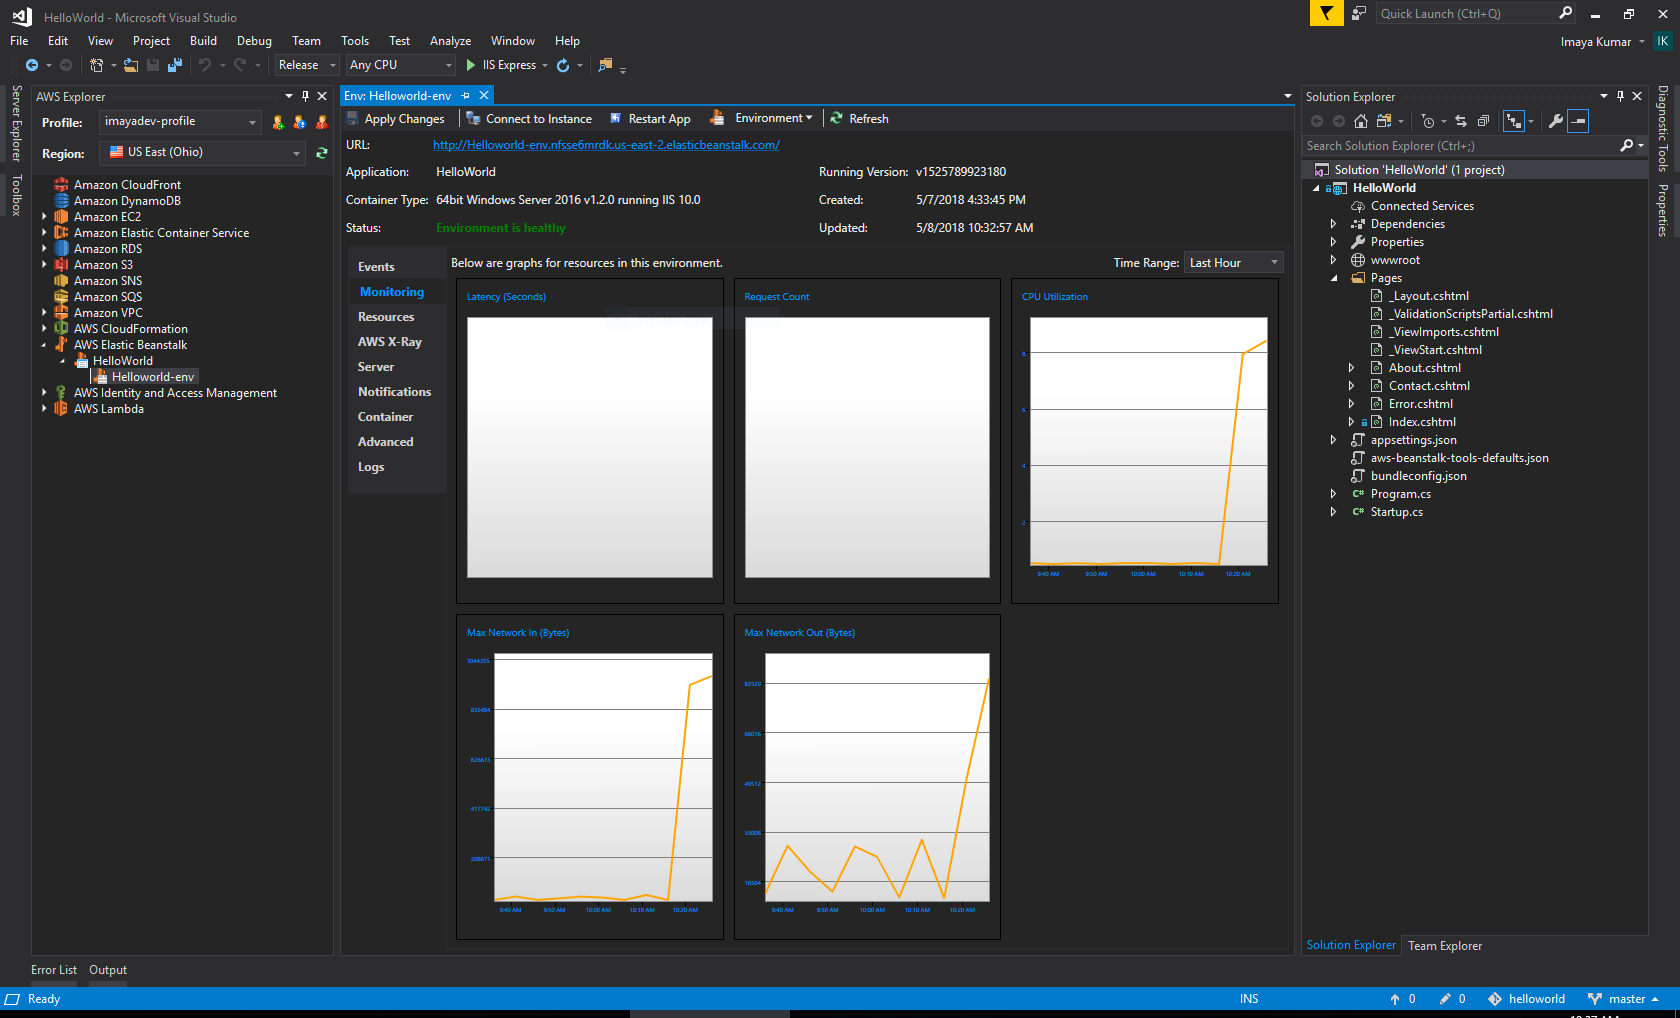
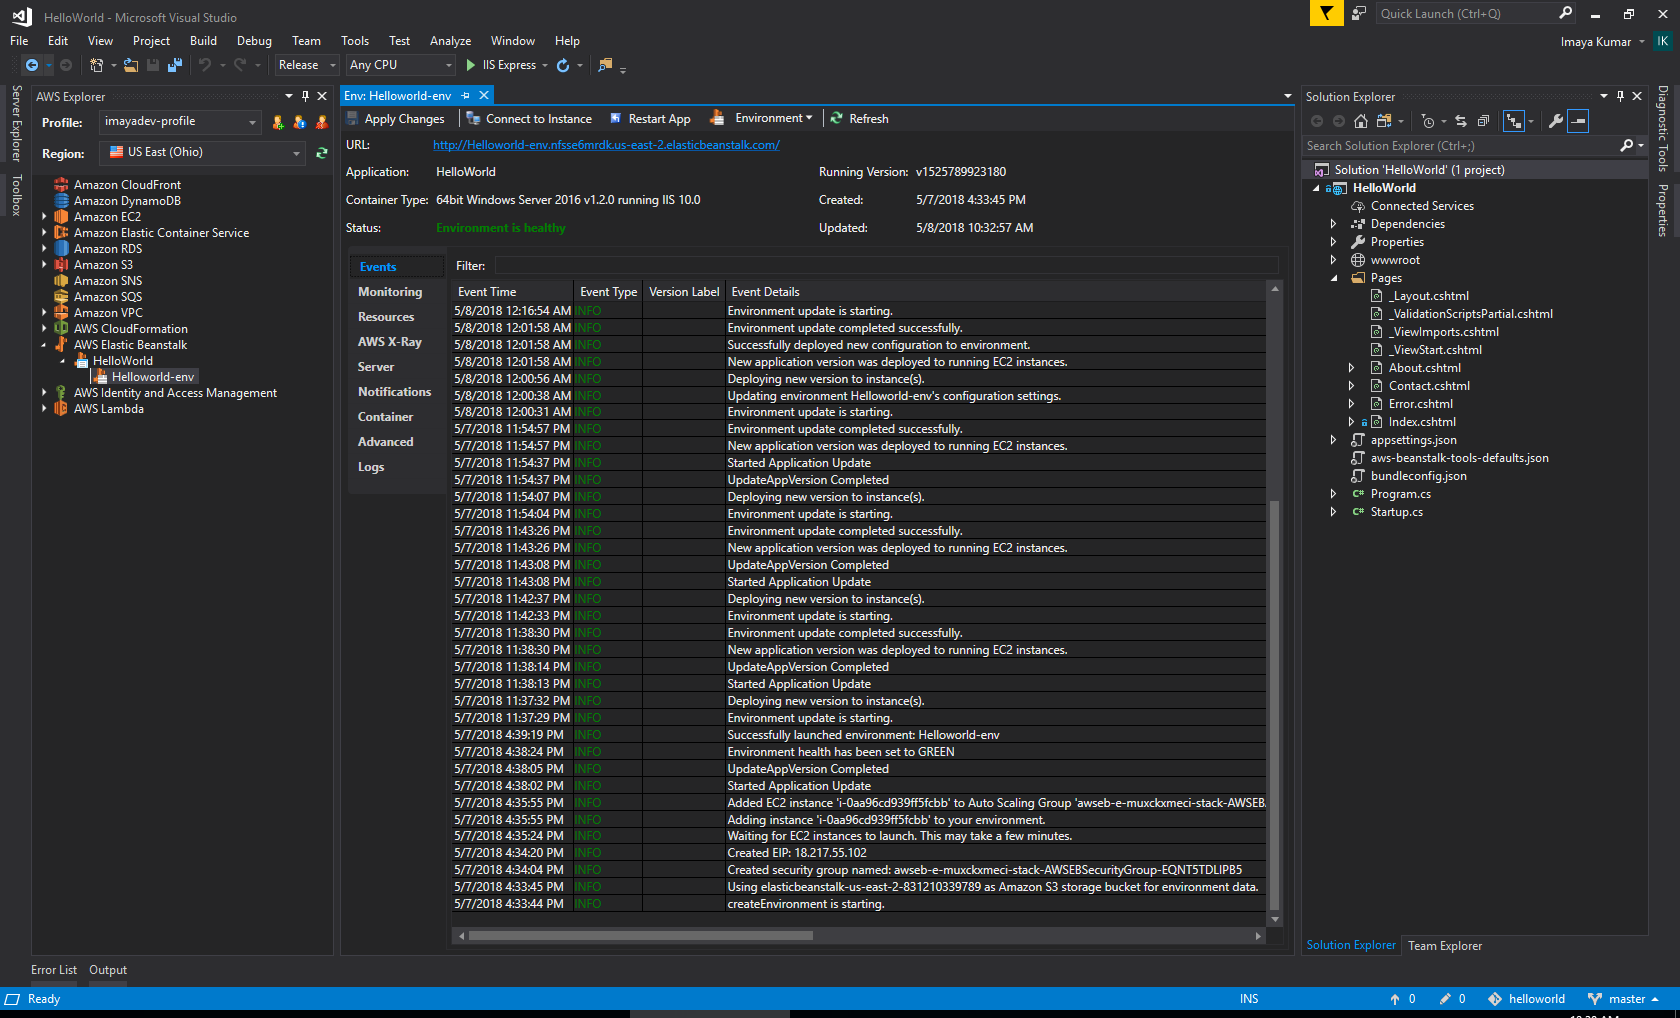
## Additional Info
If you had installed the AWS Toolkit for Visual Studio, you will be
able to make use of many of its exciting features. For example, you
will be able to see event logs, monitoring graphs and much more as
shown below.