1. Click the **Launch Stack** link above for the region of your choice. 1. Click **Next** on the Select Template page. 1. Provide a globally unique name for the **Website Bucket Name** such as `nlp-yourname` and click **Next**. 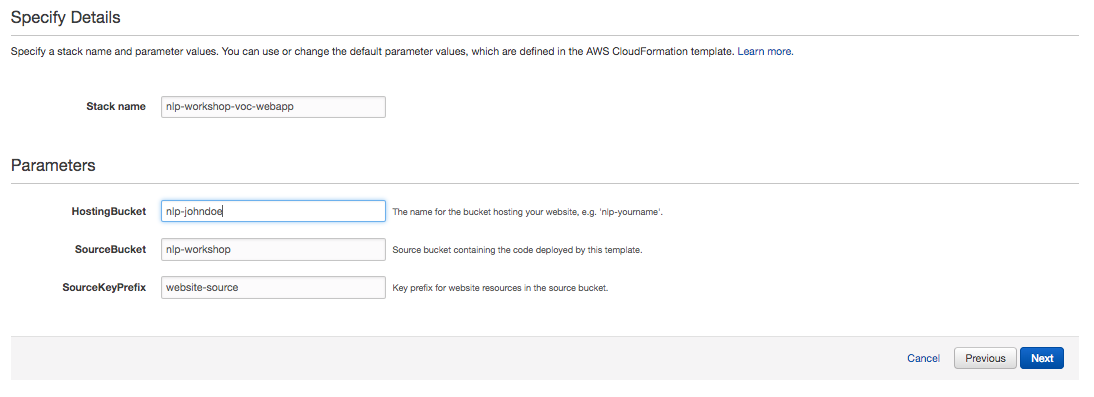 1. On the Options page, leave all the defaults and click **Next**. 1. On the Review page, check the box to acknowledge that CloudFormation will create IAM resources and click **Create**. 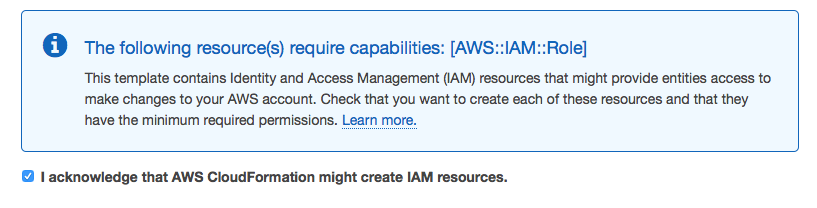 This template uses a custom resource to copy the static website assets from a central S3 bucket into your own dedicated bucket. In order for the custom resource to write to the new bucket in your account, it must create an IAM role it can assume with those permissions. 1. Wait for the `nlp-workshop-voc-webapp` stack to reach a status of `CREATE_COMPLETE`. 1. With the `nlp-workshop-voc-webapp` stack selected, click on the **Outputs** tab and click on the WebsiteURL link. 1. Verify the VOC application home page is loading properly and move on to the next module, [Sentiment Analysis](../2_SentimentAnalysis).
1. In the AWS Management Console choose **Services** then select **S3** under Storage. 1. Choose **+Create Bucket** 1. Provide a globally unique name for your bucket such as `nlp-firstname-lastname`. 1. Select the Region you've chosen to use for this workshop from the dropdown. 1. Choose **Next** in the lower right of the dialog without selecting a bucket to copy settings from. 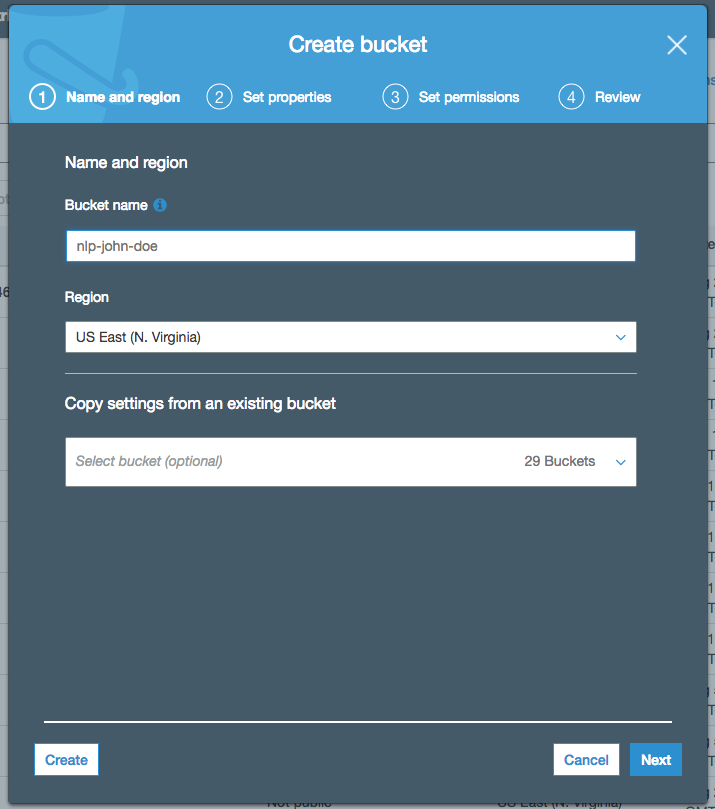 1. Leave everything default on `Configure options` screen and choose **Next** in the lower right of the dialog. 1. On `Permissions` screen, grant public read access to this bucket, by selecting the option `Grant public read access to this bucket` under the dropdown for `Manage public permissions`. Note here, that S3 displays a warning stating that the bucket is world readable. This is not recommended for any S3 buckets that you'll store data or files you work with. However, this bucket being a static website hosting bucket, read permission is needed. Therefore ignore this warning, but keep in mind to not make any of your other buckets public. 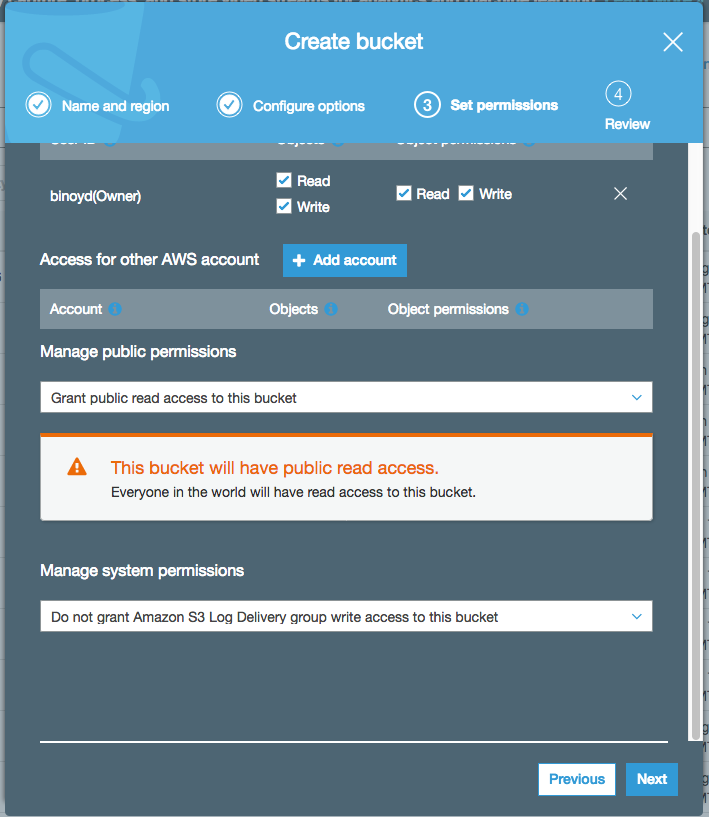 1. Choose **Next** in the lower right of the dialog to go to Review screen, and verify the screen showed is similar to the example shown below. 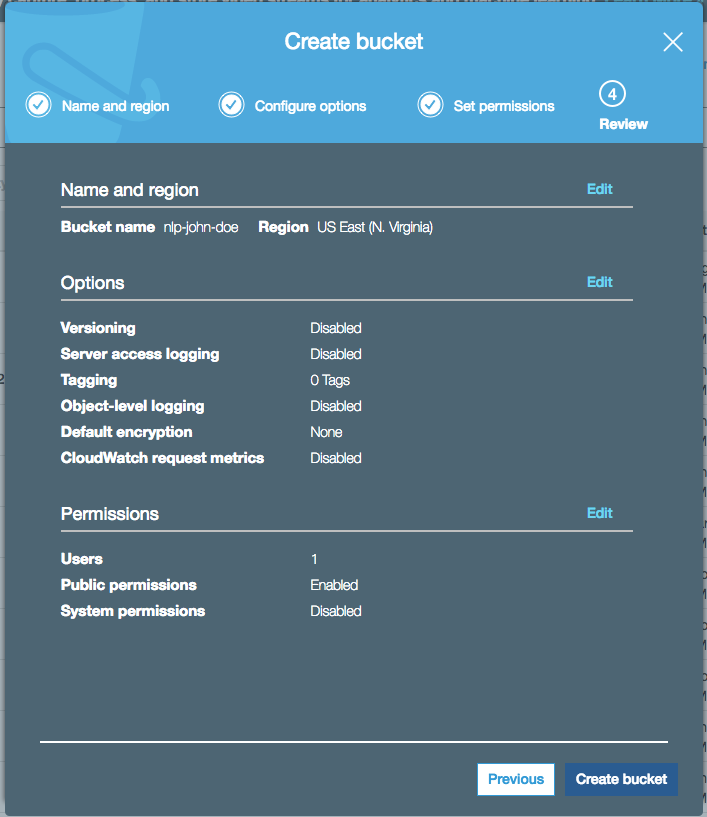 1. Choose **Create Bucket** to complete the S3 bucket creation. You'll use this bucket to host your website, which consists of in this case some HTML and JavaScript files.
If you already have the CLI installed and configured, you can use it to copy the necessary web assets from `s3://nlp-workshop/website-source` to your bucket. Execute the following command making sure to replace `YOUR_BUCKET_NAME` with the name you used in the previous section and `YOUR_BUKET_REGION` with the region code (e.g. us-east-2) where you created your bucket. aws s3 sync s3://nlp-workshop/website-source s3://YOUR_BUCKET_NAME --region YOUR_BUCKET_REGION If the command was successful, you should see a list of objects that were copied to your bucket.
If you are unable to use either of the previous methods you can launch the provided CloudFormation template in order to copy the necessary assets into your S3 bucket. Region| Launch ------|----- US East (N. Virginia) | [](https://console.aws.amazon.com/cloudformation/home?region=us-east-1#/stacks/new?stackName=nlp-copy-objects&templateURL=https://s3.amazonaws.com/nlp-workshop/templates/webapp-copy-objects.json) US East (Ohio) | [](https://console.aws.amazon.com/cloudformation/home?region=us-east-2#/stacks/new?stackName=nlp-copy-objects&templateURL=https://s3.amazonaws.com/nlp-workshop/templates/webapp-copy-objects.json) US West (Oregon) | [](https://console.aws.amazon.com/cloudformation/home?region=us-west-2#/stacks/new?stackName=nlp-copy-objects&templateURL=https://s3.amazonaws.com/nlp-workshop/templates/webapp-copy-objects.json) EU (Ireland) | [](https://console.aws.amazon.com/cloudformation/home?region=eu-west-1#/stacks/new?stackName=nlp-copy-objects&templateURL=https://s3.amazonaws.com/nlp-workshop/templates/webapp-copy-objects.json) 1. Click the **Launch Stack** link above for the region where you created your website bucket. 1. Click **Next** on the Select Template page. 1. Enter the name of your S3 bucket (e.g. `nlp-firstname-lastname`) for **Website Bucket Name** and click **Next**. 1. On the Options page, leave all the defaults and click **Next**. 1. On the Review page, check the box to acknowledge that CloudFormation will create IAM resources and click **Create**.  This template uses a custom resource to copy the static website assets from a central S3 bucket into your own dedicated bucket. In order for the custom resource to write to the new bucket in your account, it must create an IAM role it can assume with those permissions. 1. Wait for the `nlp-copy-objects` stack to reach a status of `CREATE_COMPLETE`.
1. If you have not granted public read access to your website hosting bucket during creation, using the following steps you can add the read permission for everyone. 1. In the S3 console, select the name of the bucket you created in section 1. 1. Choose the **Permissions** tab, then choose **Bucket Policy**. 1. Enter the following policy document into the bucket policy editor replacing `YOUR_BUCKET_NAME` with the name of the bucket you created in section 1. If you already added public read permission in section 1, then just verify that following code snippet is present in policy editor.: ```json { "Version": "2012-10-17", "Statement": [ { "Effect": "Allow", "Principal": "*", "Action": "s3:GetObject", "Resource": "arn:aws:s3:::YOUR_BUCKET_NAME/*" } ] } ``` 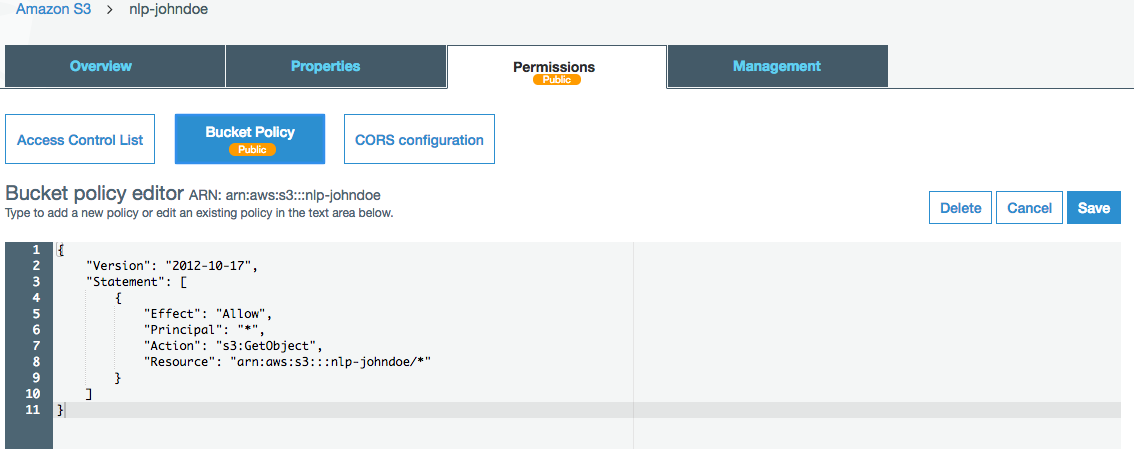 1. Choose **Save** to apply the new policy.
1. From the bucket detail page in the S3 console, choose the **Properties** tab. 1. Choose the **Static website hosting** card. 1. Select **Use this bucket to host a website** and enter `unicornfeedback.html` for the Index document. Leave the other fields blank. 1. Note the **Endpoint** URL at the top of the dialog before choosing **Save**. You will use this URL throughout the rest of the workshop to view your web application. From here on this URL will be referred to as your website's base URL. 1. Click **Save** to save your changes. 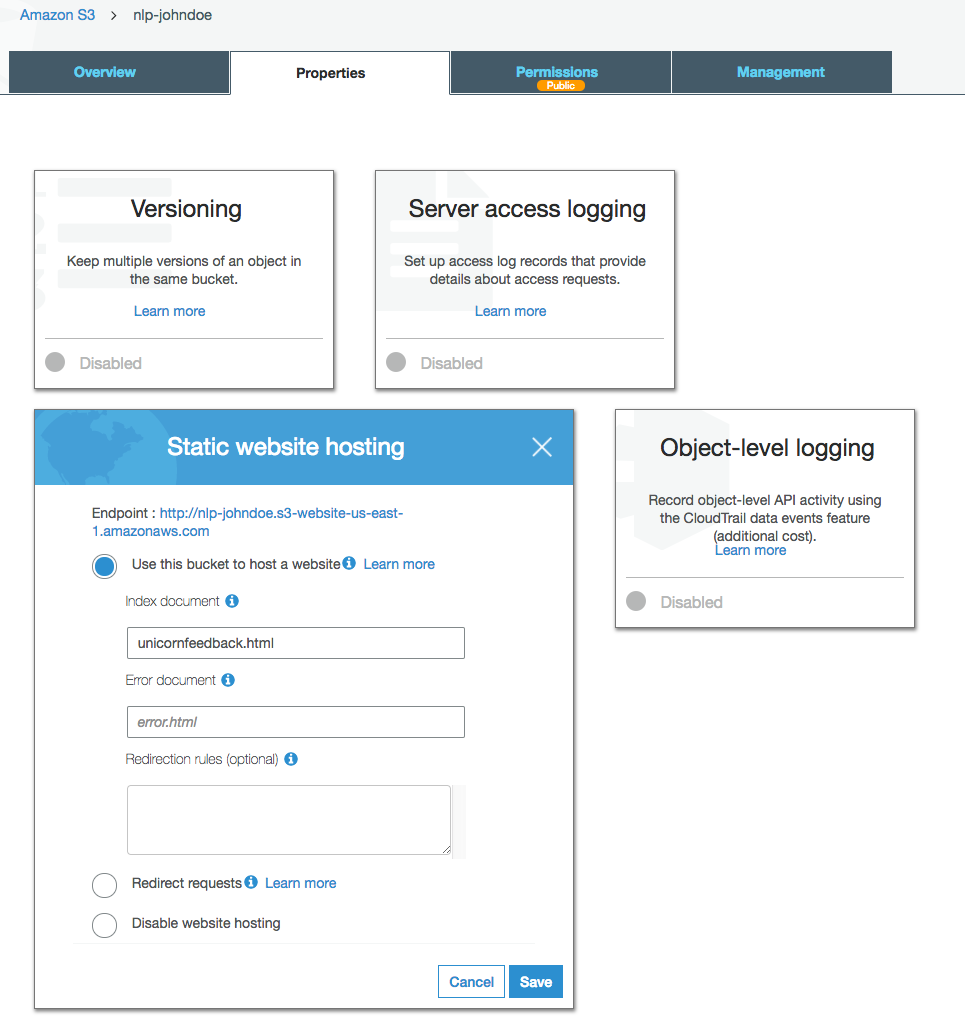
Visit your website's base URL (this is the URL you noted in section 4) in the browser of your choice. You should see the Voice of the Customer Application home page displayed. If you need to lookup the base URL, visit the S3 console, select your bucket and then click the **Static Web Hosting** card on the **Properties** tab. If the page renders correctly (see below for an example screenshot), you should see an empty table containing four columns - Name, feedback, Sentiment and Gender. Since you haven't added any database to persist any customer feedback, the table will remain empty, until you add the DynamoDB table and the API Gateway methods alongwith Lambda functions to save and read data from the table. 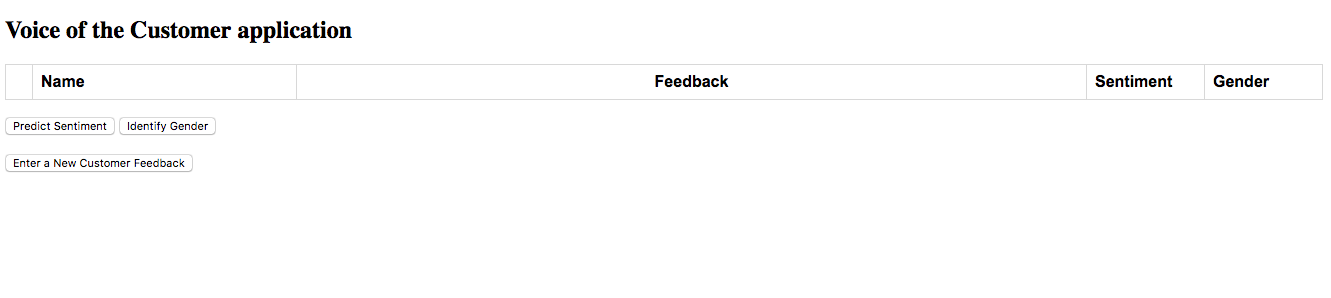
1. From the AWS Management Console, choose **Services** then select **DynamoDB** under Databases. 1. Choose **Create table**. 1. Enter `UnicornCustomerFeedback` for the **Table name**. This field is case sensitive. 1. Enter `ID` for the **Partition key** and select **String** for the key type. This field is case sensitive. 1. Check the **Add sort key** box. 1. Enter `PostedTime` for the sort key and select **String** for the key type. This field is case sensitive. 1. Check the **Use default settings** box and choose **Create**. 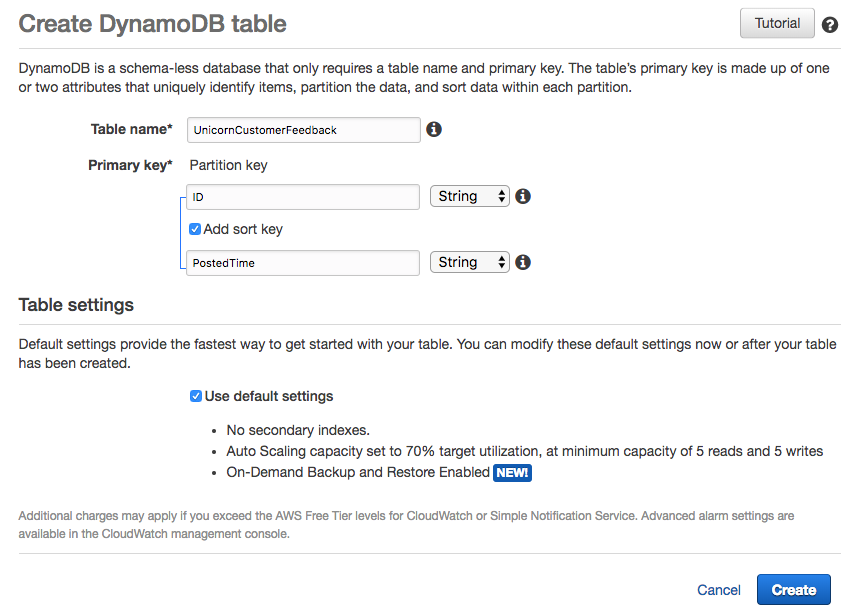 1. Scroll to the bottom of the Overview section of your new table and note the **ARN**. You will use this in the next section.
1. From the AWS Management Console, click on **Services** and then select **IAM** in the Security, Identity & Compliance section. 1. Select **Roles** in the left navigation bar and then choose **Create role**. 1. From the **AWS service** group, under the section **Choose the service that will use this role**, select **Lambda** 1. **Lambda** appears under the section **Select your use case**. Select the sole use case **Lambda**, as this allows lambda functions to call AWS services on your behalf. Then click **Next: Permissions** **Note:** Selecting a role type automatically creates a trust policy for your role that allows AWS services to assume this role on your behalf. If you were creating this role using the CLI, AWS CloudFormation or another mechanism, you would specify a trust policy directly. 1. Begin typing `AWSLambdaBasicExecutionRole` in the **Filter** text box and check the box next to that role. 1. Click **Next: Review**. 1. Enter `VOCLambdaRole` for the **Role name**. 1. Choose **Create role**. 1. Type `VOCLambdaRole` into the filter box on the Roles page and choose the role you just created. 1. On the Permissions tab, choose the **Add inline policy** link in the lower right corner to create a new inline policy. 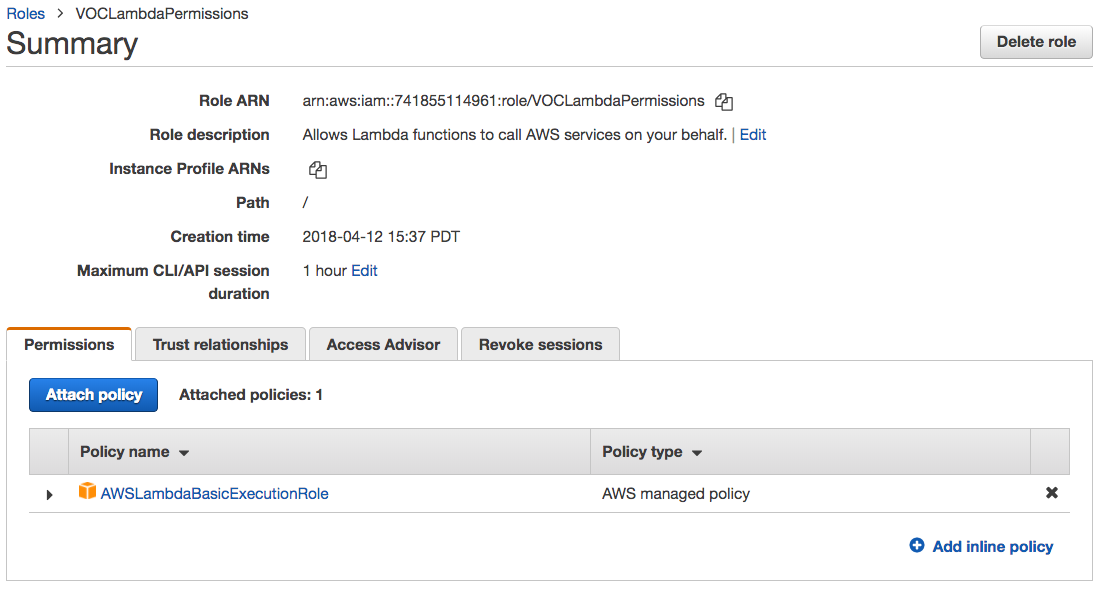 1. Select **JSON** tab. 1. Enter the following policy document into the policy editor : ```json { "Version": "2012-10-17", "Statement": [ { "Action": [ "dynamodb:BatchGetItem", "dynamodb:DescribeTable", "dynamodb:GetItem", "dynamodb:PutItem", "dynamodb:UpdateItem", "dynamodb:DeleteItem", "dynamodb:ListTables", "dynamodb:Query", "dynamodb:Scan", "dynamodb:DescribeStream", "dynamodb:GetRecords", "dynamodb:GetShardIterator", "dynamodb:ListStreams", "comprehend:DetectSentiment", "sagemaker:InvokeEndpoint", "s3:ListBucket", "s3:GetObject", "s3:PutObject", "s3:PutObjectAcl", "s3:PutObjectVersionAcl", "s3:DeleteObject", "s3:DeleteObjectVersion", "s3:CopyObject", "xray:PutTraceSegments" ], "Resource": "*", "Effect": "Allow" } ] } ``` 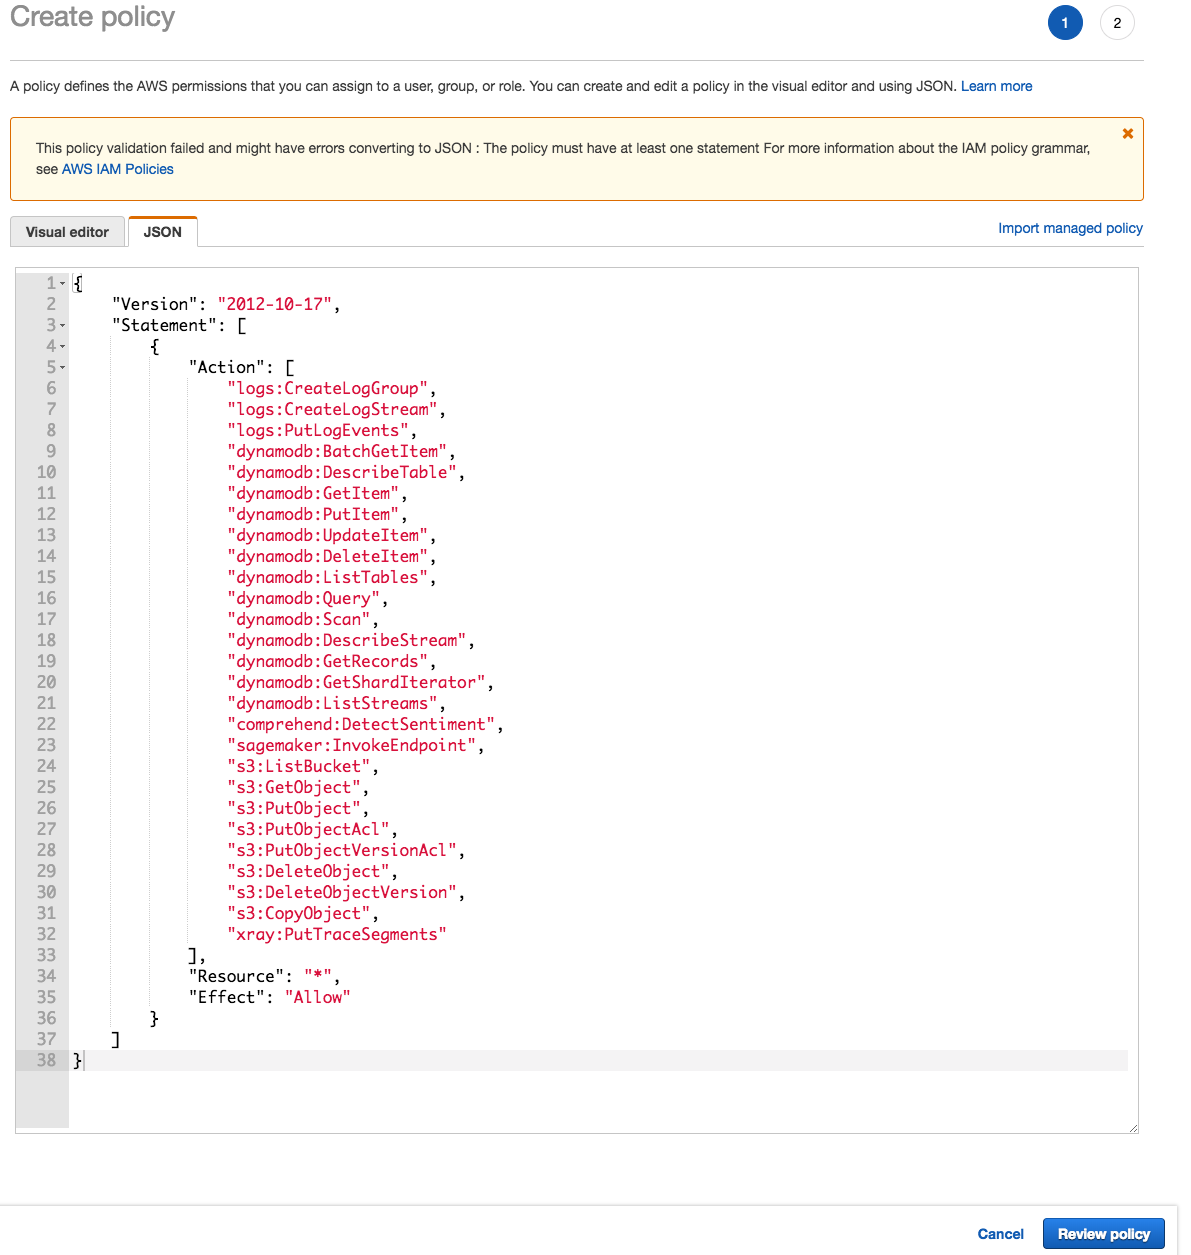 1. Choose **Review Policy**. 1. Make sure appropriate permissions for the services as listed above, are shown in the review screen. 1. Enter `VOCLAmbdaAllAccess` for the policy name and choose **Create policy**. 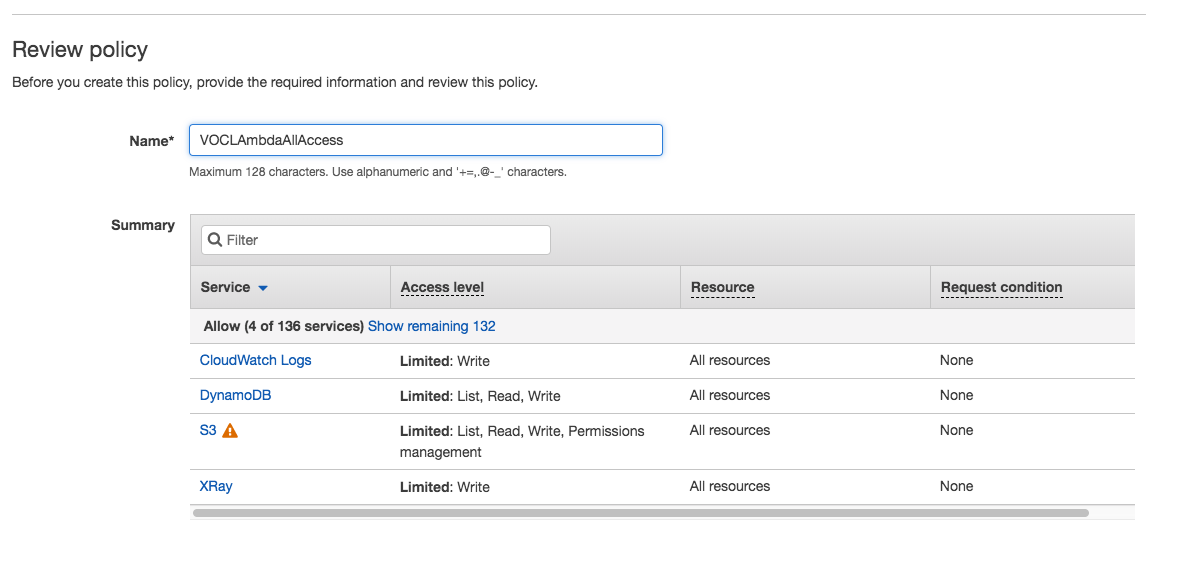
1. Choose on **Services** then select **Lambda** in the Compute section. 1. Click **Create function**. 1. Keep the default **Author from scratch** card selected. 1. Enter `EnterCustomerFeedback` in the **Name** field. 1. Select **Python 3.6** for the **Runtime**. 1. Ensure `Choose an existing role` is selected from the **Role** dropdown. 1. Select `VOCLambdaRole` from the **Existing Role** dropdown. 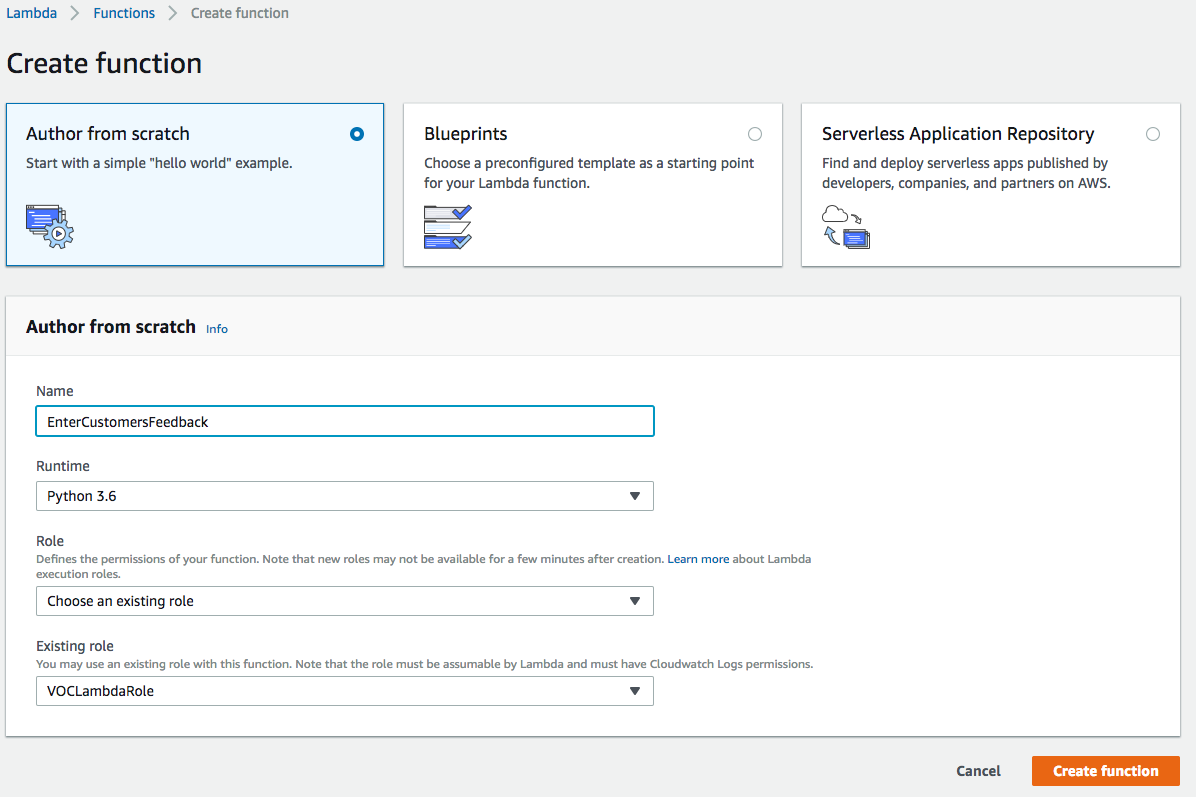 1. Click on **Create function**. 1. Scroll down to the **Function code** section and replace the existing code in the **lambda_function.py** code editor with the contents of [entercustomerfeedback.py](functions/entercustomerfeedback.py). 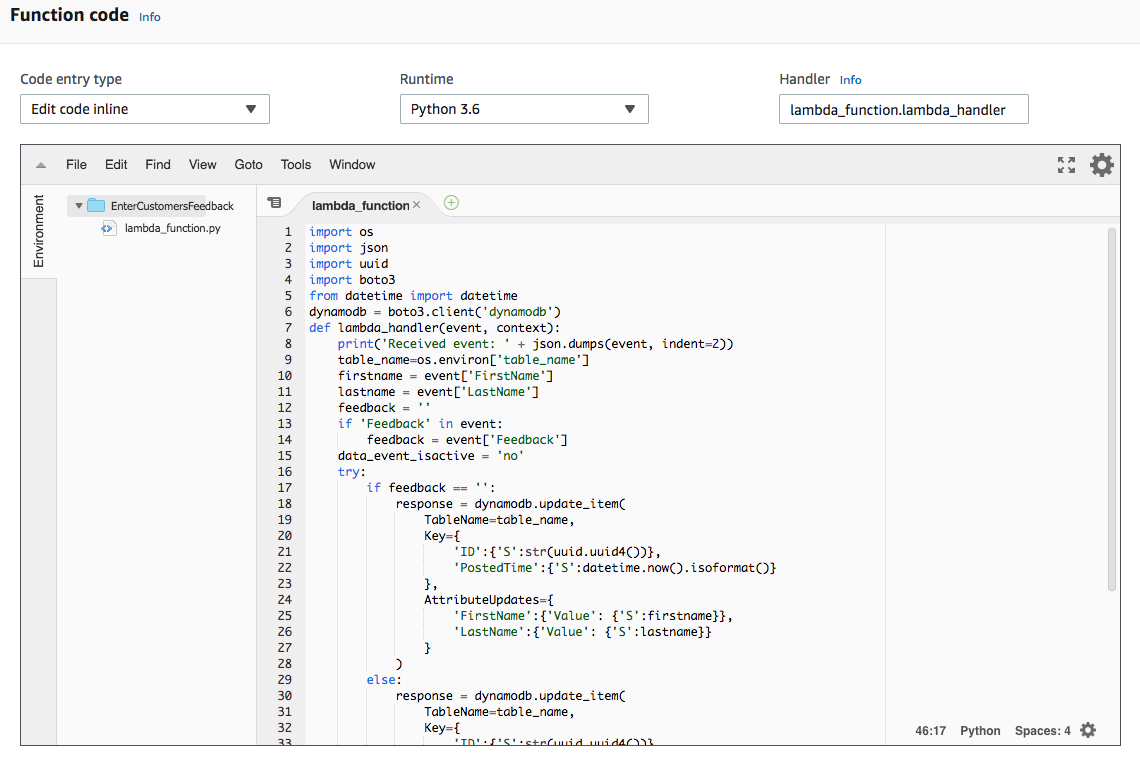 1. Scroll down to the **Environment variables** section and add one environment variable. Environment variables are key vaue pairs, entered one in each pair of boxes. The box to the left contains the variable name, and the box to the right contains value. In this function, you create one variable by entering `table_name` as name and `UnicorCustomerFeedback` as value. Make sure this value is same as the name of the DynamoDB table you used.  1. Click **"Save"** in the upper right corner of the page.
1. Choose on **Services** then select **Lambda** in the Compute section. 1. Click **Create function**. 1. Keep the default **Author from scratch** card selected. 1. Enter `EnterCustomerFeedback` in the **Name** field. 1. Select **Python 3.6** for the **Runtime**. 1. Ensure `Choose an existing role` is selected from the **Role** dropdown. 1. Select `VOCLambdaRole` from the **Existing Role** dropdown. 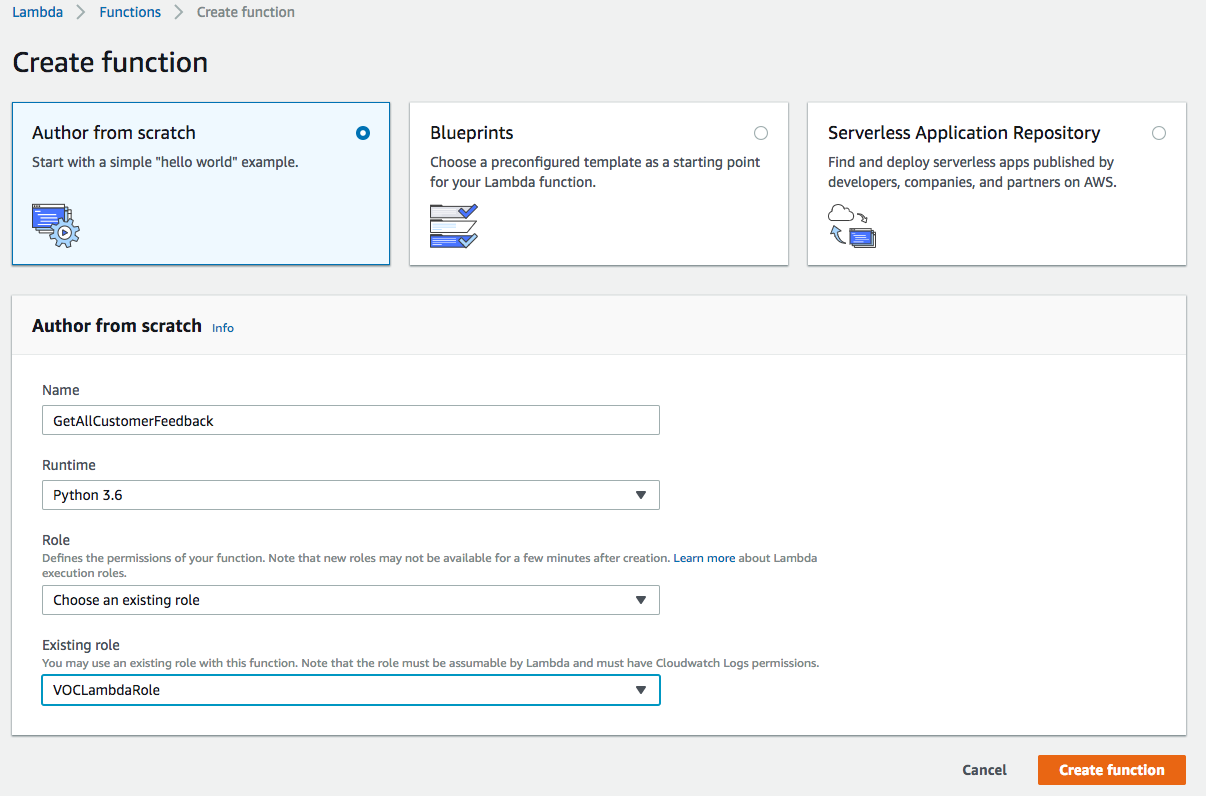 1. Click on **Create function**. 1. Scroll down to the **Function code** section and replace the existing code in the **lambda_function.py** code editor with the contents of [getallcustomerfeedbacks.py](functions/getallcustomerfeedbacks.py). 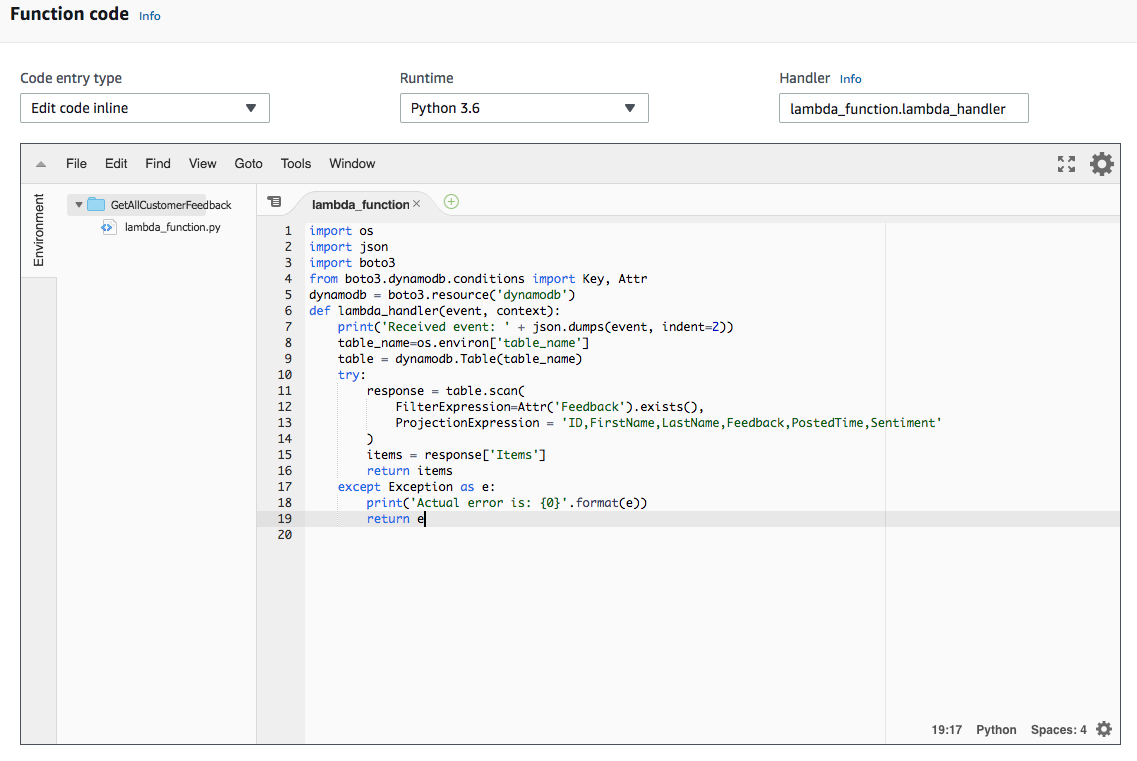 1. Scroll down to the **Environment variables** section and add one environment variable. Environment variables are key vaue pairs, entered one in each pair of boxes. The box to the left contains the variable name, and the box to the right contains value. In this function, you create one variable by entering `table_name` as name and `UnicorCustomerFeedback` as value. Make sure this value is same as the name of the DynamoDB table you used.  1. Click **"Save"** in the upper right corner of the page.
1. From the main edit screen for `EnterCustomerFeedback` function, select **Configure test event** from the **Select a test event...** dropdown. 1. Keep **Create new test event** selected. 1. Enter `submitfeedback` in the **Event name** field 1. Copy and paste the following test event into the editor: ```JSON { "FirstName": "John", "LastName": "Doe", "Feedback": "I loved the Unicorns" } ``` 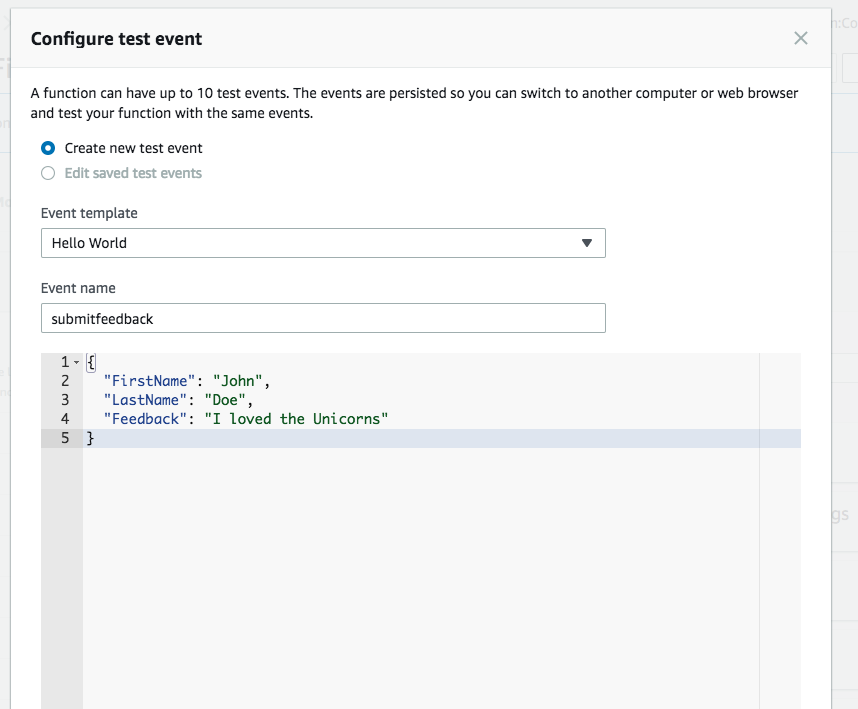 1. Click **Create**. 1. On the main function edit screen click **Test** with `submitfeedback` selected in the dropdown. 1. Scroll to the top of the page and expand the **Details** section of the **Execution result** section. 1. Verify that the execution succeeded and that the function returns a status code of `200`. The Log output should also show something similar to the following: 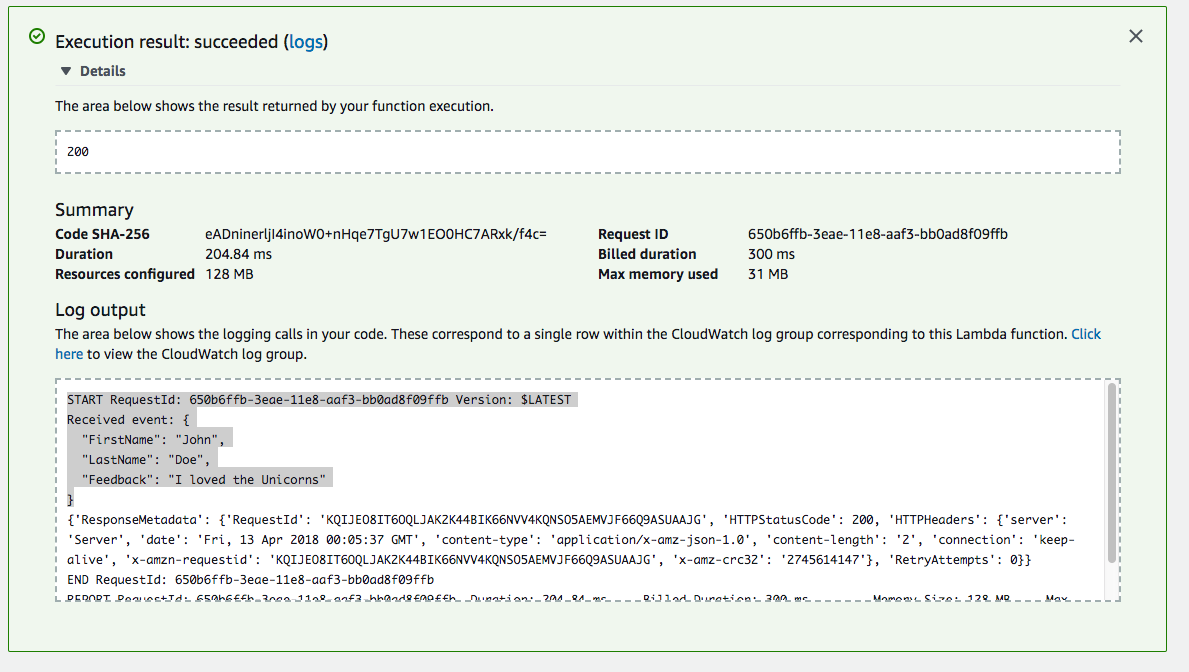 1. After you have successfully tested your `EnterCustomerFeedback` function, it will enter the record, as shown above, into the DynamoDB table. At this point, if you wish, you can check your DynamoDB table to confirm that the item you just passed to the test event exists in the table. 1. Follwing test event would validate not only that the item was inserted into the table, but also that it can be read by a Lambda function and returned to the caller. . From the main edit screen for `GetAllCustomerFeedbacks` function, select **Configure test event** from the **Select a test event...** dropdown. 1. Keep **Create new test event** selected. 1. Enter `listfeedbacks` in the **Event name** field 1. Copy and paste the following empty json into the editor (note that we don't need to pass any id because this function fetches all records from database): ```JSON { } ```  1. Click **Create**. 1. On the main function edit screen click **Test** with `listfeedbacks` selected in the dropdown. 1. Scroll to the top of the page and expand the **Details** section of the **Execution result** section. 1. Verify that the execution succeeded and that the function returns the record you inserted in the previous test event: ```JSON [ { "Feedback": "I loved the Unicorns", "FirstName": "John", "ID": "c093b3a6-14b0-4b80-b204-b732fcc10d0d", "LastName": "Doe", "PostedTime": "2018-04-13T00:05:37.923174" } ] ``` 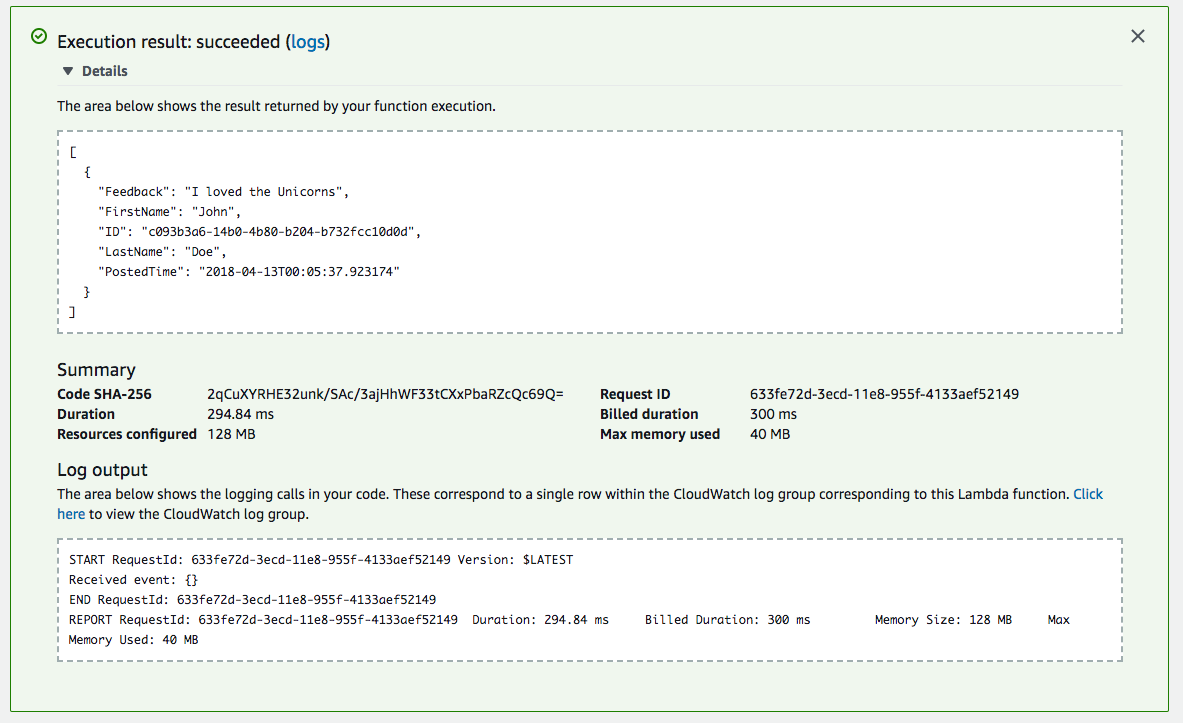
1. In the AWS Management Console, click **Services** then select **API Gateway** under Application Services. 1. Choose **Create API**. 1. Select **New API** and enter `NLP Workshop API` for the **API Name**. 1. Select `Edge optimized` from the **Endpoint Type** dropdown. ***Note***: Edge optimized are best for public services being accessed from the Internet. Regional endpoints are typically used for APIs that are accessed primarily from within the same AWS Region. 1. Choose **Create API** 
1. In the left nav, click on **Resources** under your NLP Workshop API. 1. From the **Actions** dropdown select **Create Resource**. 1. Enter `enterfeedback` as the **Resource Name**. 1. Ensure the **Resource Path** is set to `enterfeedback`. 1. Select **Enable API Gateway CORS** for the resource. 1. Click **Create Resource**. 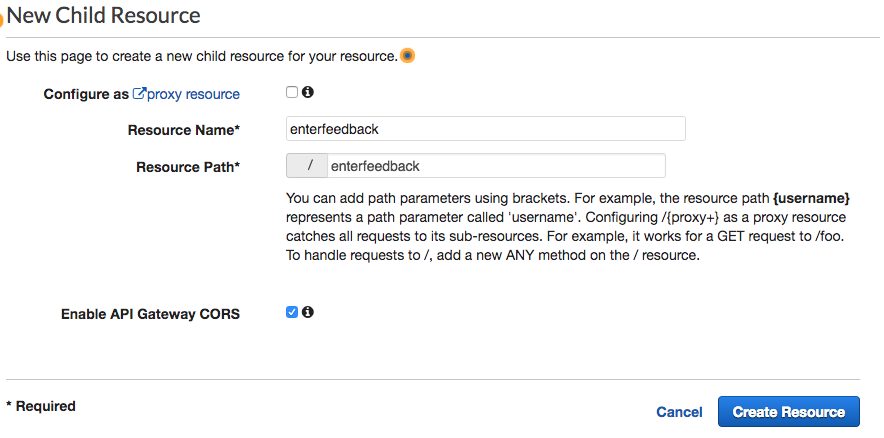 1. With the newly created `/enterfeedback` resource selected, from the **Action** dropdown select **Create Method**. 1. Select `GET` from the new dropdown that appears, then **click the checkmark**.  1. Select **Lambda Function** for the integration type. 1. Select the Region you are using for **Lambda Region**. 1. Enter the name of the function you created in the previous module, `EnterCustomerFeedback`, for **Lambda Function**. 1. Choose **Save**. Please note, if you get an error that you function does not exist, check that the region you selected matches the one you used in the beginning of this section. 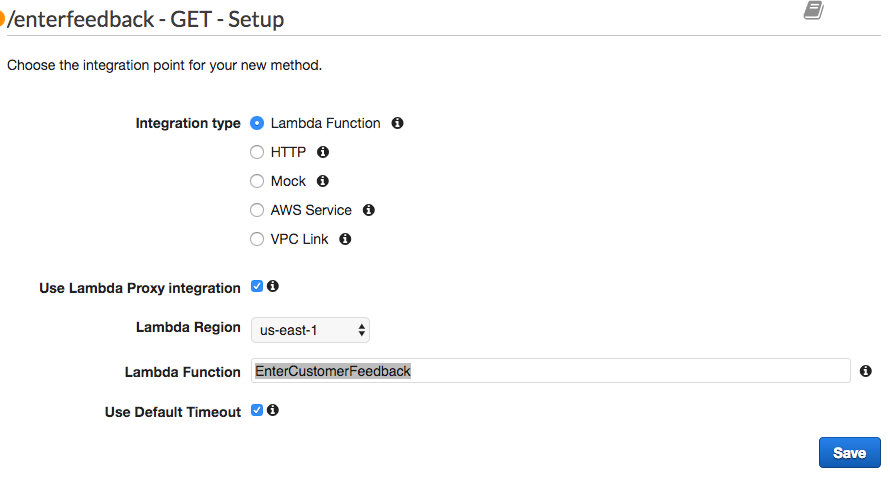 1. When prompted to give Amazon API Gateway permission to invoke your function, choose **OK**. 1. Choose the **Method Request** card. 1. Expand the section named **URL Query String Parameters**. 1. Select the **Add query string**. 1. Enter parameter **Name** as `FirstName`, then **click the checkmark**. 1. Select the **Required** checkbox next to `FirstName` 1. Select the **Add query string**. 1. Enter parameter **Name** as `LastName`, then **click the checkmark**. 1. Select the **Required** checkbox next to `LastName` 1. Select the **Add query string**. 1. Enter parameter **Name** as `Feedback`, then **click the checkmark**. 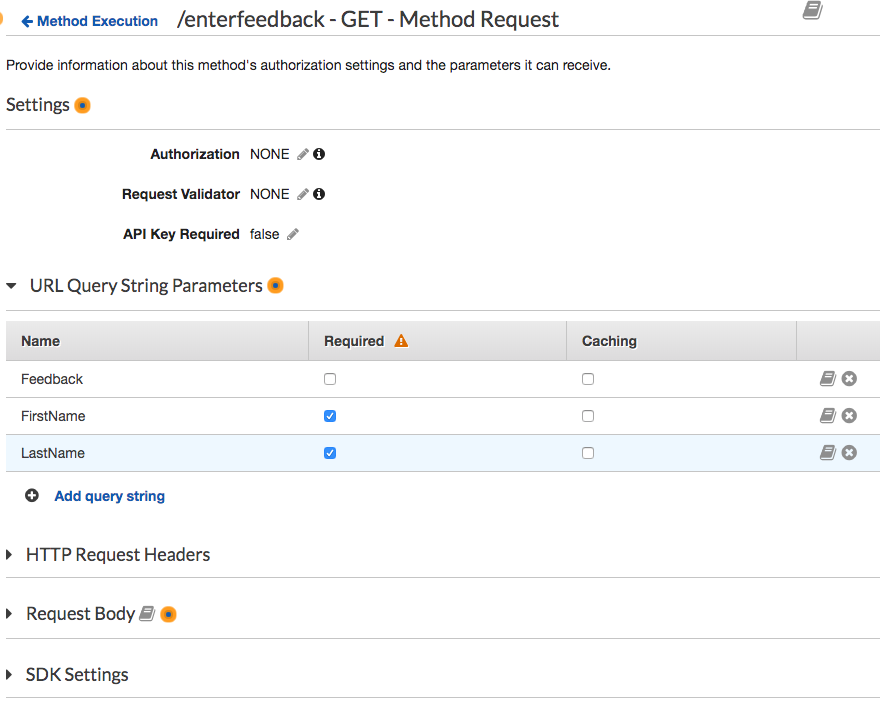 1. Click on the **<-Method Execution** link to go back to `GET` method's configuration page 1. Choose the **Integration Request** card. 1. Expand the section named **Body Mapping Templates** 1. From **Request body passthrouhg** choose the option **When there are no templates defined (recommended)**  1. Click on the **<-Method Execution** link to go back to `GET` method's configuration page 1. Choose the **Method Response** card. 1. Click **Add Header** under **Response Headers for 200**. 1. Enter the value `Access-Control-Allow-Origin` as header **Name**, then **click the checkmark**. 1. Click on the **<-Method Execution** link to go back to `GET` method's configuration page 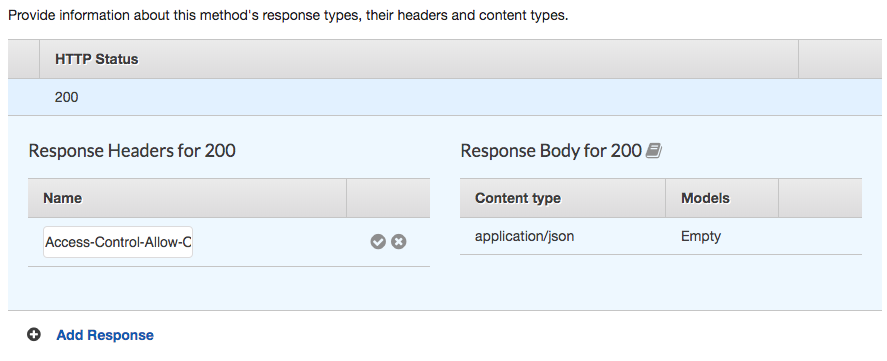 1. Select the root(`/`) method of the API 1. From the **Actions** dropdown select **Create Resource**. 1. Enter `getallcontents` as the **Resource Name**. 1. Ensure the **Resource Path** is set to `getallcontents`. 1. Select **Enable API Gateway CORS** for the resource. 1. Click **Create Resource**. 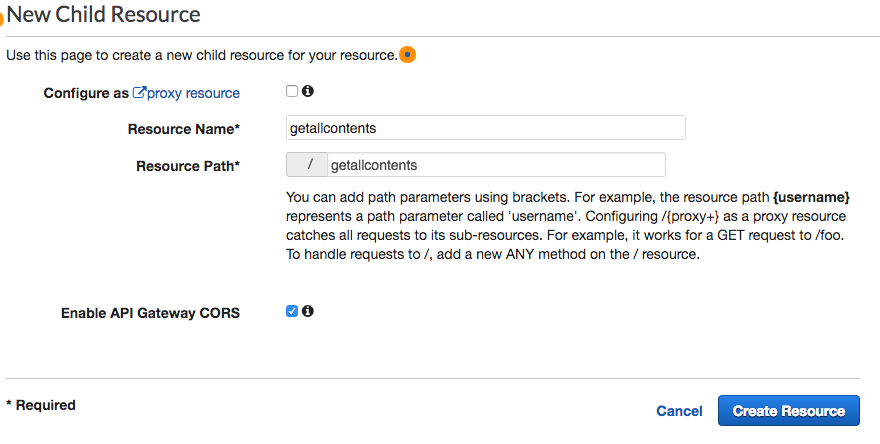 1. With the newly created `/getallcontents` resource selected, from the **Action** dropdown select **Create Method**. 1. Select `GET` from the new dropdown that appears, then **click the checkmark**. 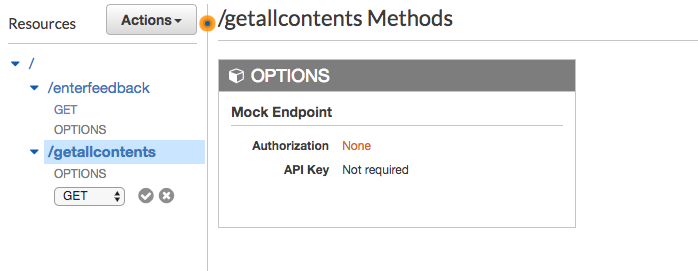 1. Select **Lambda Function** for the integration type. 1. Select the Region you are using for **Lambda Region**. 1. Enter the name of the function you created in the previous module, `GetAllCustomerFeedbacks`, for **Lambda Function**. 1. Choose **Save**. Please note, if you get an error that you function does not exist, check that the region you selected matches the one you used in the beginning of this section. 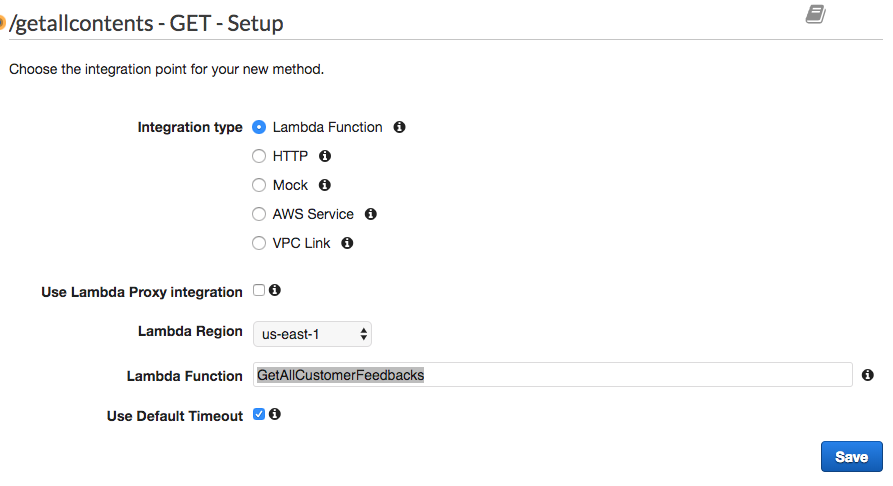 1. When prompted to give Amazon API Gateway permission to invoke your function, choose **OK**. 1. Click on the **<-Method Execution** link to go back to `GET` method's configuration page 1. Choose the **Integration Request** card. 1. Expand the section named **Body Mapping Templates** 1. From **Request body passthrouhg** choose the option **When there are no templates defined (recommended)**  1. Click on the **<-Method Execution** link to go back to `GET` method's configuration page 1. Choose the **Method Response** card. 1. Click **Add Header** under **Response Headers for 200**. 1. Enter the value `Access-Control-Allow-Origin` as header **Name**, then **click the checkmark**. 1. Click on the **<-Method Execution** link to go back to `GET` method's configuration page 
1. From the **Resources** section of `NLP Workshop API` function, select the `GET` method under the resource `enterfeedback`. 1. Click on the link for **TEST** under the **Client** card. 1. Since you have previously selected `FirstName`, `LastName`, and `Feedback` as query string paramters for **Method Request**, you'll be presented with an input form with these 3 fields. 1. Enter some sample values, and click the **Test** button. 1. On the right hand side of the test screen, you should see value `200` coming back as response body. This indicates that the API gateway have been able to successfully invoke the Lambda function. 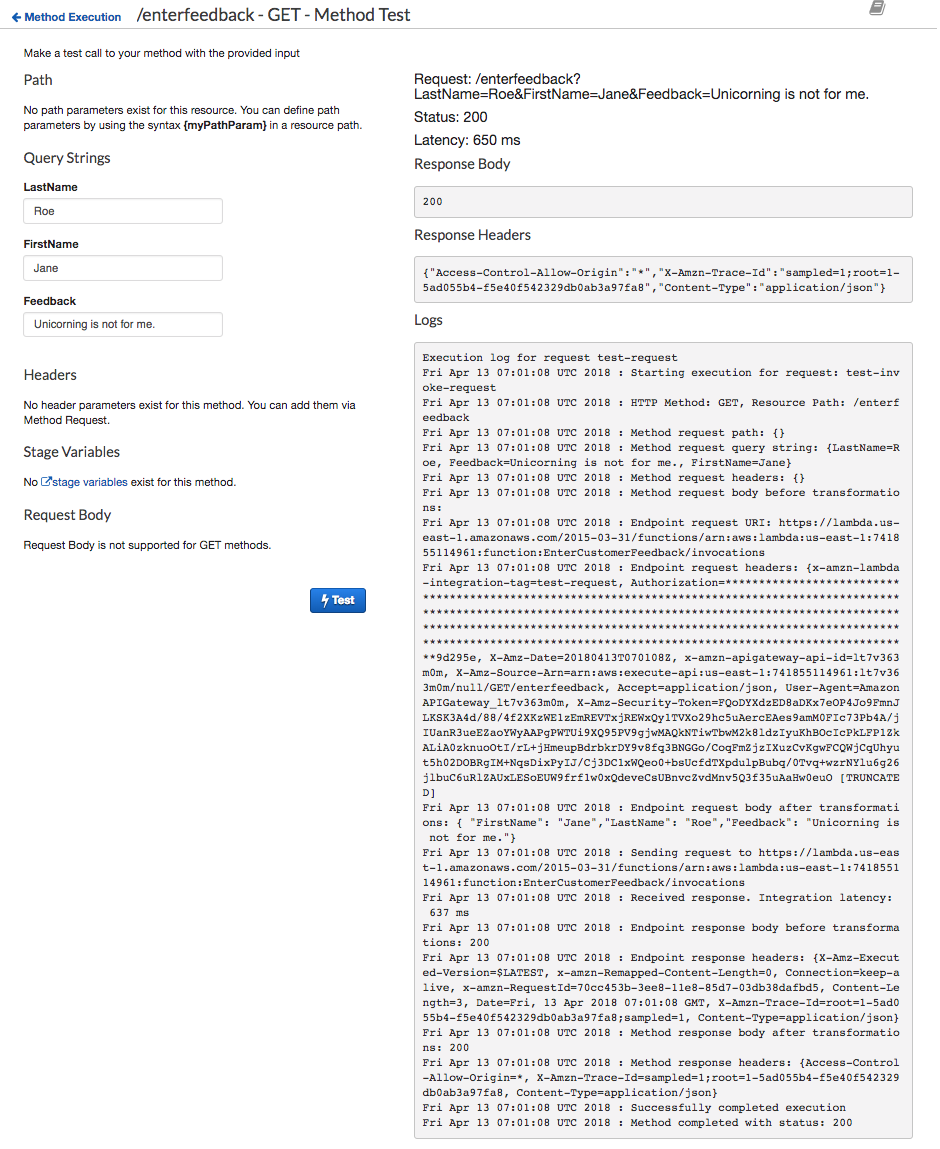 1. After you have successfully tested your `enterfeedback` resource, it will enter the record into the DynamoDB table. At this point, if you wish, you can check your DynamoDB table to confirm that the item you just passed to the test event exists in the table. 1. Follwing test event would validate not only that the item was inserted into the table, but also that it can be read by a Lambda function and returned via the API gateway. 1. From the **Resources** section of `NLP Workshop API` function, select the `GET` method under the resource `getallcontents`. 1. Click on the link for **TEST** under the **Client** card. 1. Since this method does not need any query parameters, simply click the **Test** button. 1. On the right hand side of the test screen, you should see request status to be `200` . This indicates that the API gateway have been able to successfully invoke the Lambda function. 1. Verify that the response body contains both feedback records one inserted during this validation and another inserted during Lambda function validation: ```JSON [ { "Feedback": "I loved the Unicorns", "FirstName": "John", "ID": "c093b3a6-14b0-4b80-b204-b732fcc10d0d", "LastName": "Doe", "PostedTime": "2018-04-13T00:05:37.923174" }, { "Feedback": "Unicorning is not for me.", "FirstName": "Jane", "ID": "2b86b34f-1b34-4858-8c9e-2608f454a7d7", "LastName": "Roe", "PostedTime": "2018-04-13T07:01:08.494610" } ] ``` 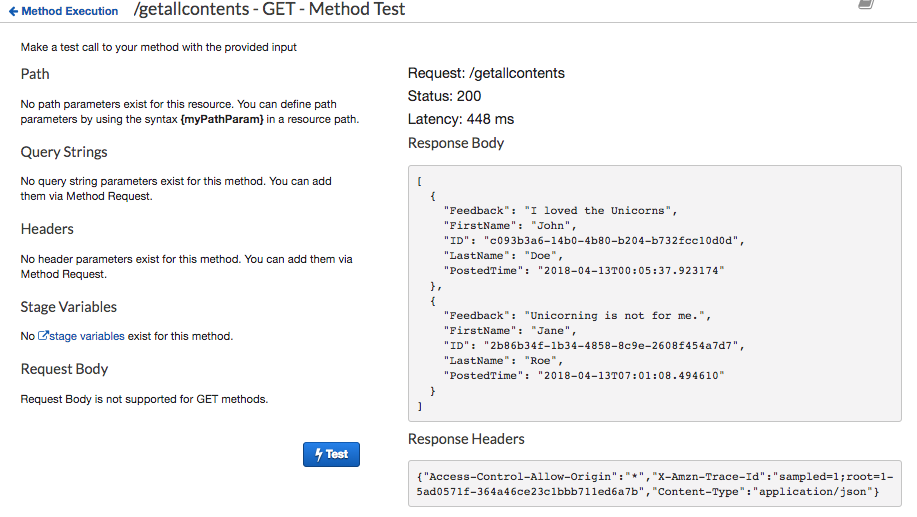
1. In the **Actions** drop-down list select **Deploy API**. 1. Select **[New Stage]** in the **Deployment stage** drop-down list. 1. Enter `vocweb` for the **Stage Name**. 1. Choose **Deploy**. 1. Note the **Invoke URL**. You will use it in the next section.
If you completed this module manually, you can download the `config.js` file from your hosting S3 bucket and save it locally. To do so, visit `/js/config.js` under the base URL for your website and choose **File**, then choose **Save Page As** from your browser. Note: **Note:** If you used the AWS CloudFormation template, the template created a custome resource and implemented a Lambda function that replace the API endpoint into the config file on your hosting S3 bucket. 1. Open the config.js file in a text editor. 1. Update the **invokeUrl** setting under the **api** key in the config.js file. Set the value to the **Invoke URL** for the deployment stage your created in the previous section. An example of a complete `config.js` file is included below. Note, the actual values in your file will be different. ```JavaScript var _config = { api: { invokeUrl: https://nx5or4mpue.execute-api.us-east-1.amazonaws.com/vocweb } }; ``` 1. Save your changes locally. 1. In the AWS Management Console, choose **Services** then select **S3** under Storage. 1. Choose your website bucket and then browse to the `js` key prefix. 1. Choose **Upload**. 1. Choose **Add files**, select the local copy of `config.js` and then click **Next**. 1. Choose **Next** without changing any defaults through the `Set permissions` and `Set properties` sections. 1. Choose **Upload** on the `Review` section.