# Project Description
- Automatic tagging images and visualization of tags from the images with Amazon Rekognition
- (1) For images uploaded like this:

- (2) Visualize the analysis results of taggs automatically extracted from images

* Read this in other languages: [English](README.md), [Korea(한국어)](README.kr.md)
### Architecture
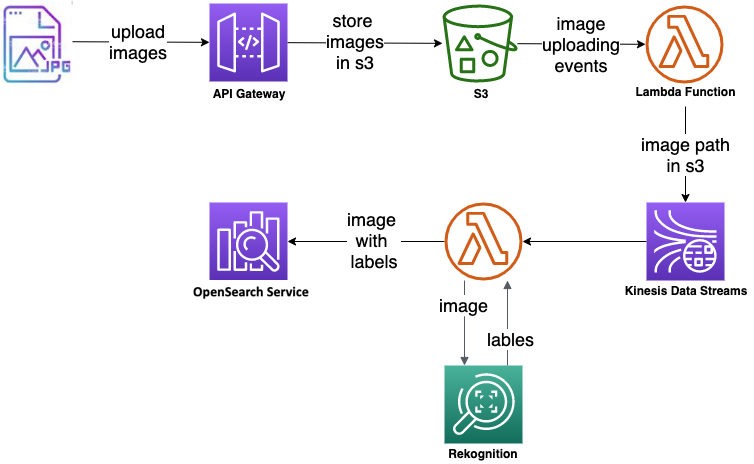
##### Key AWS Services
- API Gateway
- Lambda Function
- Kinesis Data Stream
- Elasticsearch Service
- Rekognition
- S3
### RESTful API Specification
##### Image upload
- Request
- PUT
```
- /v1/{bucket}/{object}
```
| URL Path parameters | Description | Required(Yes/No) | Data Type |
|---------------------|-------------|------------------|-----------|
| bucket | s3 bucket name | Yes | String |
| object | s3 object name | Yes | String |
- ex)
* bucket: image-valuts
* object: raw-image/20191101_125236.jpg (Percent-encoding: `raw-image%2F20191101_125236.jpg`)
    curl -X PUT "https://t2e7cpvqvu.execute-api.us-east-1.amazonaws.com/v1/image-valuts/raw-image%2F20191101_125236.jpg" \
         --data @20191101_125236.jpg
- Response
- No Data
### How To Build & Deploy
1. Install AWS CDK based on [Getting Started With the AWS CDK](https://docs.aws.amazon.com/cdk/latest/guide/getting_started.html), and create and register a new IAM User to deploy CDK Stacks into `~/.aws/config`.
For example, create the IAM User, **cdk_user** and register it into `~/.aws/config`.
```shell script
$ cat ~/.aws/config
[profile cdk_user]
aws_access_key_id=AKIAIOSFODNN7EXAMPLE
aws_secret_access_key=wJalrXUtnFEMI/K7MDENG/bPxRfiCYEXAMPLEKEY
region=us-east-1
```
:information_source: **cdk_user** needs `AdministratorAccess` IAM Policy.
2. Upload Python Packages for Lambda Layer into S3 bucket
For example, if we are uploading `elasticsearch` python packages to S3 bucket,
(1) create the packages
```shell script
$ python3 -m venv es-lib
$ cd es-lib
$ source bin/activate
(es-lib) $ mkdir -p python_modules
(es-lib) $ pip install 'elasticsearch>=7.0.0,<7.11' requests requests-aws4auth -t python_modules
(es-lib) $ mv python_modules python
(es-lib) $ zip -r es-lib.zip python/
(es-lib) $ aws s3 mb s3://my-bucket-for-lambda-layer-packages
(es-lib) $ aws s3 cp es-lib.zip s3://my-bucket-for-lambda-layer-packages/var/
(es-lib) $ deactivate
```
(2) upload the zipped package file into S3
```shell script
$ aws s3 ls s3://image-insights-resources/var/
2019-10-25 08:38:50 0
2019-10-25 08:40:28 1294387 es-lib.zip
```
**Reference**
+ [How to create a Lambda layer using a simulated Lambda environment with Docker](https://aws.amazon.com/premiumsupport/knowledge-center/lambda-layer-simulated-docker/)
```
$ cat < requirements.txt
> elasticsearch>=7.0.0,<7.11
> requests==2.23.0
> requests-aws4auth==0.9
> EOF
$ docker run -v "$PWD":/var/task "public.ecr.aws/sam/build-python3.7" /bin/sh -c "pip install -r requirements.txt -t python/lib/python3.7/site-packages/; exit"
$ zip -r es-lib.zip python > /dev/null
$ aws s3 mb s3://my-bucket-for-lambda-layer-packages
$ aws s3 cp es-lib.zip s3://my-bucket-for-lambda-layer-packages/var/
```
3. Download source code from the git repository, and set up cdk environment
```shell script
$ git clone https://github.com/aws-samples/aws-realtime-image-analysis.git
$ cd aws-realtime-image-analysis
$ python3 -m venv .env
$ source .env/bin/activate
(.env) $ pip install -r requirements.txt
```
4. Create an IAM User to be allowed to read/write S3, and take a note of both `Access Key Id` and `Secrect Key`.
```json
{
"Version": "2012-10-17",
"Statement": [
{
"Sid": "VisualEditor0",
"Effect": "Allow",
"Action": [
"s3:GetObject*",
"s3:ListObject*",
"s3:PutObject",
"s3:PutObjectAcl"
],
"Resource": "*"
}
]
}
```
5. Set up `cdk.context.json` file like this:
```json
{
"image_bucket_name_suffix": "Your-S3-Bucket-Name-Suffix",
"lib_bucket_name": "Your-S3-Bucket-Name-Of-Lib",
"s3_access_key_id": "Access-Key-Of-Your-IAM-User-Allowed-To-Access-S3",
"s3_secret_key": "Secret-Key-Of-Your-IAM-User-Allowed-To-Access-S3"
}
```
For example,
```json
{
"image_bucket_name_suffix": "k7mdeng",
"lib_bucket_name": "lambda-layer-resources-use1",
"s3_access_key_id": "AKIAIOSFODNN7EXAMPLE",
"s3_secret_key": "wJalrXUtnFEMI/K7MDENG/bPxRfiCYEXAMPLEKEY"
}
```
6. Deploy by running `cdk deploy` command
```shell script
(.env) $ cdk --profile=cdk_user deploy --all
```
7. Make sure **Binary Media Types** of the image uploader API is correct

8. (Optional) Find out the bastion host's public ip address.

9. (Optional) Create ssh key for bastion host.
```shell script
$ cd ~/.ssh
$ ssh-keygen
Generating public/private rsa key pair.
Enter file in which to save the key (~/.ssh/id_rsa): MY-KEY
Enter passphrase (empty for no passphrase):
Enter same passphrase again:
Your identification has been saved in MY-KEY.
Your public key has been saved in MY-KEY.pub.
The key fingerprint is:
SHA256:NjRiNGM1MzY2NmM5NjY1Yjc5ZDBhNTdmMGU0NzZhZGF
The key's randomart image is:
+---[RSA 3072]----+
|E*B++o |
|B= = .. |
|**o + |
|B=+ o |
|B+=oo . S |
|+@o+ o . |
|*.+o . |
|.oo |
| o. |
+----[SHA256]-----+
$ ls -1 MY-KEY*
MY-KEY
MY-KEY.pub
```
10. (Optional) To access the OpenSearch Cluster, add the ssh tunnel configuration to the ssh config file (`~/.ssh/config` on Mac, Linux) of the personal local PC as follows:
```shell script
# Elasticsearch Tunnel
Host estunnel
HostName 12.34.56.78 # your server's public IP address
User ec2-user # your servers' user name
IdentitiesOnly yes
IdentityFile ~/.ssh/MY-KEY # your servers' key pair
LocalForward 9200 vpc-YOUR-ES-CLUSTER.us-east-1.es.amazonaws.com:443 # your ElasticSearch cluster endpoint
```
11. (Optional) Send the publick key of ssh to the bastion host.
```shell script
$ cat send_ssh_publick_key.sh
#!/bin/bash -
REGION=us-east-1 # Your Region
INSTANCE_ID=i-xxxxxxxxxxxxxxxxx # Your Bastion Host Instance Id
AVAIL_ZONE=us-east-1a # Your AZ
SSH_PUBLIC_KEY=${HOME}/.ssh/MY-KEY.pub # Your SSH Publikc Key location
aws ec2-instance-connect send-ssh-public-key \
--region ${REGION} \
--instance-os-user ec2-user \
--instance-id ${INSTANCE_ID} \
--availability-zone ${AVAIL_ZONE} \
--ssh-public-key file://${SSH_PUBLIC_KEY}
$ bash send_ssh_publick_key.sh
{
"RequestId": "af8c63b9-90b3-48a9-9cb5-b242ec2c34ad",
"Success": true
}
```
12. (Optional) Run `ssh -N estunnel` in the Terminal.
```shell script
$ ssh -N estunnel
```
13. (Optional) Connect to `https://localhost:9200/_dashboards/app/login?` in a web browser.
- Search: `https://localhost:9200/`
- Kibana: `https://localhost:9200/_dashboards/app/login?`
### Enable the Lambda function to ingest records into Amazon OpenSearch
The lambda function uses the delivery role to sign HTTP (Signature Version 4) requests before sending the data to the Amazon OpenSearch Service endpoint.
You manage Amazon OpenSearch Service fine-grained access control permissions using roles, users, and mappings.
This section describes how to create roles and set permissions for the lambda function.
Complete the following steps:
1. Connect to `https://localhost:9200/_dashboards/app/login?` in a web browser.
2. Enter the master user and password that you set up when you created the Amazon OpenSearch Service endpoint. The user and password is stored in the [AWS Secrets Manager](https://console.aws.amazon.com/secretsmanager/listsecrets) as a name such as `OpenSearchMasterUserSecret1-xxxxxxxxxxxx`.
3. In the Welcome screen, click the toolbar icon to the left side of **Home** button. Choose **Security**.

4. Under **Security**, choose **Roles**.
5. Choose **Create role**.
6. Name your role; for example, `firehose_role`.
7. For cluster permissions, add `cluster_composite_ops` and `cluster_monitor`.
8. Under **Index permissions**, choose **Index Patterns** and enter index-name*; for example, `retail-trans*`.
9. Under **Permissions**, add three action groups: `crud`, `create_index`, and `manage`.
10. Choose **Create**.

In the next step, you map the IAM role that the lambda function uses to the role you just created.
11. Choose the **Mapped users** tab.

12. Choose **Manage mapping** and under **Backend roles**,
13. For **Backend Roles**, enter the IAM ARN of the role the lambda function uses:
`arn:aws:iam::123456789012:role/UpsertToESServiceRole709-xxxxxxxxxxxx`.

14. Choose **Map**.
**Note**: After OpenSearch Role mapping for the lambda function, you would not be supposed to meet a data delivery failure with the lambda function like this:
[ERROR] AuthorizationException: AuthorizationException(403, 'security_exception', 'no permissions for [cluster:monitor/main] and User [name=arn:aws:iam::123456789012:role/UpsertToESServiceRole709-G1RQVRG80CQY, backend_roles=[arn:aws:iam::123456789012:role/UpsertToESServiceRole709-G1RQVRG80CQY], requestedTenant=null]')
### Vizualization
1. Connect to `https://localhost:9200/_dashboards/app/login?` in a web browser (Chrome, Firefox etc).
2. Enter the master user and password that you set up when you created the Amazon OpenSearch Service endpoint. The user and password is stored in the [AWS Secrets Manager](https://console.aws.amazon.com/secretsmanager/listsecrets) as a name such as `OpenSearchMasterUserSecret1-xxxxxxxxxxxx`.
3. In Kibana toolbar, select `Managemant > Index Patterns` menu, and create `Index Pattern` (e.g.,: image_insights)
- (1) 
- (2) 
4. Choose `Visualize` menu and create graphs
(a) Image Count
- (1) 
- (2) 
- (3) 
- (4) 
(b) Tag Cloud
- (1) 
- (2) 
- (3) 
(c) Tag Count
- (1) 
- (2) 
- (3) 
(d) Tag Pie Chart
- (1) 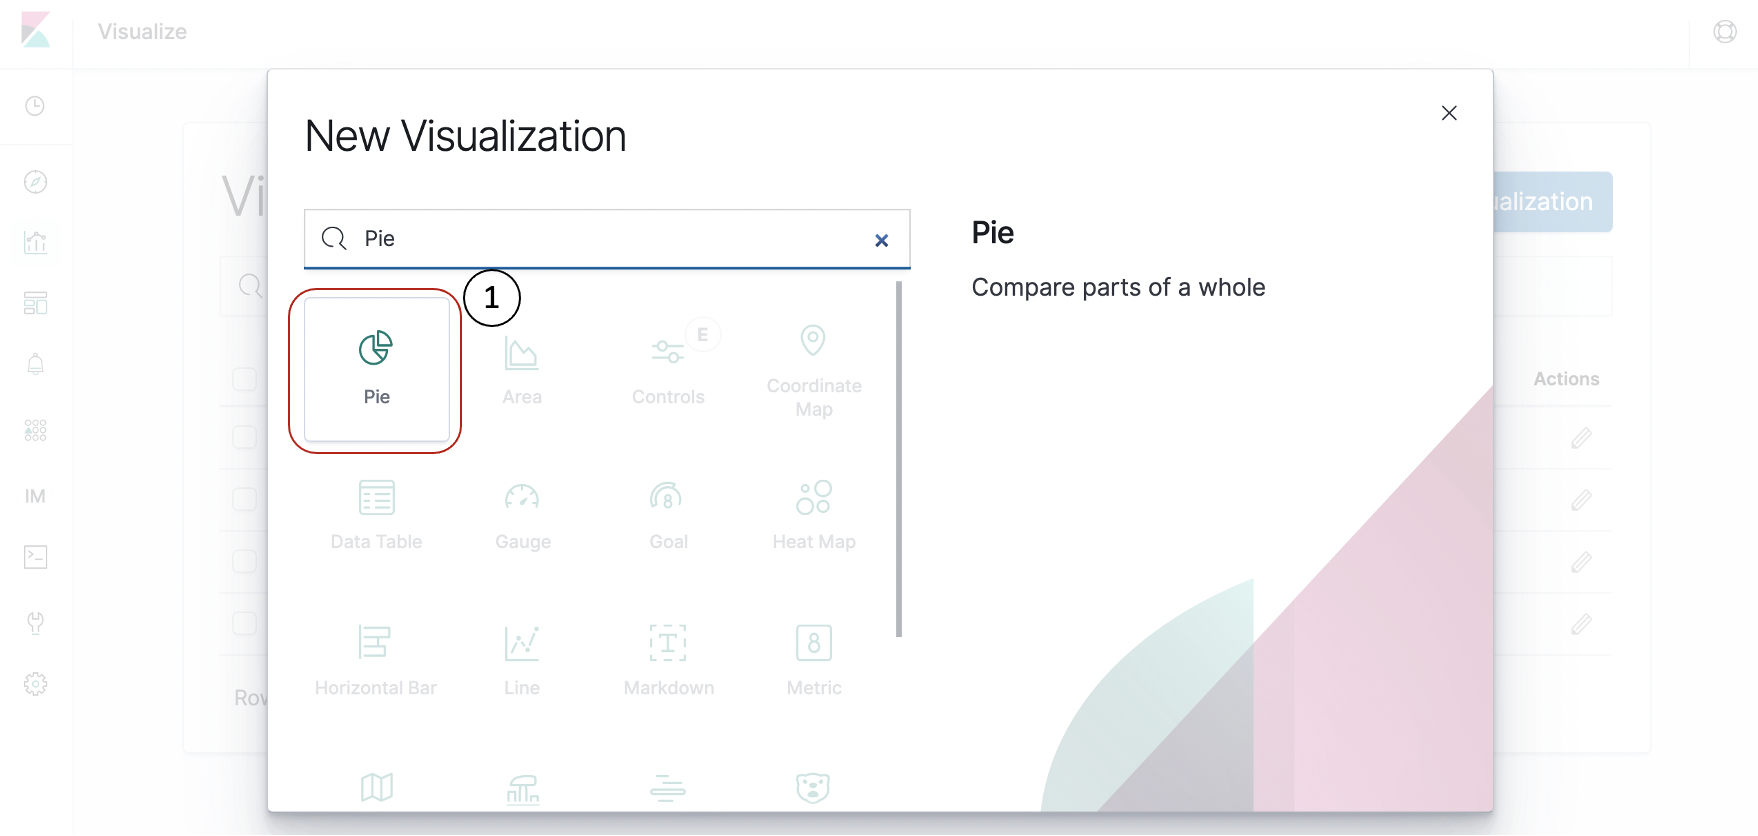
- (2) 
- (3) 
5. Make a dashboard out of the above graphs
- (1) 
- (2) 
- (3) 
### Demo
#### How To Send images to APIs
- **Upload images through APIs with Postman**
1. In `Postman`, set up `Authorization` like this:

1. Set up `Headers`

1. Choose `Body` tab and add a image as `binary` format by clicking `Select File`

1. Click `Send` to run the rest api `PUT` method

### Clean Up
Delete the CloudFormation stack by running the below command.
```shell script
(.env) $ cdk --profile cdk_user destroy --all
```
## Security
See [CONTRIBUTING](CONTRIBUTING.md#security-issue-notifications) for more information.
## License
This library is licensed under the MIT-0 License. See the LICENSE file.