# Lab 3 – Isolating Tenant Data
### Overview
At this stage, we have addressed many of the core elements of SaaS architecture. What we really haven't touched on, though, is tenant isolation. As a SaaS provider, you must make every attempt to ensure that each tenant's resources are protected from any kind of cross-tenant access. This is especially challenging when these tenants are sharing elements of their infrastructure. If, for some reason, one tenant was able to access another tenant's environment, that could represent a huge setback for a SaaS business.
To address this, we must move beyond basic authentication. We must introduce policies and access controls that ensure that we are doing everything we can to isolate and protect tenant environments. Even in SaaS environments where resources are not shared, we must take extra measures to be sure that we've minimized our exposure to cross-tenant access.
For this bootcamp, we'll focus squarely on how to isolate the data that resides in our DynamoDB tables. Specifically, we want to look at how can we can successfully isolate the tenant data that resides in the product and order tables that hold application data. To achieve this, we need to consider how we've partitioned the data. Below is a diagram that highlights the partitioning scheme of the product and order tables.

In this example graphic, you'll see that we have data from multiple tenants living side-by-side as items in these tables. So, if I get access to one of these tables, I could presumably get access to any tenant's data.
Our goal then is to implement a security model that can scope access to these tables down to the item level. Essentially, I want to build a view of the table that constrains access to just those items that are valid for a given tenant.
For this bootcamp, we're going to leverage a combination of Amazon Cognito, Amazon Identity and Access Management (IAM), and AWS Security Token Service
(STS) to limit access to these tables. This will connect directly to the notion of SaaS identity we discussed earlier, leveraging the tokens from the experience to bind a user to a scoped set of policies.
There are two key phases to implementing this isolation model. First, when tenants are initially provisioned, we need to create a set of IAM roles for each tenant. For every role that exists in the tenant's environment, we must create policies that scope access to the system's resource for that tenant. Below you'll see a conceptual representation of this the onboarding process and how it creates these roles for each tenant.
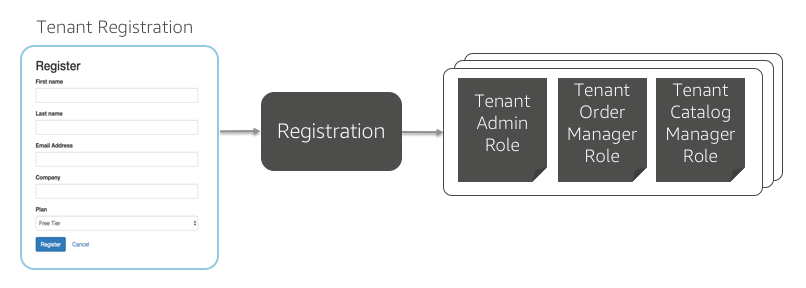
On the left is the registration process we built in Lab 1. On the right are collections of policies that are emitted (behind the scenes) for each role. It's important to note that you are not required to have separate roles for each user. Instead, these roles apply to all users for that tenant.
The second phase of isolation comes into play when you are accessing resources from your code. The diagram below illustrates the fundamental moving parts of this process.
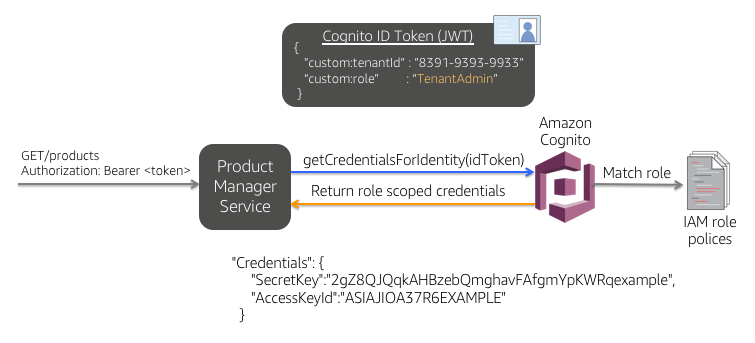
In this example, you'll see that our product manager service is invoked from the UI with a request to get a list of products. The JWT token (acquired during authentication) is passed along here in the Authorization header of our HTTP request. This token includes data about the user identity, role, and tenant identity. While this token is valuable for conveying user and tenant attributes, it does nothing to control a tenant's access to resources. **Instead, we must use the data in this token to acquire the scoped credentials we need to access our DynamoDB tables**.
The remaining bits of the diagram illustrate how these scoped credentials are acquired. Once our `GET` request comes into our product manager service, we'll make a `getCredentialsForIdentity()` call to Cognito, passing in our token. Cognito will then crack that token open, examine the tenant identifier and user role and match it to one of the policies that were created during provisioning. It will then create a **temporary** set of credentials (shown at the bottom) via STS and return those to our product manager service. Our service will use these temporary credentials to access DynamoDB tables with confidence that these credentials will scope access _by tenant id_.
### What You'll Be Building
Our goal in this exercise is to walk you through the configuration and creation of some of the elements that are part of this process. While the concepts are helpful above, we want to expose you to some of the specifics of how they are used in our reference solution. We'll start by introducing the policies during provisioning and how to configure Cognito to connect our policies to user roles. Lastly, we'll look at how this lands in the code of our application services. The basic steps in this process include:
* **Example of Cross Tenant Access** – first you'll look at how, without policies and scoping, a developer can create a situation that violates the cross-tenant boundaries of the system.
* **Configure the Provisioned IAM Policies** – now that you've seen an example of cross tenant access, let's start to introduce policies that can be used to prevent cross-tenant access (intended or un-intended). You'll create a policy for different role/resource combinations to get a sense of how these policies are used to scope access to DynamoDB tables. You'll then provision a new tenant and see how these policies are represented in IAM.
* **Mapping User Roles to Policies** – with Cognito, we can create rules that determine how a user's role will map to the policies that we've created. In this part you'll see how these policies have been configured for our tenant and user roles.
* **Acquiring Tenant-Scoped Credentials** – finally you'll see how to orchestrate the acquisition of credentials that are scoped by the policies outlined above. The credentials will control our access to data. You'll see how this explicitly enforces cross-tenant scoping.
With this piece in place, you'll have added a robust mechanism to your solution that much more tightly controls and scopes access to tenant resources. This solution highlights one of many strategies that could be applied to enforce tenant isolation.
## Part 1 - Example of Cross-Tenant Access
Before we introduce **policies**, it would help to examine a scenario where the absence of richer security policies can open the door to cross-tenant access. We will look at an (admittedly contrived) example where a developer could introduce code that might enable cross-tenant access.
To do this, we'll return to the product manager service and look at how manually injected tenant context could surface data in your application that should not be surfaced. This will set the stage for understanding how the introduction of **policies** can prevent this from happening.
**Step 1** - In [Lab 2](Lab2.md) we added products to the catalogs for each of our two tenants. If you do not have two tenants registered at this point with at least 1 product each, please follow the steps in Lab 2 to complete that now.
To artificially create cross tenant access, we need the unique tenant identifiers. Let's go find the tenant id's for our two different tenants. Navigate to the **DynamoDB** service in the **AWS console** and select the **Tables** option located on the upper left-hand side of the page. Select the **TenantBootcamp** table and then the **Items** tab.
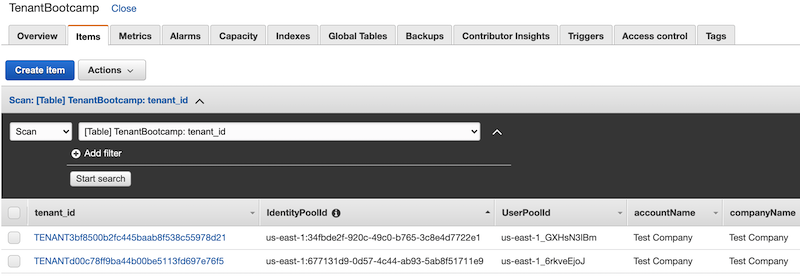
**Step 2** - Locate the two tenants you created within the list by matching the tenant with the username/email that you used. **Capture the tenant_id value for both of these tenants**. You'll need these values in subsequent steps.
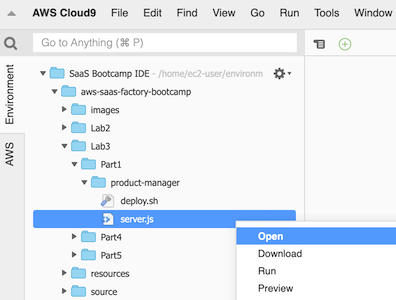
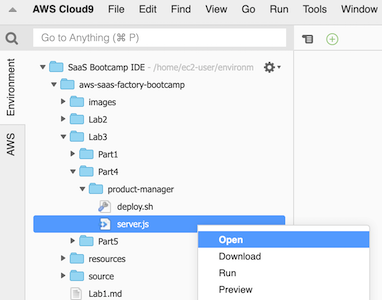
**Step 3** - Now let's go back to the code of our product manager service and make a modification. Open our product manager `server.js` file in our Cloud9 IDE. In Cloud9, navigate to `Lab3/Part1/product-manager/`. Open the file in the editor by either double-clicking or right-click `server.js` and click **Open**.
**Step 4** - Locate the `GET` function that fetches all products for a tenant. The code function will appear as follows:
```javascript
app.get('/products', function(req, res) {
var searchParams = {
TableName: productSchema.TableName,
KeyConditionExpression: "tenant_id = :tenant_id",
ExpressionAttributeValues: {
":tenant_id": tenantId
//":tenant_id": ""
}
};
// construct the helper object
tokenManager.getSystemCredentials(function(credentials) {
var dynamoHelper = new DynamoDBHelper(productSchema, credentials, configuration);
dynamoHelper.query(searchParams, credentials, function(error, products) {
if (error) {
winston.error('Error retrieving products: ' + error.message);
res.status(400).send('{"Error": "Error retrieving products"}');
} else {
winston.debug('Products successfully retrieved');
res.status(200).send(products);
}
});
});
});
```
This function is invoked by the application to acquire a list of products that populate the catalog page of system. You can see that it references the `tenant_id` that was extracted from the security token passed into our application. Let's consider what might happen if were **manually replace** this `tenant_id` with another value. Locate the `tenant_id` that you recorded earlier from DynamoDB for **TenantTwo** and _**replace**_ the `tenant_id` with this value. So, when you're done, it should appear similar to the following:
```javascript
app.get('/products', function (req, res) {
winston.debug('Fetching Products for Tenant Id: ' + tenantId);
var searchParams = {
TableName: productSchema.TableName,
KeyConditionExpression: "tenant_id = :tenant_id",
ExpressionAttributeValues: {
":tenant_id": "TENANT4c33c2eae9974615951e3dc04c7b9057"
}
};
// construct the helper object
tokenManager.getSystemCredentials(function (credentials) {
var dynamoHelper = new DynamoDBHelper(productSchema, credentials, configuration);
dynamoHelper.query(searchParams, credentials, function (error, products) {
if (error) {
winston.error('Error retrieving products: ' + error.message);
res.status(400).send('{"Error" : "Error retrieving products"}');
} else {
winston.debug('Products successfully retrieved');
res.status(200).send(products);
}
});
});
});
```
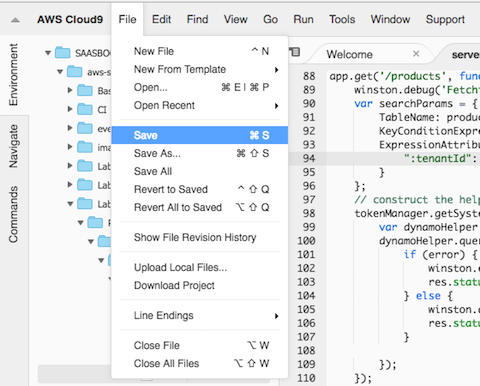
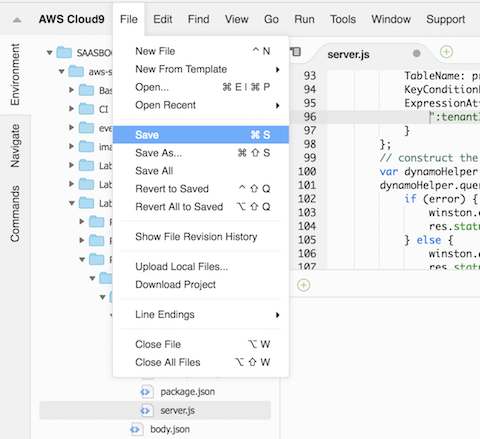
**Step 5** - Now we need to deploy our updated product manager microservice with our cross tenant access violation in-place. First, save your edited `server.js` file in Cloud9 by clicking **File** on the toolbar followed by **Save**.
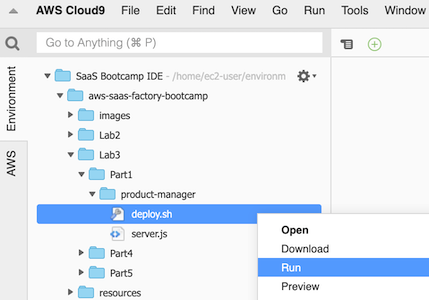
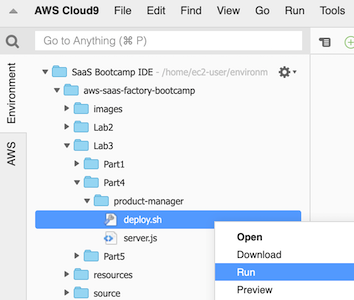
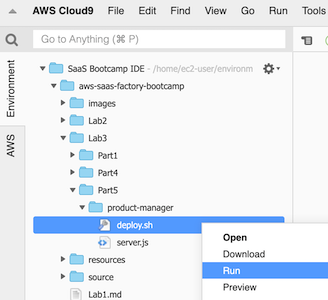
**Step 6** - To deploy our modified service, navigate to the `Lab3/Part1/product-manager/` directory and right-click `deploy.sh`, and click **Run** to execute the shell script.
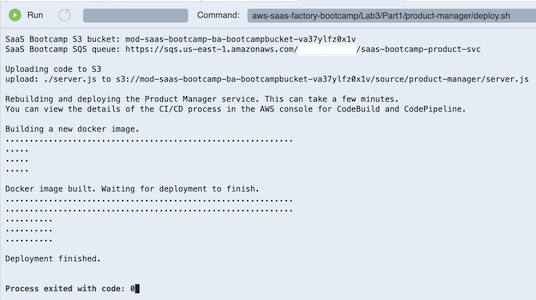
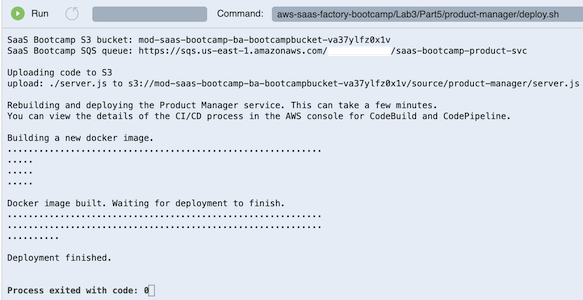
**Step 7** - Wait for the `deploy.sh` shell script to execute successfully.
**Step 8** - With our new version of the service deployed, we can now see how this impacted the application. Let's log back into the system with the credentials for **TenantOne** that you created above (if **TenantTwo** is still logged in, log out using the dropdown at the top right of the page).
**Step 9** - Select the **Catalog** menu option at the top of the page. This _should_ display the catalog for your **TenantOne** user you just authenticated as. However, the _**list actually contains products that are from TenantTwo**_. We've now officially crossed the tenant boundary.
**Recap**: The key takeaway here is that authentication alone is not enough to protect your SaaS system. Without additional policies and authorization in place, the code of your system could un-intentionally access data for another tenant. Here we forced this condition more explicitly, but you can imagine how more subtle changes by a developer could have an un-intended side effect.
## Part 2 - Configuring Provisioned IAM Policies
It's clear now that we need policies to better protect our system from cross-tenant access. The question is: what can we do to better isolate and protect tenant data? The first piece of the puzzle is **IAM policies**. With IAM policies, we can create rules that control the level of access a user has to tenant resources.
Instead of creating new policies from scratch, let's edit policies that were provisioned during the start of our process. The following steps will guide through the policy editing process:
**Step 1** - To locate to the policies we want to edit, navigate to the IAM service in the AWS console and select **Policies** from the list of options on the upper left-hand side of the page. This will give you a list of all the polices that are available in IAM.
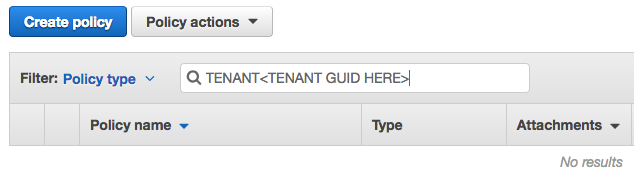
**Step 2** - Now, we want to find the policies associated with the two tenants that we created (**TenantOne** and **TenantTwo**). Let's start with TenantOne. We need to enter the policy name in the search box near the top of the screen. Enter the GUID of the tenant for TenantOne. You captured this value earlier from DynamoDB.
**Step 3** - The list should now be narrowed to just the 2 policies for tenant one. There will be a policy for tenant **admin** and a second one for tenant **user**. **Select the triangle/arrow** in the column preceding the **TenantAdmin** policy name to drill into the policy. Then, select the **Edit policy** button that's near the center of the page.

**Step 4** - The console will now display a list of DynamoDB polices and a Cognito User Pool policy. We're interested in editing the policy for the **ProductBootcamp** table. However, _it's location in this list of DynamoDB tables can vary_. Open each of the collapsed DynamoDB entries in this list by **selecting the arrow** at the left edge of the list. Near the bottom of each expanded set of polices, you should find a **Resources** section. Locate the set of policies that reference the **ProductBootcamp** table. The ARN will be similar to the following:

**Step 5** - Our interest is in the **Request conditions** associated with this policy. These conditions are at the heart of our ability to control which items a user can access within a DynamoDB table. We want our policy to indicate that only users with partition key value that matches **TenantOne**'s tenant identifier will be allowed to access those items in the table. Hover over the **Request conditions** value and **select the text for the conditions** this will put you into edit mode for the conditions.
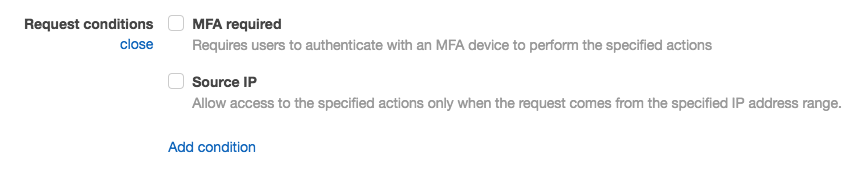
**Step 6** - Select the **Add condition** option at the bottom of the list. Select **dynamodb:LeadingKeys** for the **Condition key**. Select **For all values in request** for the **Qualifier**. Select **StringEquals** for the **Operator**. Finally, in the **Value** text box, enter the GUID of **TenantOne**. Click the **Add** button. Select the **Review policy** button and then select the **Save Changes** button to save this change to the policy.

This process created a new **request condition** for our policy that now indicates that the value of our partition key in our DynamoDB table must match the tenant identifier when you user attempts to access items in the table.
**Step 7** - We now want to repeat this same process for **TenantTwo**. Complete steps 2-6 again replacing all references to TenantOne with **TenantTwo**. This will ensure that TenantTwo is also protected.
**Recap**: The exercises in this part of the lab showed how to put in place the elements needed to support our tenant isolation goals. We amended our existing tenant **policies** introducing changes that allow us to scope access to DynamoDB tables. This was achieved by adding a new condition to our ProductBootcamp table policies. These policies, which are tenant-specific, limit a user's view of the table to only those items that contain our tenant identifier in the table's partition key.
## Part 3 - Mapping User Roles to Policies
Now that we have policies defined, we need some way to connect these policies with specific user roles. Ultimately, we need a way to match both the role of the user and the tenant scope to a _specific_ set of policies. For this scenario, we're going to lean on the **role matching capabilities of Cognito**. Cognito will allow us to define a set of conditions that will be used to create this match and, in the process, emit a **set of credentials** that will be scope based on the matching policies —- which is exactly what we need to implement our tenant isolation model.
In this bootcamp these policy mappings have already been created. Let's take a look at them in the **Cognito console**.
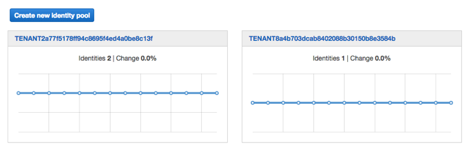
**Step 1** - Navigate to the Cognito service in the AWS console. From the landing page, select the **Manage Identity Pools** button to see a list of identity pools. It will include **separate pools** for each of the tenants that you have onboarded.
Locate the identity pools for **TenantOne** and **TenantTwo**. They will be named with the GUID of the tenant. Click on the identity pool that is associated with **TenantOne**.
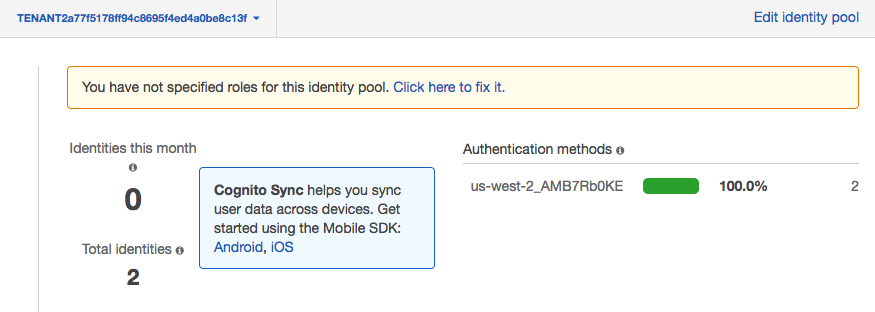
**Step 2** - Once you select the identity pool, you see a page that provides and overview of the identity pool activity. Now select the **Edit identity pool** link at the top right of the page.
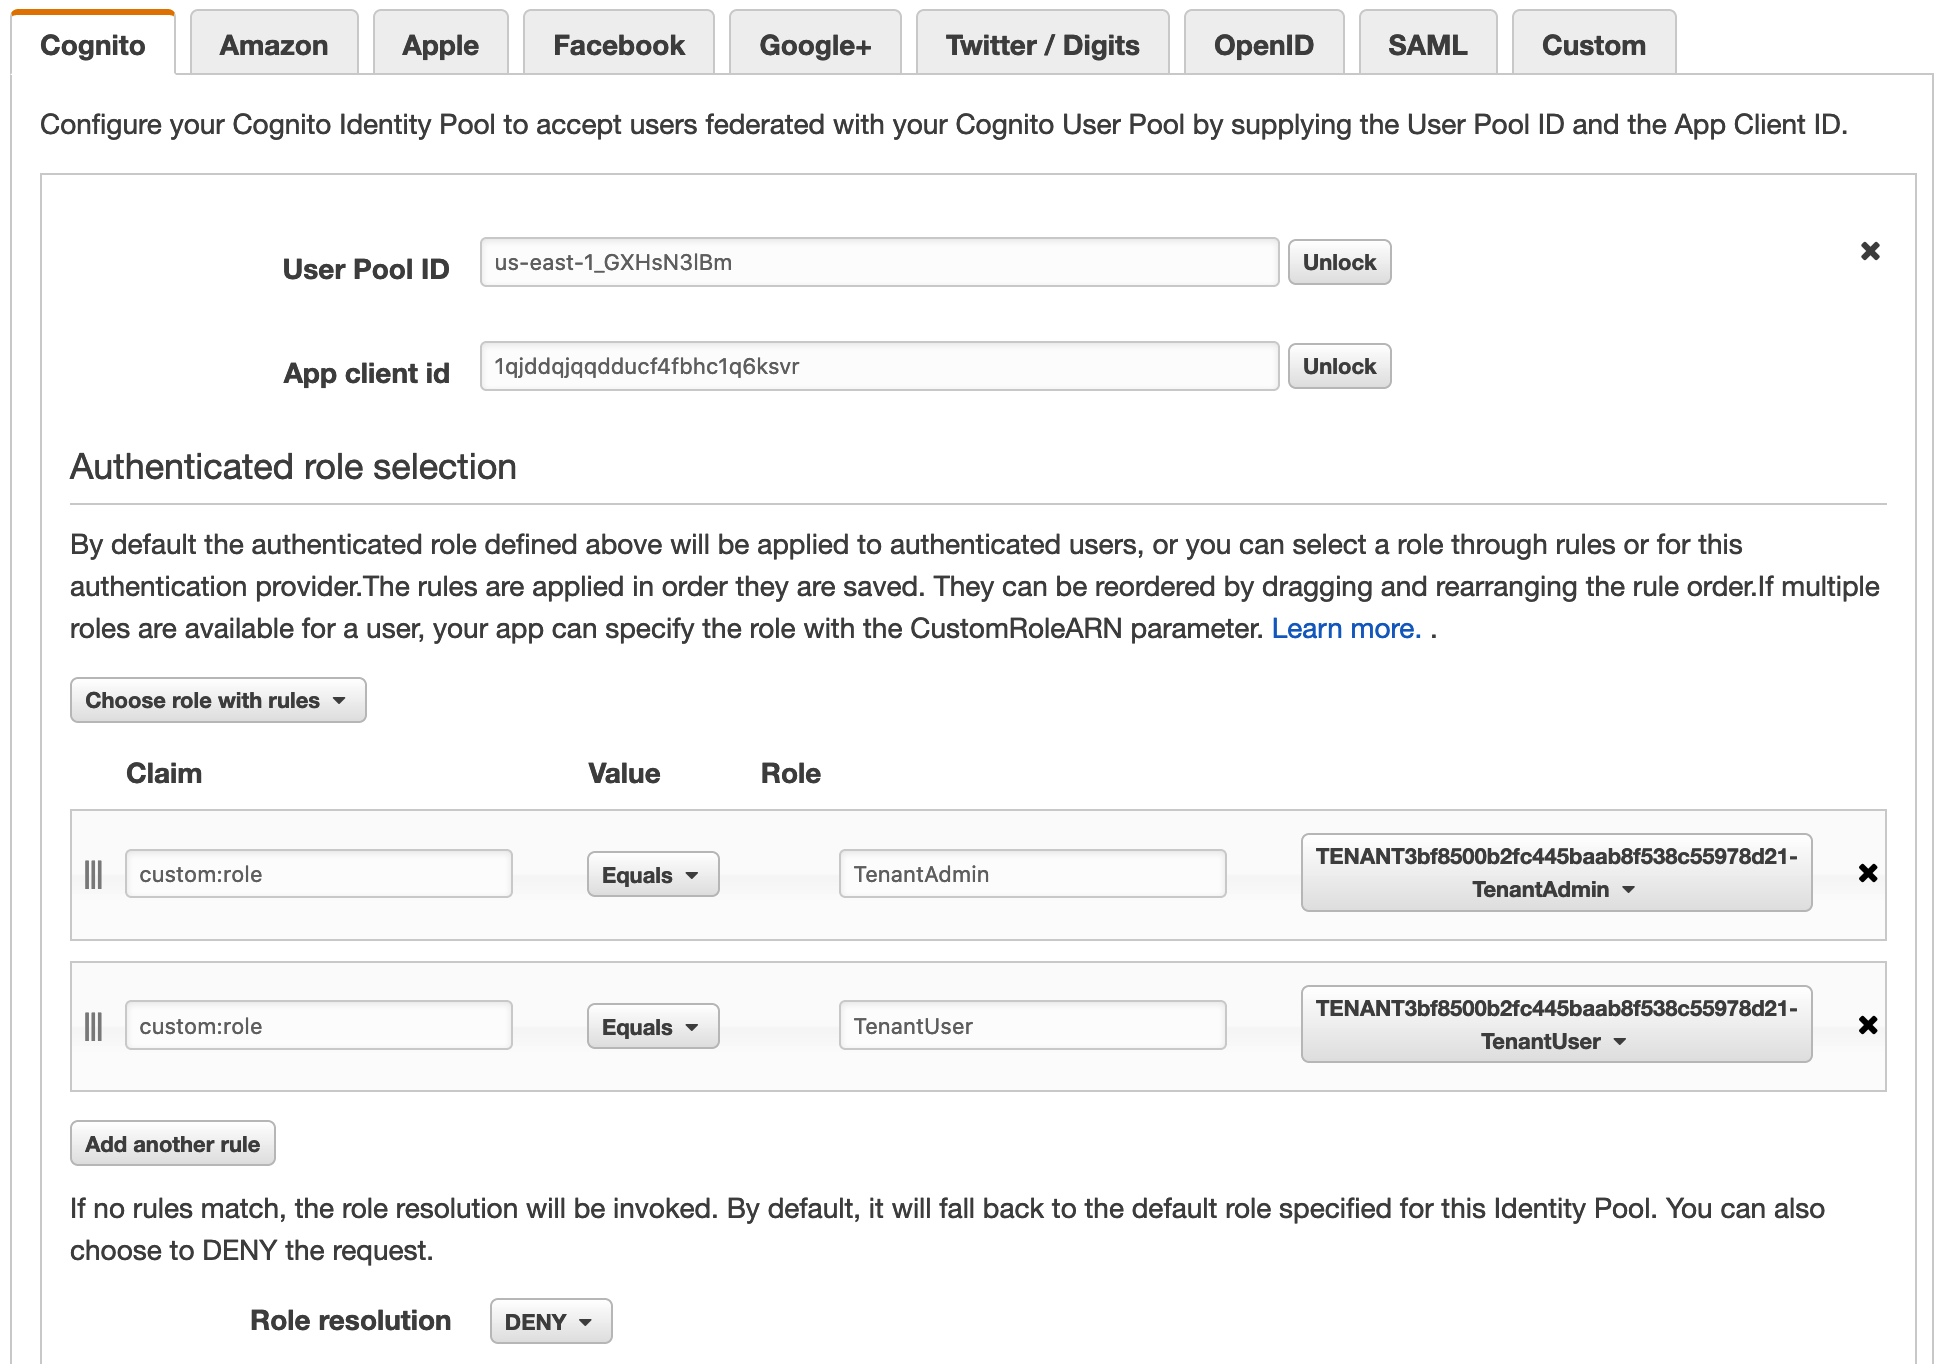
**Step 3** - If you scroll down the edit identity pool page, you'll see a heading for **Authentication Providers**. Expand this section and you'll see a page with authorization provider configurations.
We can now see the role mappings in place for our two roles. There is a **TenantAdmin** role that represents the administrator and there's a **TenantUser** role that maps to individual non-admin users of your SaaS system. Naturally, these have different levels of access to the system and its resources.
The claim column has a value (URL encoded) that matches the custom **role** attribute you configured in Cognito back in Lab 1. When that **custom claim matches** the name of the role, the IAM policy (with the DynamoDB restrictions) is enforced on the **temporary security tokens returned from STS**.
**Recap**: You've now completed building out the second phase of our tenant isolation. With this exercise, we saw the role-mapping rules in our Cognito identity pool. These mappings directly associate roles for tenants (TenantAdmin and TenantUser) to the policies that we configured in first part of this lab.
## Part 4 - Acquiring Tenant-Scoped Credentials
At this point, all the elements of our isolation scheme are in place. We have authentication with Cognito, roles provisioned for each tenant that scope access to our DynamoDB tables, and we have role-mapping conditions configured in Cognito that will connect our authenticated users with their corresponding policies. All that remains now is to introduce the code into our application services that exercises these elements and acquires credentials that will properly scope our access to the tenant resources.
The steps that follow will guide you through the process of configuring and deploying a new version of the product manager service that successfully acquires these tenant-scoped credentials.
**Step 1** - Let's start by looking at how the product manager service is modified to support tenant isolation. In Cloud9, navigate to `Lab3/Part4/product-manager/` and open `server.js` in the editor by double-clicking or right-clicking and selecting **Open**.
The code shown below highlights the last key piece of the tenant isolation puzzle. You'll notice that we have added a call to our `tokenManager` that acquires credentials from the authenticated user's security token. The `getCredentialsFromToken()` method takes the HTTP request and returns the `credentials` that are **scoped by tenant**. These credentials are used in our calls to the `dynamoHelper` to ensure that we **cannot cross tenant boundaries**.
```javascript
app.get('/product/:id', function (req, res) {
winston.debug('Fetching product: ' + req.params.id);
tokenManager.getCredentialsFromToken(req, function (credentials) {
// init params structure with request params
var params = {
tenant_id: tenantId,
product_id: req.params.id
};
// construct the helper object
var dynamoHelper = new DynamoDBHelper(productSchema, credentials, configuration);
dynamoHelper.getItem(params, credentials, function (err, product) {
if (err) {
winston.error('Error getting product: ' + err.message);
res.status(400).send('{"Error" : "Error getting product"}');
} else {
winston.debug('Product ' + req.params.id + ' retrieved');
res.status(200).send(product);
}
});
});
});
```
**Step 2** - The call to `getCredentialsFromToken()` described above is where all the magic happens in terms of mapping our token/identity to the appropriate policies and returning that in the form of credentials. Given the importance of this function, let's dig in and look more closely at what it is doing. Below is a snippet of code from the `TokenManager` that implements the `getCredentialsFromToken()` function:
```javascript
module.exports.getCredentialsFromToken = function (req, updateCredentials) {
var bearerToken = req.get('Authorization');
if (bearerToken) {
var tokenValue = bearerToken.substring(bearerToken.indexOf(' ') + 1);
if (!(tokenValue in tokenCache)) {
var decodedIdToken = jwtDecode(tokenValue);
var userName = decodedIdToken['cognito:username'];
async.waterfall([
function (callback) {
getUserPoolWithParams(userName, callback);
},
function (userPool, callback) {
authenticateUserInPool(userPool, tokenValue, callback);
}
], function (error, results) {
if (error) {
winston.error('Error fetching credentials for user');
updateCredentials(null);
} else {
tokenCache[tokenValue] = results;
updateCredentials(results);
}
});
} else if (tokenValue in tokenCache) {
winston.debug('Getting credentials from cache');
updateCredentials(tokenCache[tokenValue]);
}
}
};
```
Let's highlight the key elements of this function.
* The very first action is to extract the security `bearerToken` from the HTTP request. This is the token that you received from Cognito after you authenticated your user.
* We then decode the token and extract the `userName` attribute.
* Next, a series of calls are executed in sequence. It starts by looking up the `userPool` for the current user. It then calls `authenticateUserInPool()`. This function, which is part of the `TokenManager` helper class ultimately calls the Cognito `getCredentialsForIdentity()` method, passing in the token from the user.
It's this call to Cognito that **triggers the role mapping** we configured earlier. Cognito will extract the role from the supplied token and match it to the policy, then construct a **temporary set of scoped credentials** that are returned to the calling function.
**Step 2** - So that's what the code is doing behind the scenes. Now, let's deploy this new version of the product manager service to see it in action. In Cloud9, navigate to the `Lab3/Part4/product-manager` directory, right-click `deploy.sh`, and click **Run** to execute the shell script.
**Step 3** - Wait for the `deploy.sh` shell script to execute successfully.

**Step 4** - Let's verify that all of the moving parts of this process are working. Use the same web application URL you've used throughout. If **TenantTwo** is stilled logged in, log out using the dropdown at the top left of the application navigation bar. Now, login as **TenantOne** and access your data by selecting the **Catalog** menu item and viewing **TenantOne's** products. **Everything should work**.
While seeing this work is great, it's hard to know that this new code is truly enforcing our tenant isolation. This always of tough case to test. Let's try a bit of a brute force method in Part 5.
**Recap**: We looked at the source code to see how we tie together the JWT **security bearer token** from the HTTP headers, our defined **custom claims**, and Cognito's **role-to-policy mapping** and return of **temporary STS credentials** to enforce tenant isolation in our system. We then deployed a fresh version of the product manager service to remove our manual "security hack" from before.
## Part 5 - Verifying Tenant-Scoped Credentials
At this point, we have incorporated security at the IAM level by leveraging Cognito's
`getCredentialsForIdentity()`, but we have not evaluated if we can circumvent our security measures. As we did before, we will **manually override the tenant identifier** to see if we can break tenant isolation. This will demonstrate that, so long as the access policies and roles defined previously are properly configured, our **tenant isolation measures can't be defeated** by introducing a tenant different from the authenticated SaaS Identity.
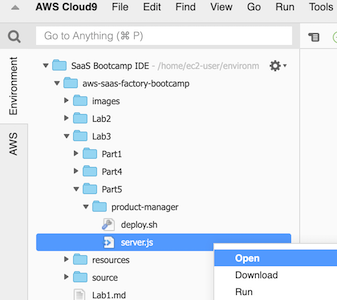
**Step 1** - As before, we will modify the source code for our latest product manager service and manually inject a tenant identifier. In Cloud9 navigate to the `Lab3/Part5/product-manager/` folder and open `server.js` in the editor by double-clicking or right-clicking and selecting **Open**.
**Step 2** - Locate the `GET` function that fetches all products for a tenant. The code function will appear as follows:
```javascript
app.get('/products', function(req, res) {
winston.debug('Fetching Products for Tenant Id: ' + tenantId);
tokenManager.getCredentialsFromToken(req, function (credentials) {
var searchParams = {
TableName: productSchema.TableName,
KeyConditionExpression: "tenant_id = :tenant_id",
ExpressionAttributeValues: {
":tenant_id": tenantId
//":tenant_id": ""
}
};
// construct the helper object
var dynamoHelper = new DynamoDBHelper(productSchema, credentials, configuration);
dynamoHelper.query(searchParams, credentials, function(error, products) {
if (error) {
winston.error('Error retrieving products: ' + error.message);
res.status(400).send('{"Error": "Error retrieving products"}');
} else {
winston.debug('Products successfully retrieved');
res.status(200).send(products);
}
});
});
});
```
We will once again **manually inject** the `tenant_id` for **TenantTwo** to see if our new code will prevent cross tenant access. Locate the `tenant_id` that you recorded earlier from DynamoDB for **TenantTwo** and _**replace**_ the `tenant_id` with this value. So, when you're done, it should appear similar to the following:
```javascript
app.get('/products', function (req, res) {
winston.debug('Fetching Products for Tenant Id: ' + tenantId);
tokenManager.getCredentialsFromToken(req, function (credentials) {
var searchParams = {
TableName: productSchema.TableName,
KeyConditionExpression: "tenant_id = :tenant_id",
ExpressionAttributeValues: {
":tenant_id": "TENANT4c33c2eae9974615951e3dc04c7b9057"
}
};
// construct the helper object
var dynamoHelper = new DynamoDBHelper(productSchema, credentials, configuration);
dynamoHelper.query(searchParams, credentials, function (error, products) {
if (error) {
winston.error('Error retrieving products: ' + error.message);
res.status(400).send('{"Error" : "Error retrieving products"}');
} else {
winston.debug('Products successfully retrieved');
res.status(200).send(products);
}
});
});
});
```
**Step 3** - Now we need to deploy our updated product manager microservice with our cross tenant access violation in-place. First, save your edited `server.js` file in Cloud9 by clicking **File** on the toolbar followed by **Save**.
**Step 4** - To deploy our modified service, navigate to the `Lab3/Part5/product-manager/` directory and right-click `deploy.sh`, and click **Run** to execute the shell script.
**Step 5** - Wait for the `deploy.sh` shell script to execute successfully.
**Step 6** - With our new version of the service deployed, we can now see how this impacted the application. Let's log back into the system with the credentials for **TenantOne** that you created above (if **TenantTwo** is still logged in, log out using the dropdown at the top right of the page).
**Step 7** - Select the **Catalog** menu option at the top of the page. This should display the catalog for your **TenantOne** user you just authenticated as. You'll see that **no products are displayed**. In fact, if you look at the JavaScript console logs (use your browser's developer tools), you'll see that this threw an error. This is because we're logged in as **TenantOne** and our service has hard-coded **TenantTwo**. This makes it clear that our isolation policies are being enforced since the **credentials we acquired prohibited us from accessing data for TenantTwo**.
**Recap**: With this last step, we connected all the concepts of **tenant isolation** in the code of the product manager service. We added specific calls to exchange our authenticated token for a **tenant-scope set of credentials** which we then used to access our DynamoDB data store. With this **new level of isolation enforcement** in place, we attempted to hard-code something that crossed a tenant boundary and confirmed that our policies **prohibited cross-tenant access**.