{
"cells": [
{
"cell_type": "markdown",
"metadata": {},
"source": [
"# Segment Real Time Data + Personalize - Lab 5 (optional)\n",
"\n",
"In this module you are going to be adding the ability to maintain a real-time dataset that represents the latest user behavior for users of the Retail Demo Store. You will then connect that dataset to the Personalize dataset groups that you built in the first part of the workshop. This will enable your Personalize models to be kept up to date with the latest events your users are performing.\n",
"\n",
"This workshop will use the Segment analytics.js library to collect real-time data from the Retail Demo Store, and then feed that event data into the Segment platform, where it can be routed directly to a Personalize Event Tracker, and then used to maintain the latest behavioral data for your personalization user-item interaction data.\n",
"\n",
"Recommended Time: 45 Minutes\n",
"\n",
"## Prerequisites\n",
"\n",
"In order to complete this workshop, you will need to complete the Labs 1-4 in this directory. You will also need a Segment workspace. If you are doing this workshop as part of a live workshop event, ask your moderator how to set up a Segment workspace. If you are running this workshop on your own, you can [click here](https://segment.com) to create a Segment account. We do not recommend using your production Segment workspace for this workshop.\n",
"\n",
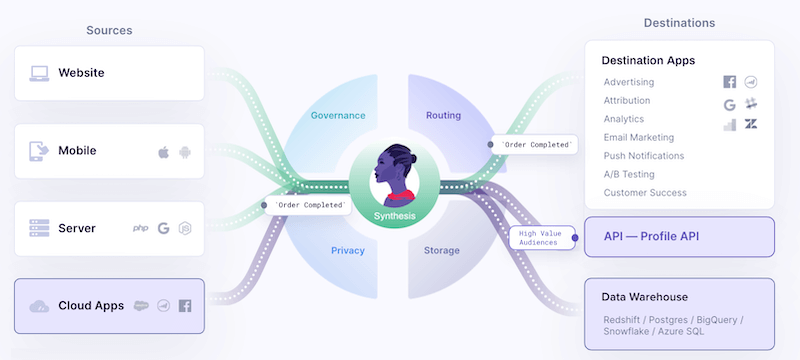
"## Segment Platform Overview\n",
"Segment is a customer data platform (CDP) that helps you collect, clean, and control your customer data. Segment provides several types of Sources which you can use to collect your data, and which you can choose from based on the needs of your app or site. For websites, you can use a javascript library to collect data. If you have a mobile app, you can embed one of Segment’s Mobile SDKs, and if you’d like to create messages directly on a server (if you have, for example a dedicated .NET server that processes payments), Segment has several server-based libraries that you can embed directly into your backend code. With Segment, you can also use cloud-sources to import data about your app or site from other tools like Zendesk or Salesforce, to enrich the data sent through Segment. By using Segment to decouple data collection from data use, you can create a centralized data supply chain based on organized and modular data.\n",
"\n",
""
]
},
{
"cell_type": "markdown",
"metadata": {},
"source": [
"## Setup\n",
"\n",
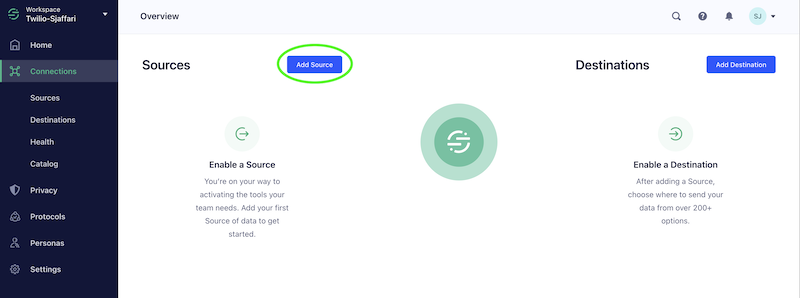
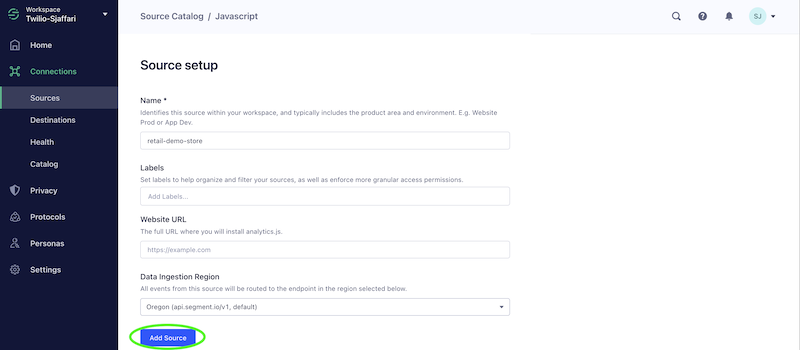
"Segment uses *sources* as a way to organize data inputs into the platform. Configuring a source will allow you to collect real-time event data from the Retail Demo Store user interface, and pass that information to Segment. You need to be signed into your Segment workspace to begin this process. Once you are signed in to the Segment console (https://app.segment.com), click on your workspace, and then ‘Connections’ in the upper left hand corner of the screen. Then, click ‘Add Source’.\n",
"\n",
"\n",
"\n",
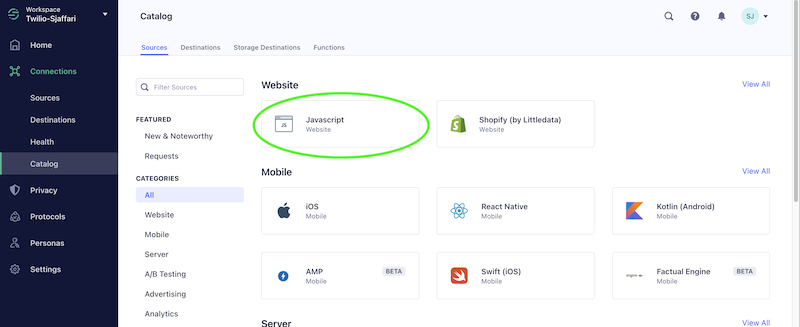
"Select the ‘javascript’ source type.\n",
"\n",
"\n",
"\n",
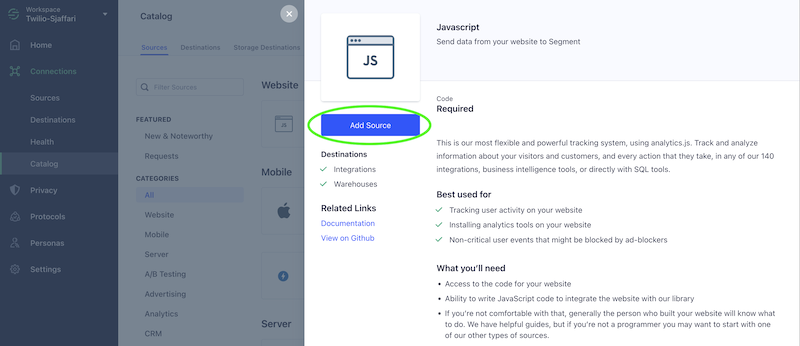
"And click ‘Add Source’.\n",
"\n",
"\n",
"\n",
"Give your source a name. We recommend ‘retail-demo-store.’\n",
"\n",
"\n",
"\n",
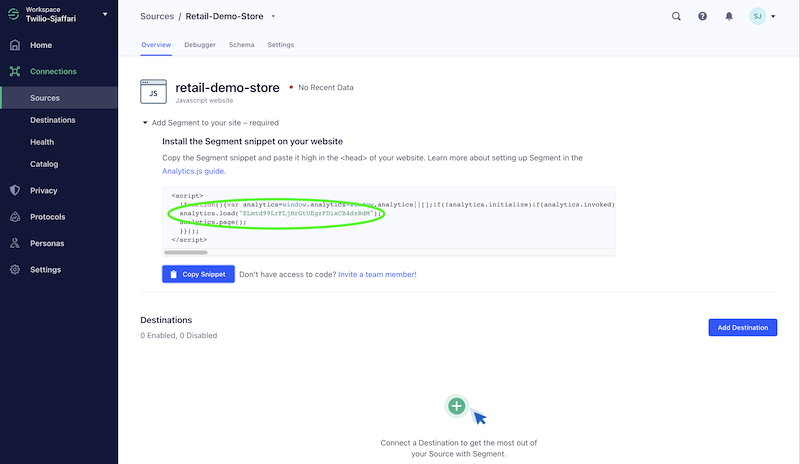
"The next screen confirms that your source was successfully created.\n",
"\n",
"\n",
"\n",
"Now that you are here, set the write key for your new source in the environment variable below. \n",
"\n",
"Copy the string in the `analytics.load(“...”)` section shown above, and paste it into the variable in the cell below. \n",
"\n",
"You will need this in a few minutes, when you enable Segment events collection in the Retail Demo Store.\n",
"\n",
"Make sure you run the cell after you paste the key."
]
},
{
"cell_type": "code",
"execution_count": null,
"metadata": {},
"outputs": [],
"source": [
"import boto3\n",
"\n",
"# Enter your Segment write key here, from the above step\n",
"\n",
"segment_write_key = \"YOUR_SEGMENT_WRITE_KEY_GOES_HERE\"\n"
]
},
{
"cell_type": "markdown",
"metadata": {},
"source": [
"Now that you have a working source, let’s wire up our event data to Amazon Personalize.\n",
"\n",
"## Configure the Segment Personalize Destination\n",
"\n",
"Segment uses Destinations to route real-time event data to a data consumer application. In this case, you will be using the Segment Personalize destination. This destination will take real-time events from Segment, pass them through an AWS Lambda function, and then into the user-item interactions dataset in your Retail Demo Store.\n",
"\n",
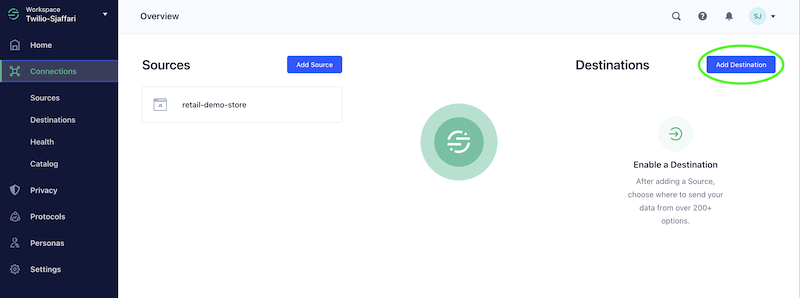
"Click ‘Connections’ in the upper left corner of the screen, and then the ‘Add Destination’ button.\n",
"\n",
"\n",
"\n",
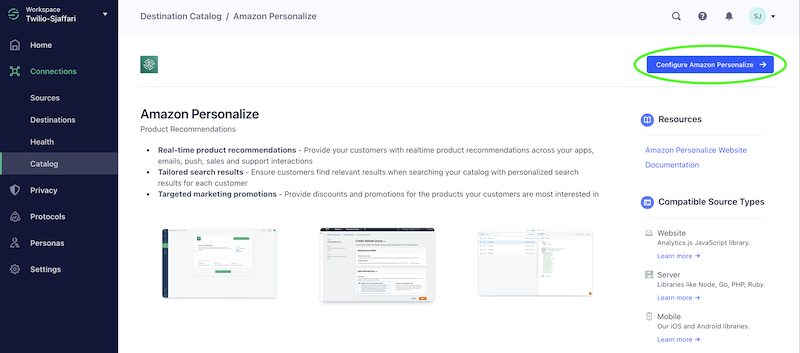
"In the Segment destinations catalog, type ‘personalize’ into the search text box in the upper left corner of the screen. You will see the Amazon Personalize destination appear in the search results. Click the tile for the destination.\n",
"\n",
"\n",
"\n",
"Then, click the ‘Configure Amazon Personalize’ button.\n",
"\n",
"\n",
"\n",
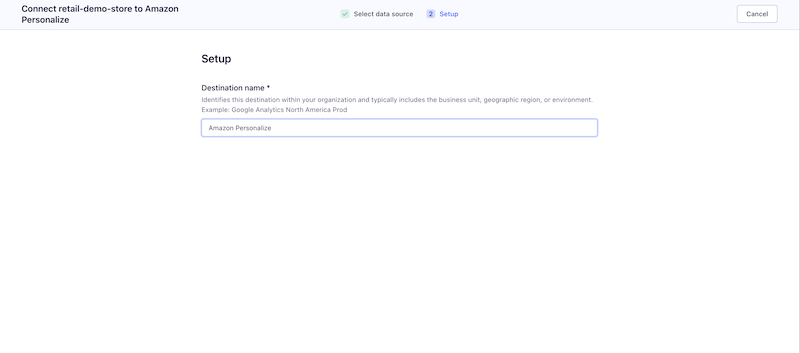
"Select your source from the earlier part of this process; this screen should show the source you created in the steps above. \n",
"\n",
"\n",
"\n",
"Then, click the ‘Confirm Source’ button.\n",
"\n",
"\n",
"\n",
"At this point, you are ready to configure the AWS Lambda function that the destination will need to process events from the Retail Demo Store.\n",
"\n",
"\n",
"\n",
"The Retail Demo Store deployment in your AWS account will have a pre-configured Lambda function that you can use to configure the destination. This function is deployed to the Retail Demo store during the environment setup steps at the beginning of the workshop.\n",
"\n",
"Segment uses a Lambda function as a way to allow you to customize the event names and properties that are sent to Personalize for training purposes. The Cloud Formation Template and code for this Lambda is available for your use, if you would like to use this pattern in your own applications.\n",
"\n",
"Log in to your AWS Console, and select Lambda under the Services finder in the top left corner of the screen. You will see a screen that looks like this:\n",
"\n",
"\n",
"\n",
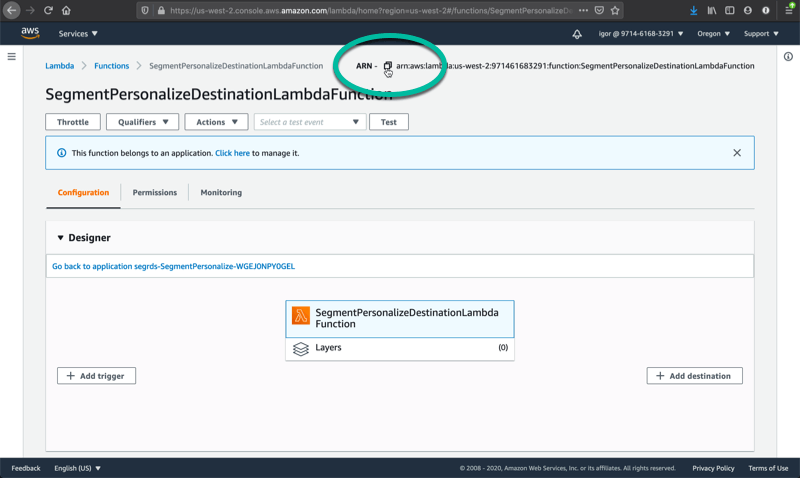
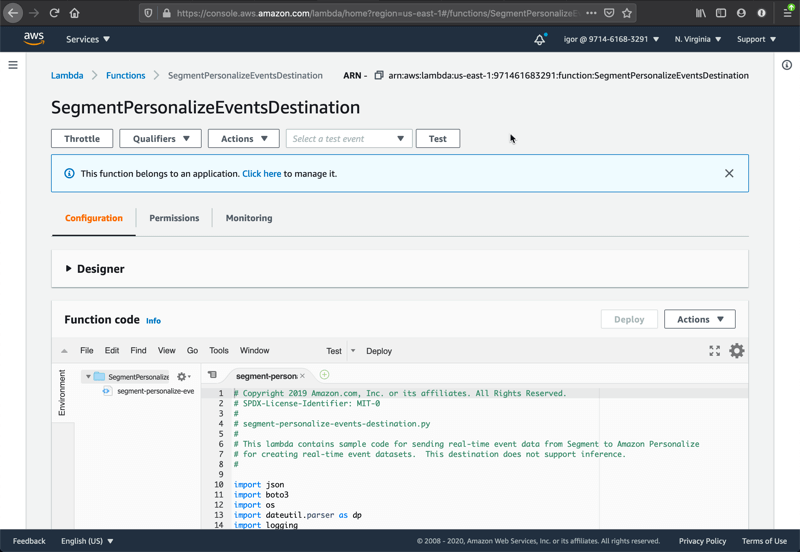
"Find the SegmentPersonalizeEventsDestination and click on it. Keep this tab or window open as you will need it in a few steps when you configure Amazon Personalize.\n",
"\n",
"\n",
"\n",
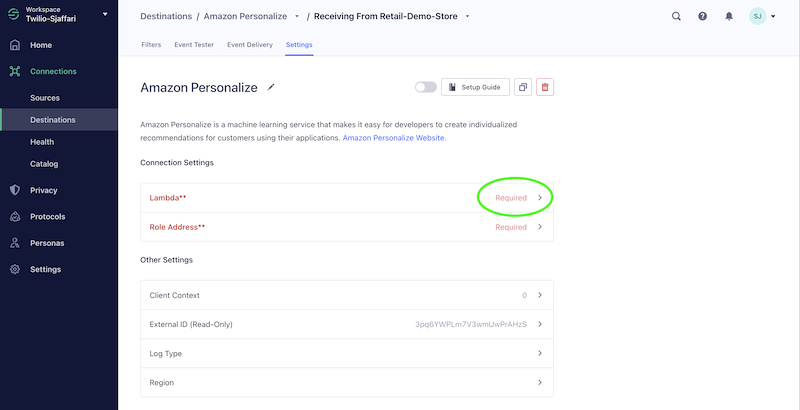
"At the top of the screen, you will see the ARN for the Lambda function. Click the copy link shown above to copy the ARN to the clipboard, then go back to the Segment console for your Personalize destination, and click on Lambda **.\n",
"\n",
"\n",
"\n",
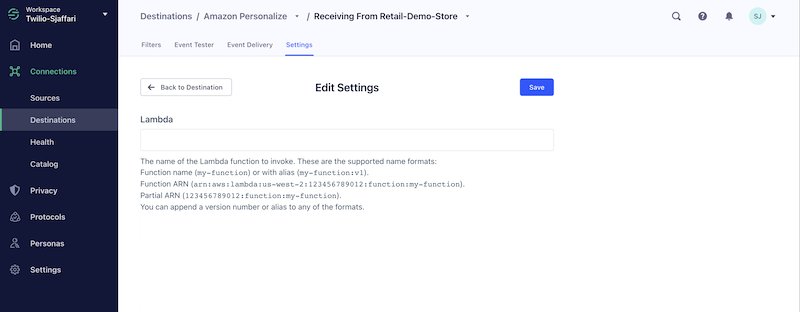
"On the next screen, paste in the ARN for the Lambda. And click the Save button.\n",
"\n",
"\n",
"\n",
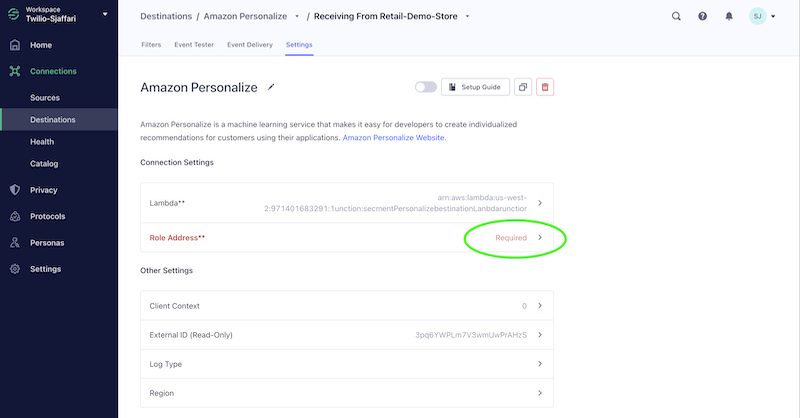
"Next, you will give Segment permission to call your Lambda from their AWS account. Click the Role Address** link.\n",
"\n",
"\n",
"\n",
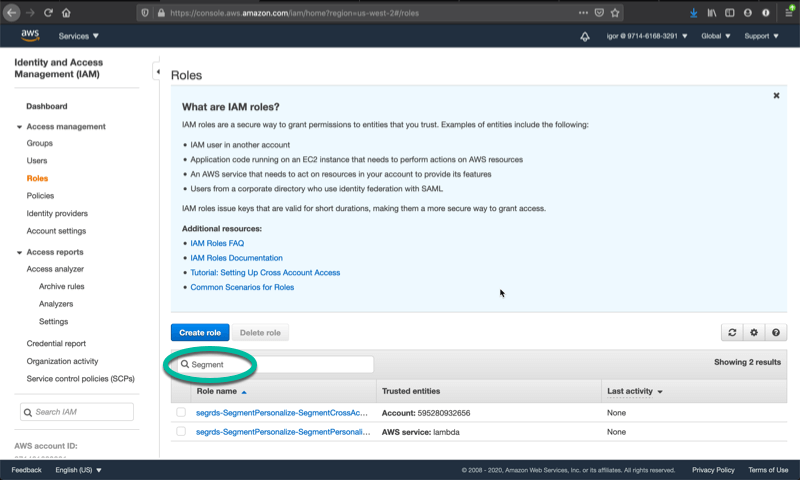
"Next, go to your AWS Console tab or window, and select IAM from Services, and then click on Roles. In the search text box, search for Segment.\n",
"\n",
"\n",
"\n",
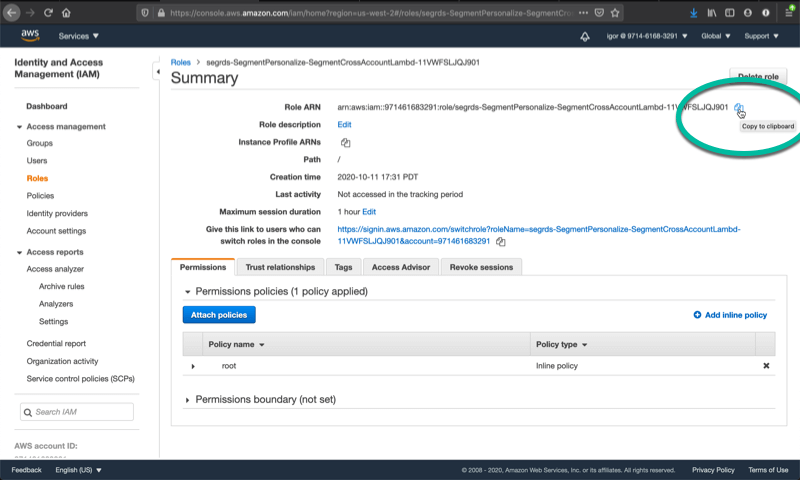
"Select the SegmentCrossAccountLambda role, and copy the Role ARN. You can easily copy the whole string by clicking the copy button to the right of the ARN as shown in the screen shot.\n",
"\n",
"\n",
"\n",
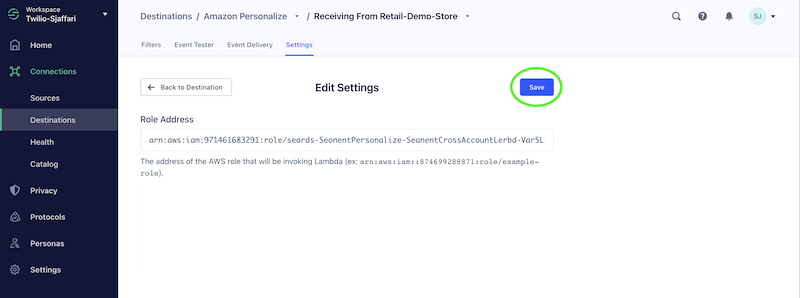
"Go back to the Segment console destination configuration tab or window, and paste in the ARN you just copied and click Save.\n",
"\n",
"\n",
"\n",
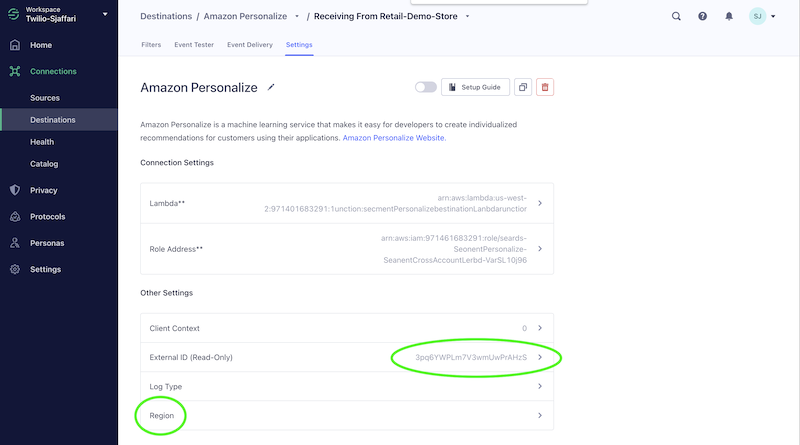
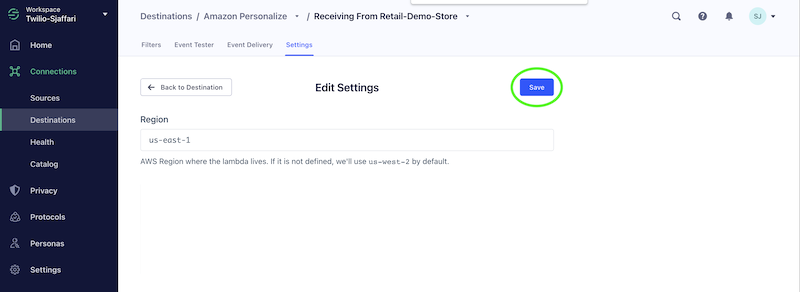
"Next, you need to set the region for the Lambda that is deployed in your account.\n",
"\n",
"If you are running this in an AWS managed workshop, ask your event admins for the region in which you are running the workshop. If you are running the workshop in us-west-2, there is no need to change this setting. Otherwise, use the region in which the workshop is deployed, otherwise Segment will not be able to invoke your Lambda.\n",
"\n",
"\n",
"\n",
"\n",
"\n",
"\n",
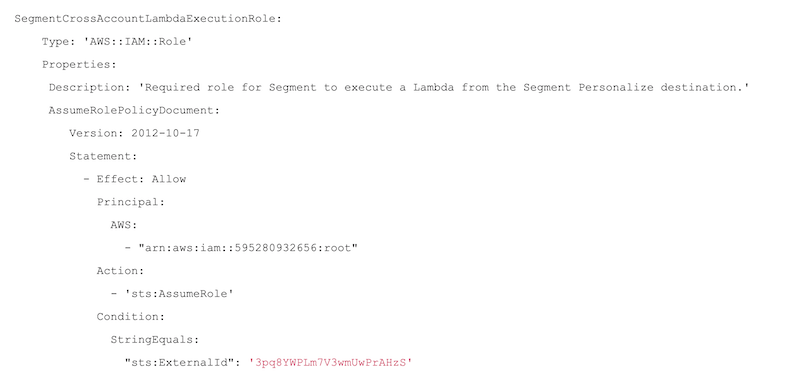
"Segment will call the Lambda using the Role SegmentCrossAccountLambdaExecutionRole. Currently this IAM role has externalId 123456789. You need to replace it using autogenerated externalId in Segment. To update role go to IAM from AWS console & search for SegmentCrossAccountLambdaExecutionRole. This role is used while Segment subsequently calling Amazon Personalize. Replace the externalId with the one randomly generated as shown in the example below.\n",
"\n",
"\n",
"\n",
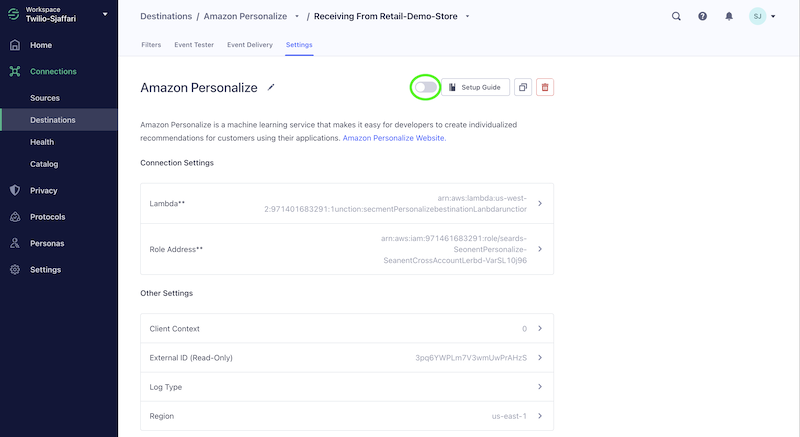
"Finally, click the slider button at the top of the screen to enable the destination. You must enable the destination or events will not be sent to Personalize in the following steps.\n",
"\n",
""
]
},
{
"cell_type": "markdown",
"metadata": {},
"source": [
"## Configure Lambda Parameters and Review Code\n",
"\n",
"Before the destination can send events to your Amazon Personalize event tracker, you will need to tell the destination lambda where to send the events. It looks for an environment variable called 'personalize_tracking_id'.\n",
"\n",
"Let's set that. Run the following cell to look up the relevant Amazon Personalize tracker from the Personalize workbook.\n",
"\n",
"We can then set the appropriate value in the destination Lambda."
]
},
{
"cell_type": "code",
"execution_count": null,
"metadata": {},
"outputs": [],
"source": [
"ssm = boto3.client('ssm')\n",
"\n",
"# First, let's look up the appropriate tracking string\n",
"response = ssm.get_parameter(\n",
" Name='/retaildemostore/personalize/event-tracker-id'\n",
")\n",
"\n",
"tracking_id = response['Parameter']['Value']\n",
"\n",
"print(tracking_id)"
]
},
{
"cell_type": "markdown",
"metadata": {},
"source": [
"Go to your AWS console tab or window, and select Lambda from the Services menu.\n",
"\n",
"Find the SegmentPersonalizeEventsDestination, and click on it in the list.\n",
"\n",
"\n",
"\n",
"\n",
"\n",
"Then, scroll down to the parameters section.\n",
"\n",
"\n",
"\n",
"The tracking parameter should be set to the tracker from the first workbook. \n",
"\n",
"Click the edit button, then paste in the tracking ID from the cell above, and click the Redeploy button at the top of the screen.\n",
"\n",
"Take some time to look at the code that this Lambda uses to send events to Personalize. You can use this code in your own deployment, however you may need to change the event parameters sent to Amazon Personalize depending on the dataset you set up.\n",
"\n",
"```python\n",
"def lambda_handler(event, context): \n",
" # In high volume applications, remove this code.\n",
" logger.debug(\"Got event: \" + json.dumps(event))\n",
"\n",
" # Segment will invoke your function once per event type you have configured\n",
" # in the Personalize destination in Segment.\n",
" try:\n",
" if ('anonymousId' in event or 'userId' in event and 'properties' in event):\n",
" # Make sure this event contains an itemId since this is required for the Retail Demo Store\n",
" # dataset - you can also check for specific event names here if needed, and only pass the ones\n",
" # that you want to use in the training dataset\n",
" if (not 'productId' in event['properties']):\n",
" logger.debug(\"Got event with no productId, discarding.\")\n",
" return\n",
"\n",
" logger.debug(\"Calling putEvents()\")\n",
" # Function parameters for put_events call.\n",
" params = {\n",
" 'trackingId': personalize_tracking_id,\n",
" 'sessionId': event['anonymousId']\n",
" }\n",
"\n",
" # If a user is signed in, we'll get a userId. Otherwise for anonymous \n",
" # sessions, we will not have a userId. We still want to call put_events\n",
" # in both cases. Once the user identifies themsevles for the session, \n",
" # subsequent events will have the userId for the same session and \n",
" # Personalize will be able to connect prior anonymous to that user.\n",
" if event.get('userId'):\n",
" params['userId'] = event['userId']\n",
"\n",
" # YOU WILL NEED TO MODIFY THIS PART TO MATCH THE EVENT PROPS\n",
" # THAT COME FROM YOUR EVENTS\n",
" # \n",
" # Personalize needs the event identifier\n",
" # that was used to train the model. In this case, we're using the \n",
" # product's productId passed through Segment to represent the itemId.\n",
" #\n",
" properties = { 'itemId': event['properties']['productId'] }\n",
"\n",
" # Build the event that we're sending to Personalize. Note that Personalize\n",
" # expects a specific event format\n",
" personalize_event = {\n",
" 'eventId': event['messageId'],\n",
" 'sentAt': int(dp.parse(event['timestamp']).strftime('%s')),\n",
" 'eventType': event['event'],\n",
" 'properties': json.dumps(properties)\n",
" }\n",
"\n",
" params['eventList'] = [ personalize_event ]\n",
"\n",
" logger.debug('put_events parameters: {}'.format(json.dumps(params, indent = 2)))\n",
" # Call put_events\n",
" response = personalize_events.put_events(**params)\n",
" else:\n",
" logger.debug(\"Segment event does not contain required fields (anonymousId and sku)\")\n",
"```\n"
]
},
{
"cell_type": "markdown",
"metadata": {},
"source": [
"## Validate that Real-Time Events are Flowing from the Retail Demo Store\n",
"\n",
"You are now ready to send live events to Personalize from the Retail Demo Store. In order to do this, you will need to enable the Segment client side integration with the Retail Demo Store. Segment provides a variety of ways to collect real time events, and a full discussion of how this works is beyond the scope of this document, however the Retail Demo Store represents a fairly typical deployment for most web applications, in that it uses the Segment analytics.js library, loaded via the Segment CDN, to inject their code into the web application. \n",
"\n",
"Because the Retail Demo Store is a Vue.js application, this code is loaded in the head tag of index.html file:"
]
},
{
"cell_type": "markdown",
"metadata": {},
"source": [
"```html\n",
" \n",
" \n",
" \n",
" \n",
" apple-touch-icon.png\">\n",
" favicon-32x32.png\">\n",
" favicon-16x16.png\">\n",
" site.webmanifest\">\n",
" \n",
" \n",
" Retail Demo Store\n",
" \n",
" <%= VITE_SEGMENT_WRITE_KEY === 'NONE' ? '' : `