1. From AWS console, click on Services and type in Lambda in the search bar and press enter.  2. Click on **Create Function** 3. Type in your function name. **Example**: *ta-deleteiamkey* 4. Set Runtime to **Python3.6** 5. Select Create custom role, on the newly opened page input a **Role Name**. **Example:** *ta-iam-role* 6. On the newly opened page, click on **View Policy Document** and then **Edit** 7. Copy and paste below IAM Role and click **Allow** IAM Role ``` { "Version": "2012-10-17", "Statement": [ { "Sid": "Stmt1477516473539", "Action": [ "logs:CreateLogGroup", "logs:CreateLogStream", "logs:PutLogEvents" ], "Effect": "Allow", "Resource": "arn:aws:logs:*:*:*" }, { "Sid": "Stmt1477680111144", "Action": [ "iam:DeleteAccessKey" ], "Effect": "Allow", "Resource": "*" } ] } ``` 8. Click on **Create Function**. 9. Copy Paste below Lambda Function Code and click **Save**. ``` import boto3 iam = boto3.client('iam') def lambda_handler(event, context): account_id = event['account'] time_discovered = event['time'] details = event['detail']['check-item-detail'] username = details['User Name (IAM or Root)'] access_key_id = details['Access Key ID'] exposed_location = details['Location'] print('Deleting exposed access key pair...') delete_exposed_key_pair(username, access_key_id) return { "account_id": account_id, "time_discovered": time_discovered, "username": username, "deleted_key": access_key_id, "exposed_location": exposed_location } def delete_exposed_key_pair(username, access_key_id): """ Deletes IAM access key pair identified by access key ID for specified user. Args: username (string): Username of IAM user to delete key pair for. access_key_id (string): IAM access key ID to identify key pair to delete. Returns: (None) """ try: iam.delete_access_key( UserName=username, AccessKeyId=access_key_id ) except Exception as e: print(e) print('Unable to delete access key "{}" for user "{}".'.format(access_key_id, username)) raise(e) ```
1. From AWS console, click on Services and type in Lambda in the search bar and press enter.  2. Click on **Create Function** 3. Type in your function name. **Example**: *ta-lookupctrail* 4. Set Runtime to **Python3.6** 5. Select Create custom role, on the newly opened page input a **Role Name**. **Example:** *ta-ctrail-role* 6. On the newly opened page, click on **View Policy Document** and then **Edit** 7. Copy and paste below IAM Role and click **Allow** IAM Role ``` { "Version": "2012-10-17", "Statement": [ { "Sid": "Stmt1477516473539", "Action": [ "logs:CreateLogGroup", "logs:CreateLogStream", "logs:PutLogEvents" ], "Effect": "Allow", "Resource": "arn:aws:logs:*:*:*" }, { "Sid": "Stmt1477680111144", "Action": [ "cloudtrail:LookupEvents" ], "Effect": "Allow", "Resource": "*" } ] } ``` 8. Click on **Create function** 9. Copy Paste below Lambda Function Code and click **Save** ``` import datetime import collections import boto3 cloudtrail = boto3.client('cloudtrail') def lambda_handler(event, context): account_id = event['account_id'] time_discovered = event['time_discovered'] username = event['username'] deleted_key = event['deleted_key'] exposed_location = event['exposed_location'] endtime = datetime.datetime.now() # Create start and end time for CloudTrail lookup interval = datetime.timedelta(hours=24) starttime = endtime - interval print('Retrieving events...') events = get_events(username, starttime, endtime) print('Summarizing events...') event_names, resource_names, resource_types = get_events_summaries(events) return { "account_id": account_id, "time_discovered": time_discovered, "username": username, "deleted_key": deleted_key, "exposed_location": exposed_location, "event_names": event_names, "resource_names": resource_names, "resource_types": resource_types } def get_events(username, starttime, endtime): """ Retrieves detailed list of CloudTrail events that occurred between the specified time interval. Args: username (string): Username to lookup CloudTrail events for. starttime(datetime): Start of interval to lookup CloudTrail events between. endtime(datetime): End of interval to lookup CloudTrail events between. Returns: (dict) Dictionary containing list of CloudTrail events occurring between the start and end time with detailed information for each event. """ try: response = cloudtrail.lookup_events( LookupAttributes=[ { 'AttributeKey': 'Username', 'AttributeValue': username }, ], StartTime=starttime, EndTime=endtime, MaxResults=50 ) except Exception as e: print(e) print('Unable to retrieve CloudTrail events for user "{}"'.format(username)) raise(e) return response def get_events_summaries(events): """ Summarizes CloudTrail events list by reducing into counters of occurrences for each event, resource name, and resource type in list. Args: events (dict): Dictionary containing list of CloudTrail events to be summarized. Returns: (list, list, list) Lists containing name:count tuples of most common occurrences of events, resource names, and resource types in events list. """ event_name_counter = collections.Counter() resource_name_counter = collections.Counter() resource_type_counter = collections.Counter() for event in events['Events']: resources = event.get("Resources") event_name_counter.update([event.get('EventName')]) if resources is not None: resource_name_counter.update([resource.get("ResourceName") for resource in resources]) resource_type_counter.update([resource.get("ResourceType") for resource in resources]) return event_name_counter.most_common(10), resource_name_counter.most_common(10), resource_type_counter.most_common(10) ```
1. From AWS console, click on Services and type in SNS in the search bar and press enter.  2. If this is the first time using SNS click **Get started** 3. Click on **Topics**. 4. Click on **Create new topic** 5. Enter a **Topic Name** and **Display Name**. **Example**: *ta-key-del* 6. Click on **Create Topic**. 7. From the topic list, note down the newly created topic ARN. 8. Select the newly created topic. 9. Click **Actions**, then select **Subscribe to topic** 10. From the **Protocol** dropdown menu select Email. Input your email in the endpoint field. 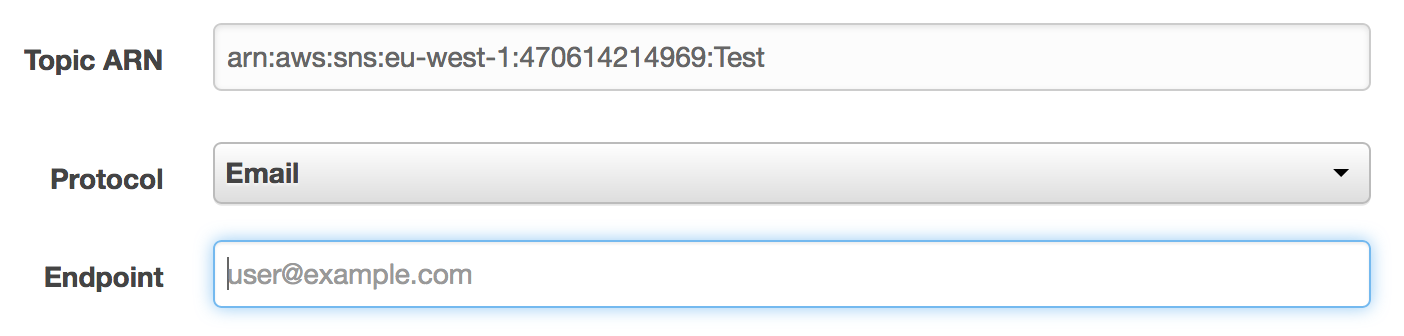 11. Click **Create subscription**, you will receive a Subscription Confirmation email on the email address specified above.
1. From AWS console, click on Services and type in Lambda in the search bar and press enter. 
2. Click on **Create Function**.
3. Type in your function name. **Example**: *ta-messagesns*
4. Set Runtime to **Python3.6**
5. Select Create custom role, on the newly opened page input a **Role Name**. **Example:** *ta-sns-role*
6. On the newly opened page, click on **View Policy Document** and then **Edit**
7. Copy and paste below IAM Role and click **Allow**
IAM Role
```
{
"Version": "2012-10-17",
"Statement": [
{
"Sid": "Stmt1477516473539",
"Action": [
"logs:CreateLogGroup",
"logs:CreateLogStream",
"logs:PutLogEvents"
],
"Effect": "Allow",
"Resource": "arn:aws:logs:*:*:*"
}, {
"Sid": "Stmt1477680111144",
"Action": [
"sns:Publish"
],
"Effect": "Allow",
"Resource": "
1. From AWS console, click on Services and type in IAM in the search bar and press enter.  2. On the left panel, click on **Roles** 3. Click on **Create role** 3. Select **AWS service** and then click on **Step Functions** 4. Click on **Next: Permissions** 5. On the Attached permissions policies ensure AWSLambdaRole is selected then click **Next: Review** 6. Input the name and a description for your role. **Example**: *ta-step-role* 7. Click **Create role**
1. From AWS console, click on Services and type in Step Functions in the search bar and press enter. 
2. If this is the first time using AWS Step Functions click on **Get started**, otherwise click on **Create state machine**
3. Select **Author from scratch**
3. In the Details panel, enter a name for your Step Function. **Example**: *ta-step-function*
5. On the State machine definition panel, copy the following ASL definition:
```
{
"Comment": "Deletes exposed IAM access keypairs and notifies security",
"StartAt": "DeleteAccessKeyPair",
"States": {
"DeleteAccessKeyPair": {
"Type": "Task",
"Resource": "
1. From AWS console, click on Services and type in CloudWatch in the search bar and press enter. 
2. Click on **Rules** under Events on the left side of the menu screen.
3. Click **Create Rule**
4. Click **Edit** on the event source pattern and paste below.
```
{
"source": [
"aws.trustedadvisor"
],
"detail-type": [
"Trusted Advisor Check Item Refresh Notification"
],
"detail": {
"status": [
"ERROR"
],
"check-name": [
"Exposed Access Keys"
]
}
}
```
5. Click **Add target**.
6. Select the Step Function you created on step 6.
7. Keep everything else default.
8. Click **Configure Details**.
9. Enter a **Name** for your event. **Example**: *ta-event-step*
10. Click on **Create rule**.
####Mock Events####
*Note: This solution will delete the key specified in the mock event. Please ensure the user/key in the mock event is not used in any production workload.*
Given that we don't want to actually expose our keys, we will emulate the scenario by triggering the workflow with a mock event. You can trigger a mock event by creating a new rule below, follow the same step above but change the Event Pattern to this:
```
{
"source": [
"awsmock.trustedadvisor"
],
"detail-type": [
"Trusted Advisor Check Item Refresh Notification"
],
"detail": {
"status": [
"ERROR"
],
"check-name": [
"Exposed Access Keys"
]
}
}
```
To trigger mock event run below command. ( Require AWS CLI )
`aws events put-events --entries file://mockpayload.json`
**mockpayload.json**
```
[
{
"DetailType": "Trusted Advisor Check Item Refresh Notification",
"Source": "awsmock.trustedadvisor",
"Time": "2018-11-22T11:38:24Z",
"Resources": [],
"Detail": "{ \"check-name\": \"Exposed Access Keys\", \"check-item-detail\": { \"Case ID\": \"12345678-1234-1234-abcd-1234567890ab\", \"Usage (USD per Day)\": \"0\", \"User Name (IAM or Root)\": \"