# Running demo code with VSCode and PlatformIO guide
This guide takes you through the steps to set up and use the provided demo code to send data from ExpressLink to the cloud using PlatformIO IDE.
## Setup and prerequisites
This code uses PlatformIO as its platform. [PlatformIO](https://platformio.org/) is a professional collaborative platform for embedded development. To get started we should set up the PlatformIO IDE in Visual Studio Code.
* If you haven’t already, [download](https://code.visualstudio.com/download) and [setup](https://code.visualstudio.com/docs/setup/setup-overview#setup-articles) Visual Studio Code.
* Open VSCode **Package Manager**.
* Search for the `PlatformIO IDE` extension.
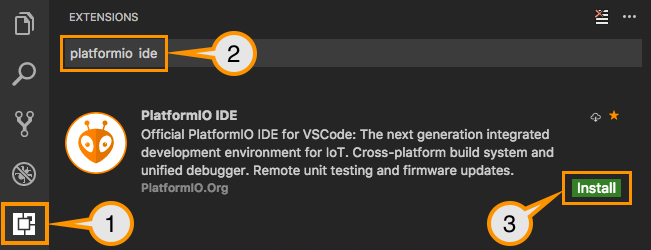 * Install `PlatformIO IDE`.
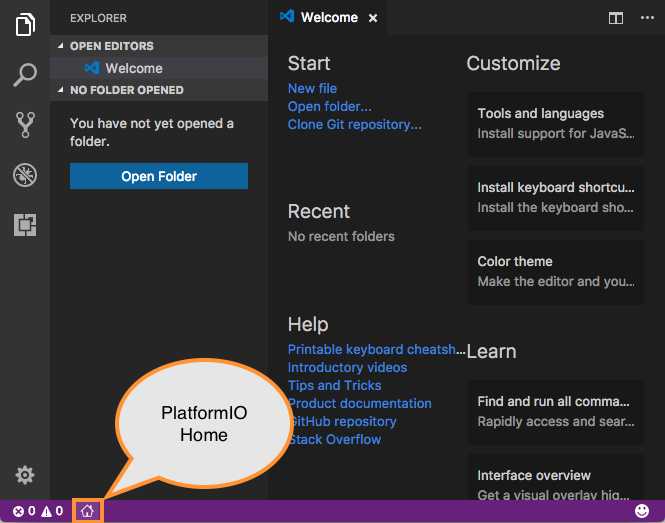
* Click on “PlatformIO Home” button.
* Install `PlatformIO IDE`.
* Click on “PlatformIO Home” button.
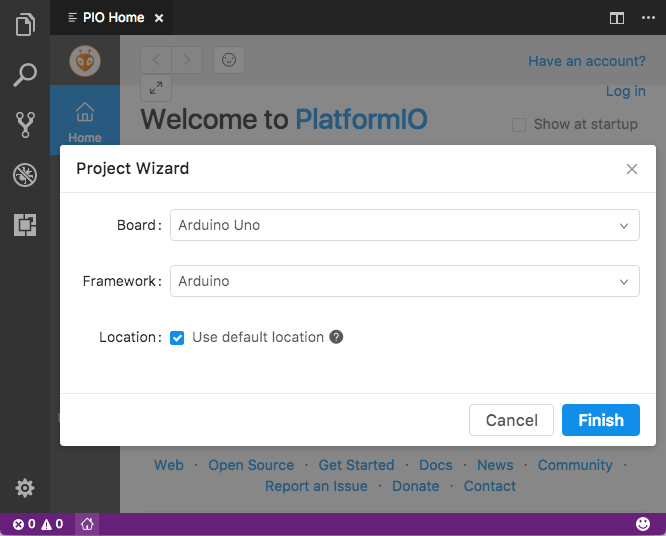
 * Click on **New Project** and select a board and create new PlatformIO Project.
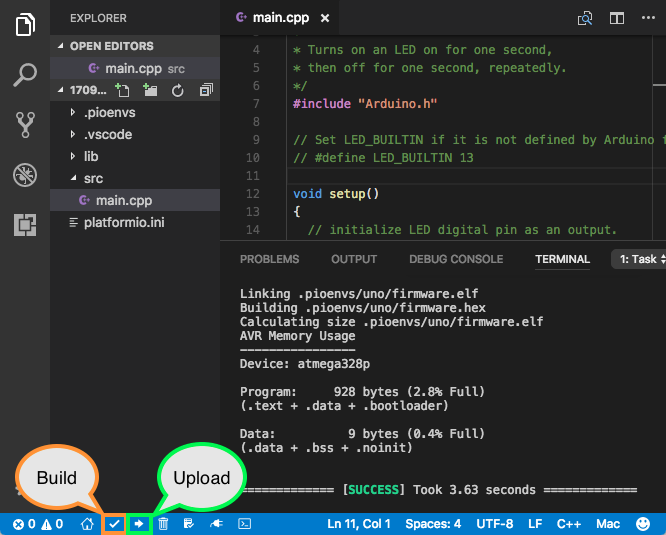
 * Copy the main.cpp file of the demo code into **src/main.cpp** file of your new project.
* In the *loop()* function, uncomment the line that will generate and send data to the topic you want to test. For instance, if you are running the demo with the Timestream template, uncomment the line that sends data to Timestream_demo topic.
* **Build** and **Upload** the program.
* Copy the main.cpp file of the demo code into **src/main.cpp** file of your new project.
* In the *loop()* function, uncomment the line that will generate and send data to the topic you want to test. For instance, if you are running the demo with the Timestream template, uncomment the line that sends data to Timestream_demo topic.
* **Build** and **Upload** the program.
 * Now from the Serial Monitor of the bottom toolbar, you can verify that your ExpressLink is connected and sending data to the cloud.
* Visit the official documentation [PlatformIO IDE for VSCode](http://docs.platformio.org/page/ide/vscode.html) for more details and examples.
* Now from the Serial Monitor of the bottom toolbar, you can verify that your ExpressLink is connected and sending data to the cloud.
* Visit the official documentation [PlatformIO IDE for VSCode](http://docs.platformio.org/page/ide/vscode.html) for more details and examples.