# Configuring a DSN on Windows
## Test Default Connection
1. Open ODBC Data Source Administrator.
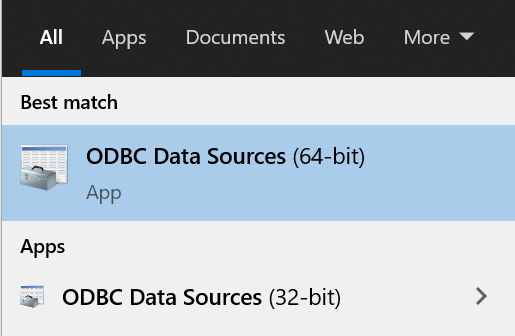 **NOTE**: Use 32 bit application to configure 32 bit driver and 64 bit app for 64 bit driver.
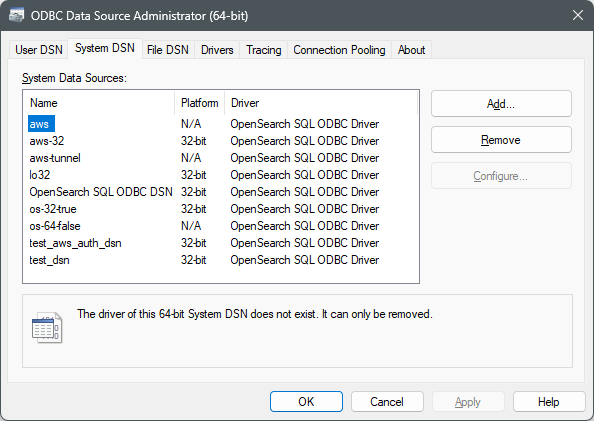
2. Click on the `System DSN` tab. Select `OpenSearch SQL ODBC DSN` and click on `Configure`.
**NOTE**: Use 32 bit application to configure 32 bit driver and 64 bit app for 64 bit driver.
2. Click on the `System DSN` tab. Select `OpenSearch SQL ODBC DSN` and click on `Configure`.
 3. DSN Setup window will open with default values for [configuration options](./configuration_options.md).
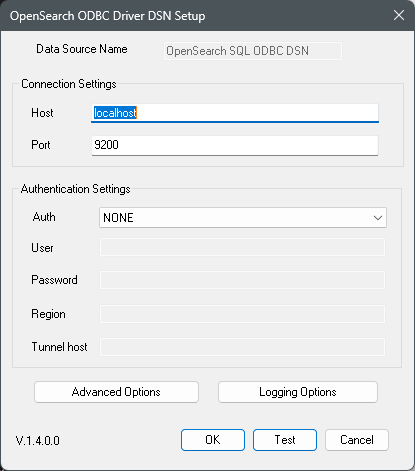 4. Change values of configuration options accordingly.
For example, if you can connect to server using following curl command
`curl -XGET https://localhost:9200 -u admin:admin`.
The DSN configuration options can be set as shown below
4. Change values of configuration options accordingly.
For example, if you can connect to server using following curl command
`curl -XGET https://localhost:9200 -u admin:admin`.
The DSN configuration options can be set as shown below
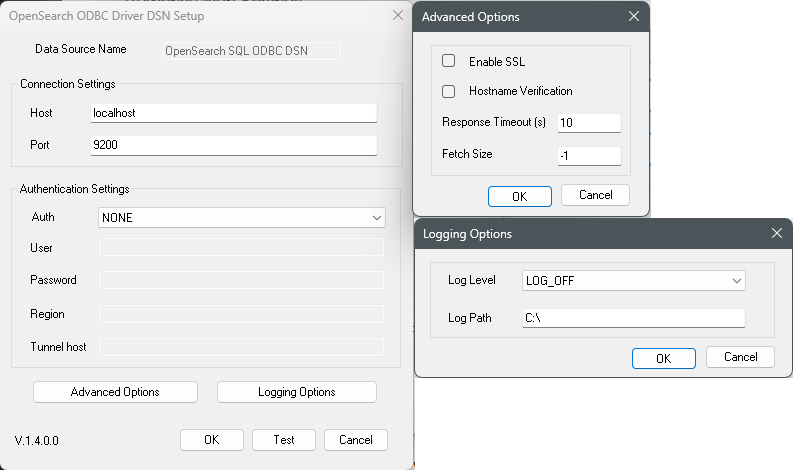 > **NOTE**: For encrypted connection, the `Host` needs to be prefaced with `https://` and `Enable SSL` in Advanced Options should be checked.
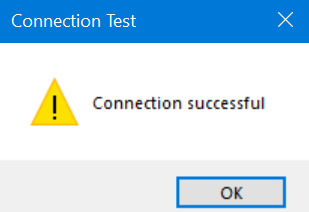
5. Click on `Test` to verify connectivity. You will get a message as `Connection successful`.
> **NOTE**: For encrypted connection, the `Host` needs to be prefaced with `https://` and `Enable SSL` in Advanced Options should be checked.
5. Click on `Test` to verify connectivity. You will get a message as `Connection successful`.
 6. Click on `OK` to save DSN values.
## Add User DSN
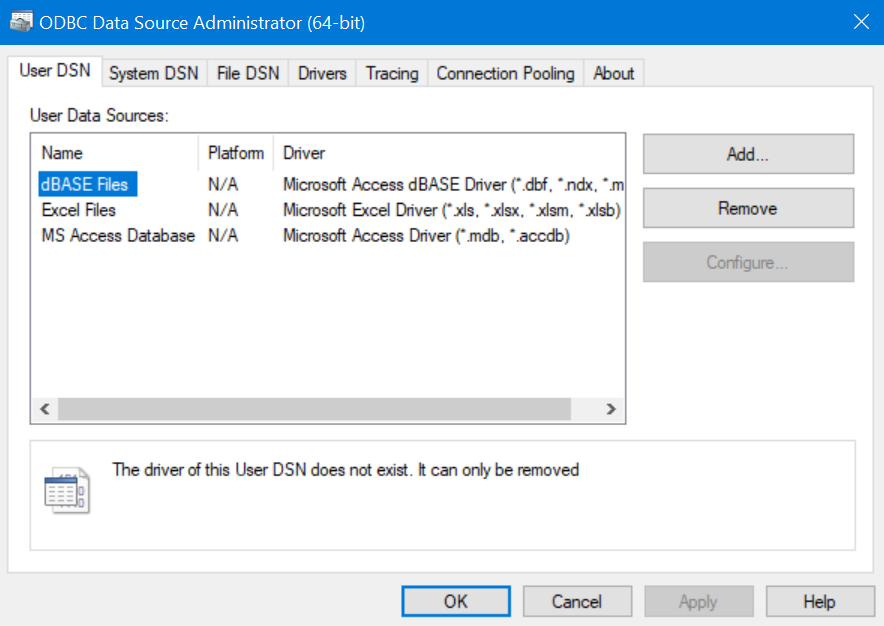
1. Open ODBC Data Source Administrator. Click on `User DSN` > `Add`.
6. Click on `OK` to save DSN values.
## Add User DSN
1. Open ODBC Data Source Administrator. Click on `User DSN` > `Add`.
 2. Select `OpenSearch SQL ODBC Driver` and click on `Finish`.
 3. The DSN Setup window will open.
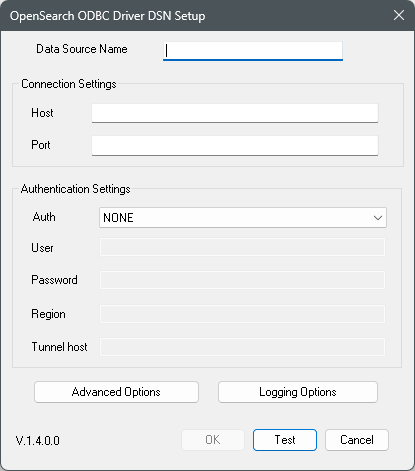 4. Update values of configuration options.
5. Click on `Test` to verify connectivity.
6. Click on `OK` to save DSN values.
7. You will find this newly added DSN in User DSN list.
4. Update values of configuration options.
5. Click on `Test` to verify connectivity.
6. Click on `OK` to save DSN values.
7. You will find this newly added DSN in User DSN list.
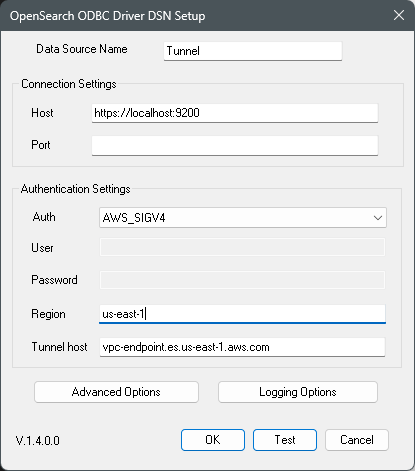
 ## Connecting to an OpenSearch cluster created as an AWS VPC endpoint over a tunnel
In case if you use a tunnel or a proxy to connect to an OpenSearch cluster located into a VPC, `Host` doesn't represent a real OpenSearch hostname. To properly sign requests with AWS signature, real OpenSearch cluster hostname is required. It could be set in `Tunnel Host` field.
## Connecting to an OpenSearch cluster created as an AWS VPC endpoint over a tunnel
In case if you use a tunnel or a proxy to connect to an OpenSearch cluster located into a VPC, `Host` doesn't represent a real OpenSearch hostname. To properly sign requests with AWS signature, real OpenSearch cluster hostname is required. It could be set in `Tunnel Host` field.