3. Create Account/Resources
Objectives
This lab module will walk though creation of user and account resources, and how to access your unique resources. By the end of the module you will have:
- Created and verified a user account
- Understood what takes place during account creation
- Know where to navigate in order to download and access your specific resources such as certificate and private key, and access other user details.
- Been introduced to UML sequence diagrams used to illustrate operations.
Resource Creation Process
When you first go through the user creation process, there are no resources created in advance. Once you log in for the first time, the API call that returns your resources will notice there are none and will go about creating them. At a high level, the process looks like this:
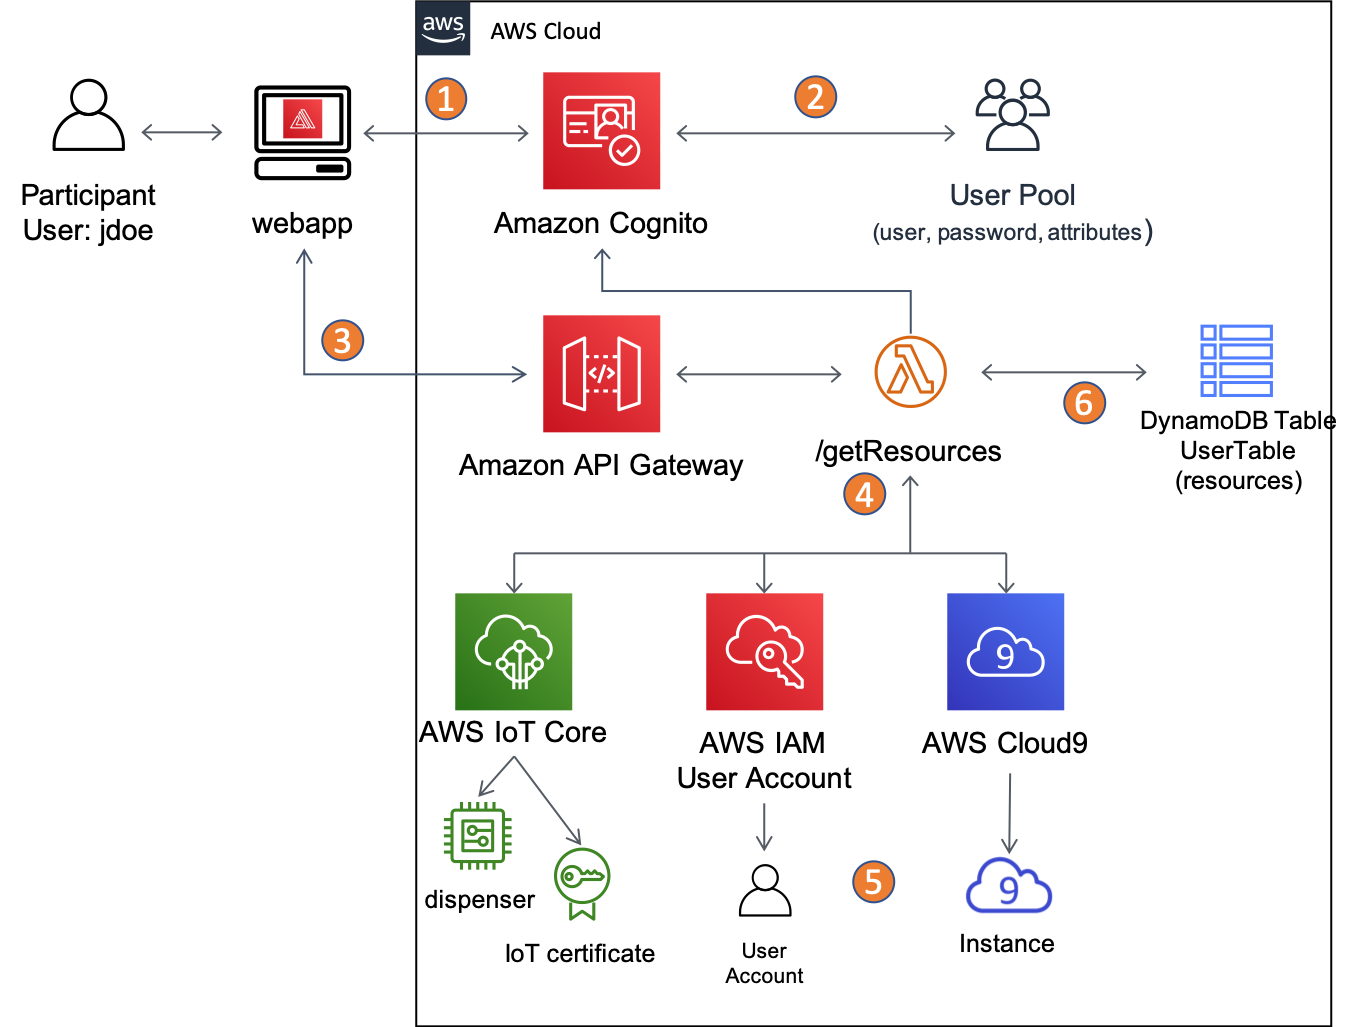
- User John Doe registers and verifies new account
jdoe - The user is created in Cognito User Pool and a valid JSON web token is returned
- As this is the first login, the
/getResourcesmethod is called which invokes a Lambda function - The function creates all of the unique resources for John on a per-service basis. As a result the following resource get created:
- An AWS IoT thing (the dispenser) and an associated certificate
- An IAM user account with an automatically generated password
- A Cloud9 development environment
- All of the created resources are stored in a DynamoDB table that can only be accessed by the Lambda function.
Finally, the /getResources returns John’s specific details to be displayed in the dispenser app. This same sequence of events can also be presented using a sequence diagram. Each actor or participant is a column, and from top to bottom are the activities. See if you can associate the diagram above from this sequence diagram figure:

Sequence diagrams are a consistent way to depict the flow of steps, especially for complex or multi-step operations. Depending upon what is being described, we are going to use a textual description or a sequence diagram in the lab modules.
Now that you have an understanding of what is taking place behind the scenes, it’s time to create your account!
Steps to Complete
Follow each step in order and use the Click to open for detailed step-by-step instructions if required to create your account and access the resources.
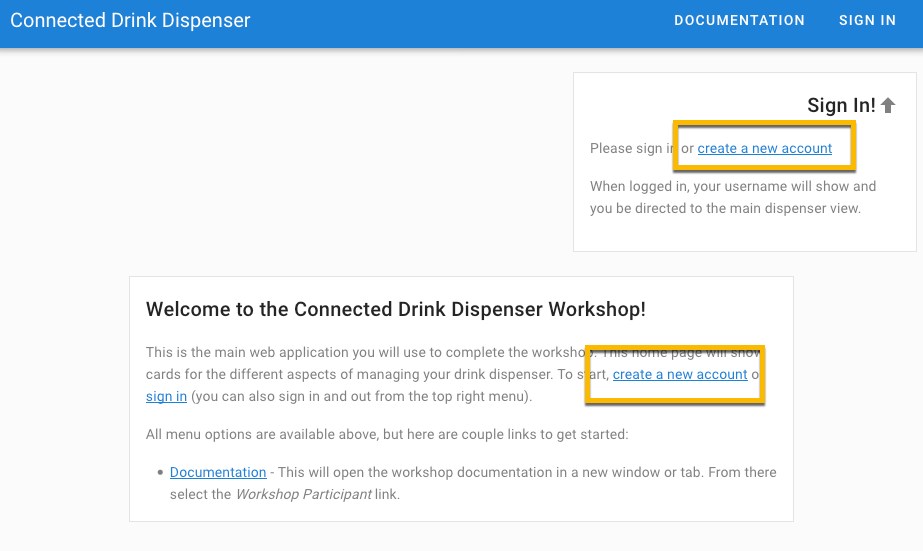
1. Register for an Account
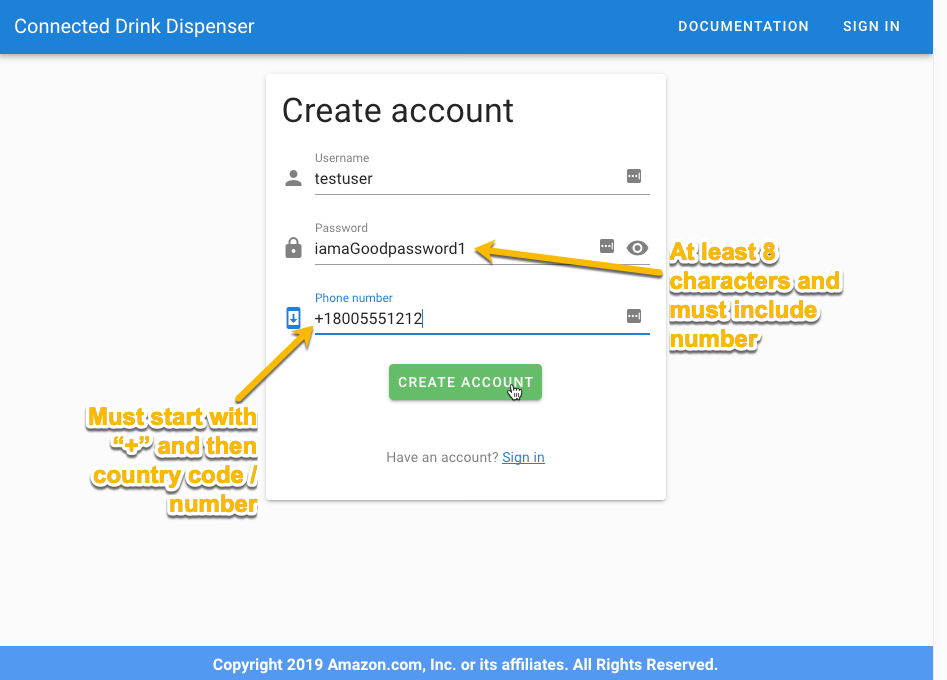
Open the URL provided in the presentation, and click on the create a new account link, or from the SIGN IN link, click on the Sign up link at the bottom of the Sign in page. For your account, enter Username, Password, and Phone number for your mobile phone to receive a validation code. Once you receive the verification code, enter it to complete the account sign up process. The mobile phone number is mandatory to validate your account. If you do not receive a code within a couple minutes, or do not have access to SMS, please ask the workshop assistants to manually validate.
The phone number must be in the "+county code" format. For instance, a US number would be "+18005551212" and for the UK "+447624…", etc. If you have questions about the format, or are unable to receive an SMS message, please let one of the lab helpers know and they can complete the process for you.
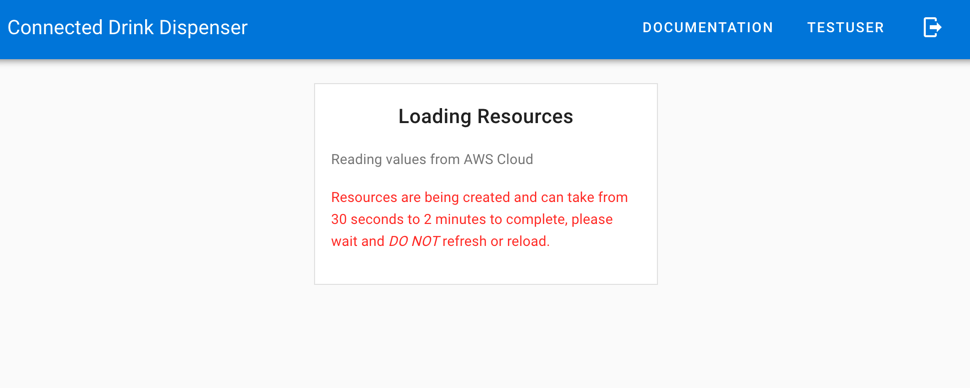
2. Initial Log In
With the account created and on the Sign in page, log in with your username/password. Initially you will see a Loading Resource page, and during this first log in, it will pause while the resources are created in the background.
There are various resources that are created, and this step normally takes around 30 second to upwards of 1-2 minutes. The reason for this is that different AWS services have different API call limits. With larger groups, you are simultaneously accessing the same resources, and API call may be throttled. If there are no changes after a minute or so, click on the log out icon (upper right in the menu bar), and log in again.
Once the resource creation is complete, the dispenser details page will load. Click the MY DETAILS button to open the resources section. Click on the CERTIFICATE FILE and PRIVATE KEY FILE, and save the files to your cdd directory on your laptop. If the files are automatically saved in the Download folder, move them to the cdd directory. Click the MY DETAILS button to hide the details.
The AMAZON ROOT CA1 FILE is not needed for this workshop, as the trusted certificate authorities are included in the Amazon FreeRTOS source code that you will be compiling. It is available here for use in other applications which you may wish use to emulate the dispenser (AWS IoT Thing).
Checkpoints
Please ensure the following checkpoints are validated before moving on to the next module.
- You have successfully created a user account and saved the user username and password for future use.
- You have downloaded the certificate file (e.g.,
34ea05fe7b-certificate.pem.crt), private key (e.g.,34ea05fe7b-private.pem.key) and optionally the root certificate CA (AmazonRootCA1.pem). This validates that all resources have been created in the cloud based on your username and assigned dispenser Id.
Outcomes
We provided a detailed explanation of what happens during account and resource creation and showed a process for just in time registration of resources. In our case, it was the creation of the user account and resources, but a similar pattern can also be used to generate AWS IoT things, certificates, and policies just as a new device needs them, and not in advance.
If you are interested in how the resource creation process takes place, look at the code for the ApiGetResourcesFunction Lambda function when you are logged into the AWS Console.